


Filter Effects submenu

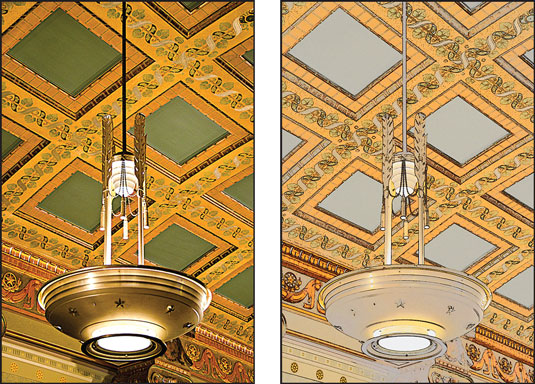
Cross Screen: This filter adds a starburst effect to the brightest part of the image, as shown. To try it, select Filter Effects from the Retouch menu and then select Cross Screen. Using the options that appear along the right side of the screen, you can adjust the number of points on the star, the intensity of the effect, the length of the star’s rays, and the angle of the effect. Use the Multi Selector to highlight an option, and then press right to display the available settings. Highlight your choice and press OK. To update the preview after changing a setting, highlight Confirm and press OK. When you’re happy with the effect, choose Save and press OK.
Soft: Also on the Filter Effects menu, the Soft filter blurs your photo to give it a dreamy, watercolor-like look. You can choose from three levels of blur: Low, Normal, and High.
Drawing Effects
Color Outline: Select this option from the Retouch menu to turn your photo into a black-and-white line drawing.
Photo Illustration: This effect produces a cross between a photo and a bold, color drawing. Use the filter’s Outlines option to adjust the look of the effect.
Color Sketch: This filter creates an image similar to a drawing done in colored pencils; the figureshows you an original (left) and its altered cousin (right). You can modify the effect through two options: Vividness, which affects the boldness of the colors; and Outlines, which determines the thickness of outlines.
Painting: Try this filter for a bold, almost surreal, adaptation of your photo.
Miniature Effect
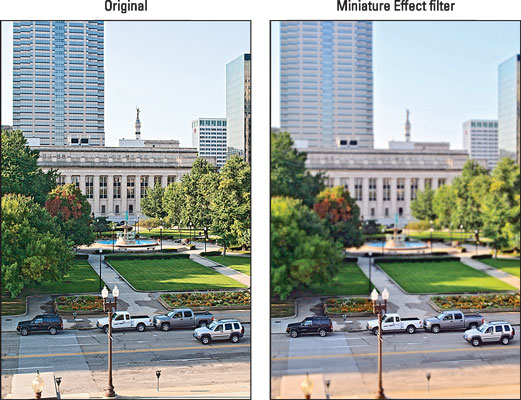
Miniature Effect: Have you ever seen an architect’s small-scale models of planned developments? The Miniature Effect filter attempts to create a photographic equivalent by applying a strong blur to all but one portion of an image, as shown. The left photo is the original; the right shows the result of applying the filter. For this example, the focus point is set on the part of the street occupied by the cars.
The Miniature Effect filter works best if you shoot your subject from a high angle — otherwise, you don’t get the miniaturization result.
Selective Color
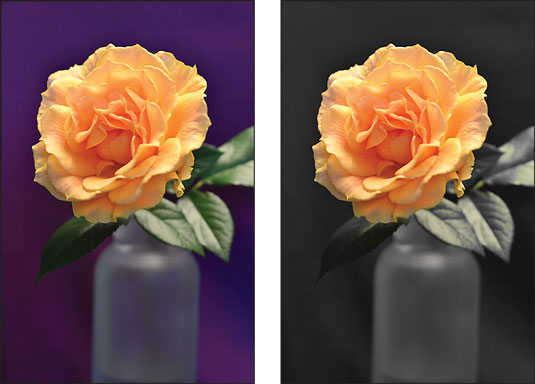
Selective Color: This effect desaturates (removes color from) parts of a photo while leaving specific colors intact. For example, in the figure, everything is desaturated but the yellows and peaches in the rose.
After choosing Selective Color, you can specify up to three colors to retain and also limit how much a color can vary from the selected one and still be retained. Make your wishes known as described in this list of (loosely ordered) actions:
- Select the first color to be retained. Using the Multi Selector, move the yellow box over the color. Then press the AE-L/AF-L button to tag that color, which appears in the first color swatch at the top of the screen.
- Set the range of the selected color. Rotate the Command dial to display a preview of the desaturated image and highlight the number box to the right of the color swatch. Then press the Multi Selector up or down to choose a value from 1 to 7. The higher the number, the more a pixel can vary in color from the selected hue and still be retained. The display updates to show you the impact of the setting.
- Choose one or two additional colors. Rotate the Command dial to highlight the second color swatch and then repeat the selection process. To choose a third color, head around the track one more time.
- Fine-tune your settings. You can keep rotating the Command dial to cycle through the color swatch and range boxes, adjusting each as necessary.
- Reset a color swatch box. To empty a selected swatch box, press the Delete button. You can then move the yellow highlight box over a new color and press the AE-L/AF-L button to select that color. To reset all the swatch boxes, hold down the Delete button.
- Save a copy of the image with the effect applied. Press OK.


