


The key is to either use tools that are simple to learn or use only tools that every member of the group is already familiar with. Trying to learn a new tool in the middle of a group project can be frustrating and can distract you from completing the project on time.
Document collaboration
Suppose you and your fellow group members are asked to produce a written document such as an essay. In the “old” days, one person would write something and forward the document to all other group members. Then everyone would provide feedback and send back their comments individually. The originator would have to open several documents and do the best job possible of combining the input of the others.No longer is this necessary, thanks to collaborative tools such as Google Docs and Microsoft 365. These web based tools allow multiple people to contribute to the same document. In a group-project situation, this means that you can collaborate on the same document at the same time as your fellow group members. The file is created by one of the group members who shares a link to the other group members with permission to edit the document. As a group member, you click on the link and are taken directly to the document, where you can start editing.
Depending on the privacy setting determined by the original document creator, you may be required to log in with your account or create a new account with that service in order to access the document.
Technology has come a long way where applications on the web look almost exactly the same as they do when installed directly on your computer. Therefore, when you get to the shared document via your web browser, it looks and feels just like a common word processing, spreadsheet, or presentation program. It doesn’t matter what software you have on your individual machines, because everything is handled online! Each of you can edit and download a copy. Eventually, one of you can save a final copy and turn it in for your assignment or link your instructor and class to the page. Online document sharing can be used for group projects, company policy documents, and much more.In some corporate setups, you may have access to a product from Microsoft called SharePoint. If you have access and are working on an online learning course in your company’s learning management system, SharePoint may be the best choice for you because you’re probably already using it for work.
One of the more common online document sharing applications on the web right now is Google Docs. With Google Docs, you can collaboratively create a word processing document, spreadsheet, presentation, or web form. This free service gives a document originator the ability to invite others to edit the document. The following figure shows a document created using Google Docs.
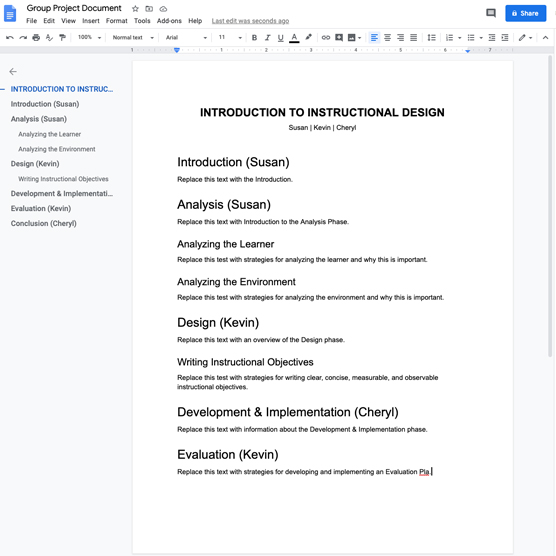 An example of a group project document using Google Docs
For your essay assignment, one group member or the instructor would start the document. Then that person would invite the other group members to view the document as collaborators in order to provide them the permission needed to edit the document. Based on your group’s organizational meeting, the editor might add headings to the document as a way of visually dividing it into pieces. Group members would then go in and begin filling in the blanks as they completed their research.
Web conferencing
If your group decides to meet synchronously, a few tools are available to help facilitate the process. Consider the following variables when choosing a synchronous tool:
- Availability: Don’t spend extra time looking for tools if your course provides them for you. For example, one institution Kevin teaches for provides each class with a virtual office space via Microsoft Teams. Students can access this space 24/7 from directly inside their virtual course.
- Functionality: Some tools are limited as to which features they offer. For example, the telephone provides voice communication, but you can’t share documents via the phone. FaceTime allows iPhone users to call, talk, and share videos with each other. However, this is limited to iPhone users only. If you have an iPhone, you cannot FaceTime with someone who has an Android phone. Plus, it may not be the best tool for sharing screens and collaborating. Other, more multi-modal tools, such as Zoom, provide interactive features that allow users to share voice, text, presentations, whiteboards, each other's computer screens, and more. Choose your tools according to what you need, or learn to work around your chosen tool’s limits.
- Cost: These tools can be quite expensive for large-scale use. Luckily these days, many tools have free versions; they may have some limitations compared to their paid versions, but work just fine for short, small-group meetings. For example, Zoom offers a free version of its Meeting tool that allows you to access almost all of its collaboration features. The limitations of this tool are that meetings are limited to 40 minutes and cannot be recorded to the Zoom server in the cloud. You must record locally and find alternative ways to share those video recordings with others for playback.
- Zoom is what we call a multimodal web conferencing tool. Multimodal refers to the user’s ability to interact using a variety of methods. For example, Zoom allows users to interact using voice, chat, video, whiteboard, application sharing, and more. The free version of Zoom allows you to meet with up to 100 participants for 40 minutes. The free version also allows you to record to your local computer so that you can later share the archive with members who may have missed the meeting or need a recap.
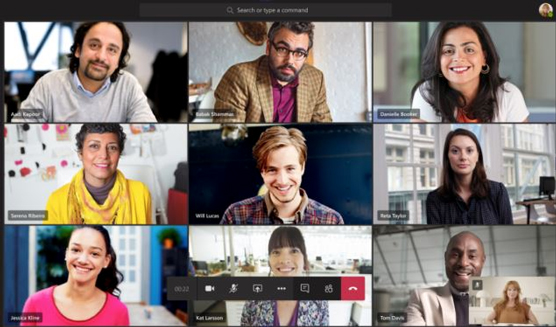
To efficiently use this tool, one group member needs to have a Zoom account. The individual with the account schedules a meeting and invites the group members via email. Group members receive a participant link in their email that they click on to join the meeting. This figure illustrates a conference call using Zoom.
 A group call using Zoom
Once connected, the group can use the voice and video features to see and hear each other. One member of the group can also share their screen so the group can work collaboratively to create a document or presentation or another type of project. If you’re not in the creation stage yet, it’s also a good idea to share the agenda with everyone and have someone take notes during the meeting and then make the notes available in a place where everyone can access them.
- Microsoft Teams is a tool, similar to Zoom, that provides unlimited chat, video calling, file sharing, and 10 gigabytes of storage to share and collaborate on documents. Participants use the same process for accessing meetings as they do with Zoom. At least one member of the group must have a Microsoft 365 account. That person schedules the meeting and sends out the invitation to their peers.
Teams is fully integrated into Microsoft 365, and participants can seamlessly share Word, PowerPoint, and Excel files with participants. This can be helpful if your group is needing to collectively contribute to an essay or develop a slideshow in order to give a group presentation. This figure illustrates a Teams meeting with group members collaborating to build a PowerPoint file.
 A group call using Teams
- Google Meet is the synchronous conferencing tool built into Google Suite. Like the other tools, one person must have a Google account and invite the other participants. If your school already uses Google Suite for email and document storage, you may as well use Meet. Imagine having a meeting with your voice, but co-editing a document! This figure shows a meeting in Meet.
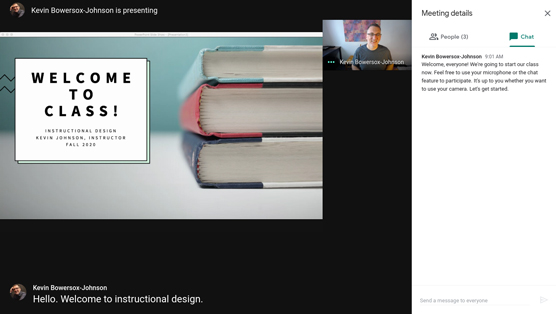 A group call using Google Meet
For conferencing tools such as Zoom, users need a microphone and speakers. We recommend a combination headset-with-microphone. A camera is optional, but it can give a more personal touch to the distant meeting experience.
If you have ever attended an online meeting, you know that the discussion can get out of hand quickly. People may unintentionally talk over each other, or there may be so many chats that you can’t keep up with them. To help reduce this chaos, web conferencing tools assign different roles and permissions to different people. For the most part, there are three different roles: the meeting host, cohosts, and participants or attendees:
- The host is the person who schedules the meeting and sends out the invitation link. Often, this is the chairperson of a committee or the group leader. This person has more permissions during the meeting to help control the chaos. They also have the ability to turn features on and off as needed. For example, the host can determine the people attendees can chat with: everyone, only the host, or no one. This allows them to present information without interruption and then turn on the chat feature when there’s a natural pause in the presentation. They can also turn on and off the ability for participants to turn on video, talk, share screens, write on the screen, and more.
- Cohosts are participants who the host assigns to help during the session. Cohosts can perform most of the same tasks as the host. A host might assign participants to cohost when hosting large meetings in order to ensure a more seamless experience for the attendees. In peer group situations, a host might assign all team members the cohost role to provide an equitable experience.
- Participants and attendees join a meeting with limited responsibilities and are able to participate based on the permissions sent by the host. For most smaller group meetings, features are not restricted.
Tools like Zoom, Teams and Meet can take a little time to learn how to use, especially as the meeting host. The good news is that most product vendors provide tutorial videos and documents on how to use the tool as both a host and a participant. So, keep this in mind when choosing a tool, and look for support options before making a final decision.

