The recommended dimensions for your customized header media are 2000 pixels wide by 1200 high. If your photo or video is larger, you can crop it after you’ve uploaded it to WordPress, although cropping with a graphics program (such as Adobe Photoshop) is the best way to get exact results.
Uploading a header image in WordPress
Twenty Seventeen comes preloaded with one default header image, but WordPress allows you to upload one of your own. To install a custom header image, follow these steps with the Twenty Seventeen theme activated:- On the WordPress Dashboard, click the Header link on the Appearance menu.
The Custom Header page appears, with the Customizing Header Media panel displayed on the left side of the screen.
- In the Header Image section, click the Add New Image button.
The Choose Image screen opens.
Selecting an image to use as a header image.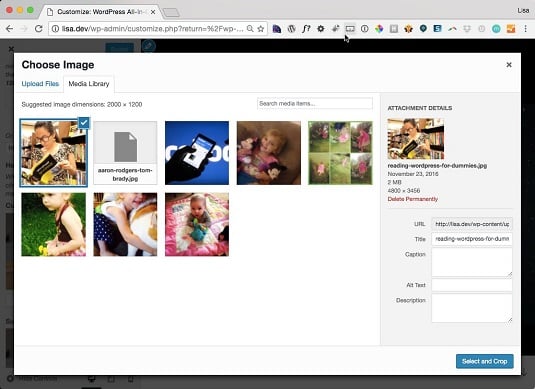
- Click the Select and Crop button.
This step opens the Crop Image screen.
Using the crop tool.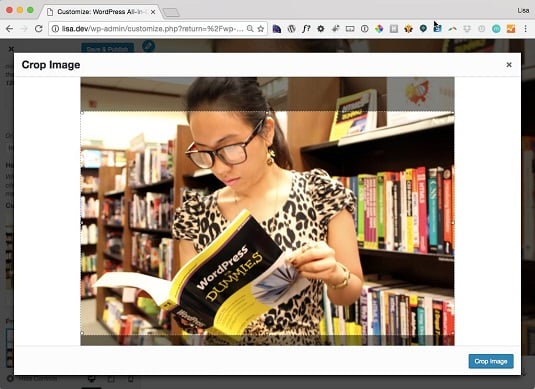
- (Optional) Crop the image to your liking.
To resize and crop your image, drag one of the eight tiny boxes located at the corners and center top and bottom of the image. You can also click within the image and move the entire image up or down to get the placement and cropping effect that you want.
- Click the Crop Image button to crop your header image.
- Click the Save & Publish button in the top-right corner of the Customizing Header Media screen to save your changes.
Here’s the Twenty Seventeen theme with a custom header image.
The Twenty Seventeen theme with new header image.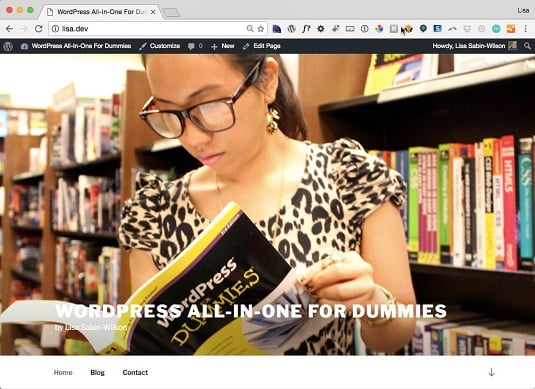
You can upload multiple images to use in the header-image area and click the Randomize Uploaded Headers button in the Customizing Header Media panel to tell the Twenty Seventeen theme that you’d like to see a different header on each new page load. This option adds a little variety to your site!
Including a header video in WordPress
The Twenty Seventeen theme comes with a default header image but not with a video for you to use as a header. One small text field, however, allows you to include a video from YouTube so that visitors to your site see a video in the background of your header.Follow these steps to configure a header video:
- On the WordPress Dashboard, click the Header link on the Appearance menu.
The Custom Header page appears, with the Customizing Header Media panel displayed on the left side of your screen.
- To upload your video file, click the Select Video button in the Header Video section.
The Select Video screen opens so you can select a video from the WordPress Media Library or upload a video file from your computer’s hard drive. The Header Video supports the MP4 file format for videos.
If you’d rather use a video from a service like YouTube, skip this step and proceed to Step 3.
- To use a video from YouTube, copy and then paste the link to that video in the Enter a YouTube video URL text field.
- Click the Save & Publish button in the top-right corner of the Customizing Header Media panel.
This action saves and publishes any changes you made in the header media.