
Although it's possible to build a WebsiteBaker template from scratch for your HTML5 and CSS3 website, it's generally not a good idea. It's much smarter to begin with a template that's close and add those features you need to make it your own. That way the general structure is already proven, and you only need to customize it to your specifications.
Find a starting template you like.
If you don't have another place to start, try the templates built into the WebsiteBaker core (especially All CSS and Round). Blank Template is especially designed for customizing.
Install the template on your local system.
It's much easier to work with a template on your local system than on a remote server.
Locate the local copy of the template.
Normally, templates are stored in the directory of your server. Each template will have its own folder.
Copy the folder of the template you want to modify.
It's generally smarter to work with a copy rather than the original. Paste the copied folder in the templates directory.
Rename the new folder to reflect your new template name.
Your new template needs a different name than the original template.
At this point, you have a copy of the original template, but this copy will not be reflected in the CMS yet. You need to make a few changes before the new template is available. Before you do that, take a look at the file structure of a typical WebsiteBaker template.
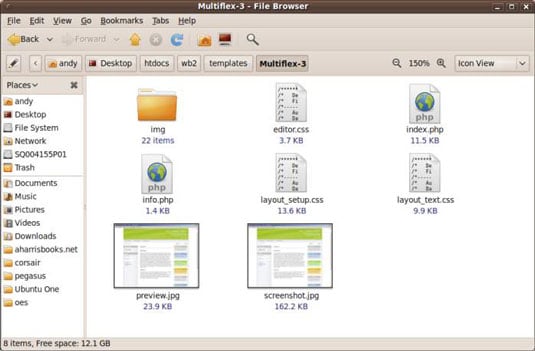
One of the reasons WebsiteBaker is great is how relatively simple the template structure is compared to other CMSs. The directory contains a relatively small number of files:
index.php: This PHP file is the basic file that's used as the foundation of every page in the system. It's essentially an HTML page with a few special PHP functions built in. You can edit any of the HTML you wish, and the resulting changes will be reflected in every page of the site.
info.php: This simple PHP file contains a number of variables used to control the overall behavior of the template. You'll make a few changes in this file to give your template an official name.
layout_setup.css: This CSS file describes the CSS used for the overall page design. You can change the contents of this CSS file to change font colors or other big-picture CSS.
layout_text.css: This CSS file is used to define the styles of the various text elements in the site. If you're looking for a class that isn't defined in layout_setup.css, you may find it here. Note: The names of the CSS files may change in other templates, but there will be at least one CSS file.
editor.css: This file is used to modify the internal WYSIWYG editor. It describes how various elements are displayed in the editor.
images directory: Often a template will include a number of images. These are stored in a subdirectory for convenience. You may need to change some of these images to create the look you're going for.
Some templates are more complex, some less so. Really, you can have as many or as few files as you want. You'll always need to have index.php and info.php. You'll almost always have at least one CSS page. You can have anything else you wish in the template, but nothing else is absolutely necessary.