The Ribbon in SharePoint 2010 displays many of the same document actions as the Edit menu. One of the advantages of using the Ribbon is that you can use it to take actions on multiple documents at once. For example, say you want to check out three documents at one time.
Here’s how you can do it with the Ribbon:
In your document library, select the check box next to each document you want to check out.
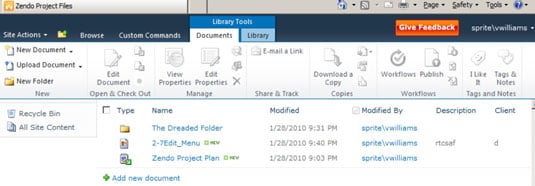
Click the Check Out button on the Documents tab of the SharePoint Ribbon.
Click OK at the confirmation prompt.
The documents are checked out.
Alternatively, you can use a document’s Edit menu to access the Check Out menu command.
Checking out — and its counterpart, checking in — is just good document library etiquette. What better way to let others know that you’re making changes to a document than by checking it out? Checking out a document sets the Checked Out flag to Yes and stores the name of the person who checked out the document.
Generally speaking, check out any document that you intend to edit for a period of longer than five minutes. In other words, if you need to do more than just change a misspelled word or update the date in a footer, check out the document. Of course, always remember to check in documents when your edits are complete.
One reason to use SharePoint Workspace (formerly known as Microsoft Groove) for accessing documents in SharePoint document libraries is that you can work with documents offline, make changes, and then synchronize those changes. It’s much easier to remember to synchronize SharePoint Workspace at the beginning and end of each day than it is to remember to check out and check in documents.
When you check out a single document at a time, SharePoint 2010 prompts you to save the document in your Local Drafts folder. Follow these steps to see for yourself:
In a document library, hover over the Name column for the document you wish to check out.
When the arrow appears, click it to display the document’s Edit menu and choose Check Out.
SharePoint displays the check out prompt.
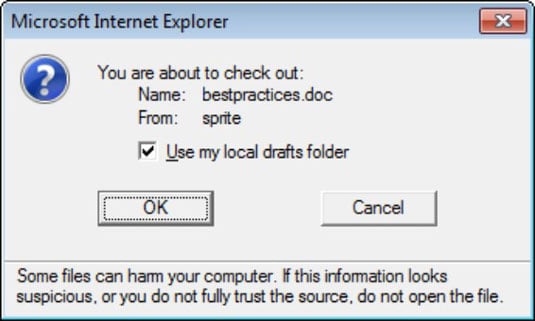
Accept the default value to Use My Local Draft Folder by clicking OK.
The document is checked out and downloaded to your local hard drive.
Unless your administrator has changed the location, your local drafts folder can be found at C:users%username%documentssharepoint drafts.
To open the document you just checked out and downloaded, you must browse to your Local Drafts folder with Windows Explorer and then open the file. Most people don’t want to bother with this extra step.
When you check out a document, if it’s in some Windows-compatible application (such as Word), you’ll receive a message letting you specify whether to check out the document to your Local Drafts folder. Generally, you want to select the Use My Local Drafts Folder option because it creates a temporary file on your hard drive and will let you edit the checked-out file even when you're offline.
By choosing not to use your local drafts folder, the file will open from the SharePoint server. This can cause your system to hang and appear unresponsive because it has to wait for your changes to travel back and forth across the network to the server. If you lose your network connection, then you could lose changes to your document.
Download a local copy of the file when making changes. You can use your local drafts folder, SharePoint Workspace, or manually download the file and upload it again when you’re done making changes.
Documents that are checked out show an arrow in the document type icon. As shown here, the bottom item is checked out, whereas the top two aren’t.
If you want to see who has a document checked out, you have to display the Checked Out To column in the document library.
To check in a document after you’re done making your changes, you can repeat the steps you followed earlier to check out the document, only in Step 2, choose the Check In option from the document’s Edit menu or click the button on the Document tab of the Ribbon.
If you change your mind and want to pretend that the check-out never happened, you can click the Discard Check Out button instead of checking in the document. This can be useful if you accidentally checked out the wrong document.