Like the Slide Master, the Handout and Notes Masters in PowerPoint 2016 contain formatting information that's applied automatically to your presentation. Here, you find out how you can modify these Masters.
Changing the Handout Master
Follow these simple steps to change the Handout Master:
Choose View→Presentation Views→Handout Master or hold down the Shift key while clicking the Slide Sorter View button.
The Handout Master rears its ugly head, as shown here. Notice that it includes a special Handout Master tab on the Ribbon.
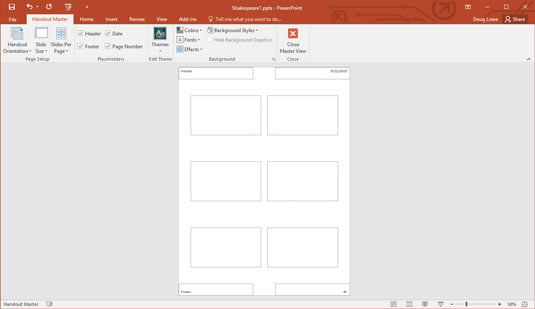 The Handout Master.
Mess around with it.
The Handout Master shows the arrangement of handouts for slides printed two, three, four, six, or nine per page, plus the arrangement for printing outlines. You can switch among these different handout layouts by using the Slides-Per-Page control in the Page Setup group on the Handout Master tab.
Unfortunately, you can't move, resize, or delete the slide and outline placeholders that appear in the Handout Master. You can, however, add or change elements that you want to appear on each handout page, such as your name and phone number, a page number, and maybe a good lawyer joke.
Click the Close Master View button on the Handout Master tab on the Ribbon.
PowerPoint returns to Normal View.
Print a handout to see whether your changes worked.
Handout Master elements are invisible until you print them, so you should print at least one handout page to check your work.
When you print handout pages, the slides are formatted according to the Slide Master. You can't change the appearance of the slides from the Handout Master.
Changing the Notes Master
Notes pages consist of a reduced image of the slide, plus any notes that you type to go along with the slide. When printed, notes pages are formatted according to the Notes Master. To change the Notes Master, follow these steps:
Choose View→Presentation Views→Notes Master.
The Notes Master comes to life, as shown here.
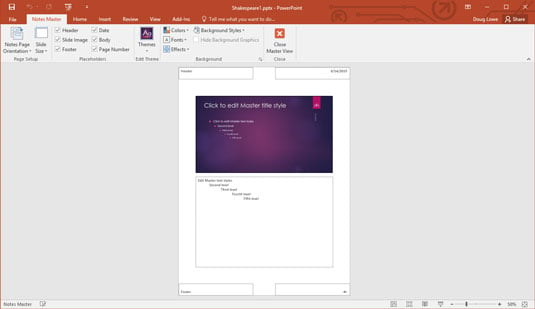 The Notes Master.
Indulge yourself.
The Notes Master contains two main placeholders — one for your notes and the other for the slide. You can move or change the size of either of these objects, and you can change the format of the text in the notes placeholder. You also can add or change elements that you want to appear on each handout page. Also notice the convenient placement of the header, footer, date, and page number blocks.
Click the Close Master View button.
PowerPoint returns to Normal View.
Print your notes to see whether your changes worked.
At the very least, add page numbers to your speaker notes. That way, if you drop a stack of notes pages, you can use the page numbers to quickly sort them back into order.
If public speaking gives you severe stomach cramps, add the text "Just picture them naked" to the Notes Master. It works every time for me.