To enter a new contact, follow these steps:
1. Click People in the Navigation bar to switch to the People module if needed.
2. Click the New Contact button on the Home tab of the Ribbon.
The New Contact entry form opens.
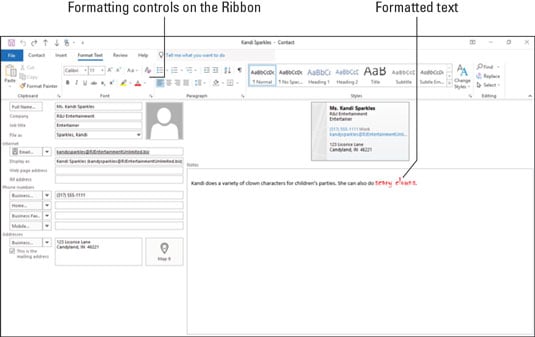
3. Fill in the blanks on the form.The following figure shows an example.
4. Click the Save & Close button on the Ribbon.Presto — you have a Contacts list.
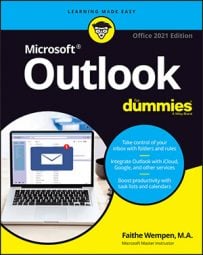
 Fill in the form to create the contact.
Outlook’s Contacts feature can be a lot more than a physical address book — if you know the ropes.
If you want, you can enter scads of details about every person in your Contacts list and choose from literally dozens of options, but if all you do is enter the essentials and move on, that’s fine. If you’re more of a detail-minded person, here’s the way to enter every jot and tittle for each contact record:
1. In the People module, click the New Contact button.
The New Contact form opens.
To be really quick, press Ctrl+N to see the Contact form.
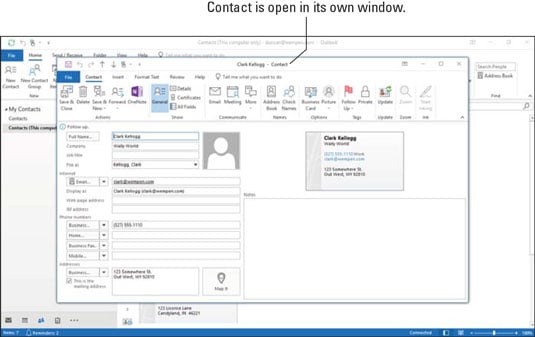
2. Click the Full Name button.The Check Full Name dialog box opens, as shown here.
 The Check Full Name dialog box.
3. Do some or all of the following:
- Click the triangle (called the scroll-down button) on the right edge of the Title text box. Either choose a title (such as Mr., Ms., or Dr.) from the list that drops down or type one (such as Reverend, Guru, or Swami).
- Click in the First text box and type the contact’s first name.
- Click in the Middle text box and type the contact’s middle initial (if any). If there’s no middle initial, you can leave this box blank. This is also a good place to put full middle names if you wish.
- Click in the Last text box and type the contact’s last name.
- Click in the Suffix drop-down menu. Either choose an option (such as Jr. or III) or type one in the box (such as Ph.D., D.D.S., or B.P.O.E.).
The Check Full Name dialog box closes and you’re back in the New Contact form, where the name you entered is in the Full Name and File As text boxes.
5. Click in the appropriate box and enter the information requested on the New Contact form.If the information isn’t available — for example, if the contact has no job title — leave the box blank. A triangle after the box means there are more choices. If your choice isn’t listed, type it in the box.
- If you’ve entered a name in the Full Name box, the File As box will already show that name.
-
If you want this person filed under something other than his or her name, click in the File As box and type in your preferred designation. For example, you may want to file your dentist’s name under the term Dentist rather than by name. If you put Dentist in the File As box, the name turns up under Dentist in the alphabetical listing rather than under the name itself. The Full Name and the File As designations exist in your Contacts list. That way (for example), you can search for your dentist either by name or by the word Dentist.
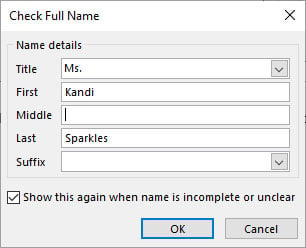
If your contact has more than one email address, click the arrow next to Email, as shown here, select Email 2, click in the text box, and then enter the second address.
 You can enter more than one email address for each person in your Contacts list.
7. Click in the text box beside the Business Phone box and type the contact’s business phone number.
8. Click in the text box beside the Home Phone box and type the contact’s home phone number.
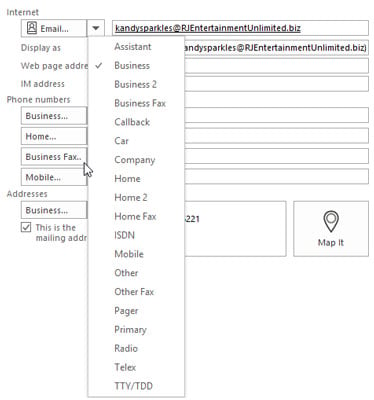
For numbers other than business and home phones, click the triangle beside a number option, choose the kind of number you’re entering, and then enter the number.
The New Contact form has four phone number blocks. You can use any of them for any of the 19 phone number types available in the drop-down menu — as shown here — depending on what types of phone numbers your contacts have.
 You can always reach your contact at one of these phone numbers.
9. Click the triangle in the Addresses section to choose the type of address you want to enter.
You can choose Business, Home, or Other.
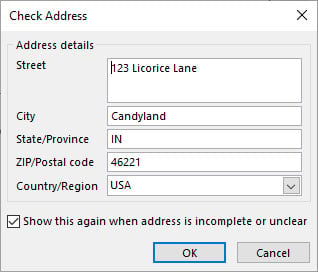
10. Click the button in the Addresses section.The Check Address dialog box opens.
11. Enter the following information in the appropriate boxes:- Street
- City
- State/Province
- ZIP/Postal code
- Country/Region
See the following figure for a look at a completed Check Address dialog box.
 The Check Address dialog box.
12. Click OK.
The Check Address dialog box closes.
13. On the New Contact form, select the This Is the Mailing Address check box if the address you just entered is the one to use for sending mail to the contact.14. Click in the Web Page Address text box and type a page’s address if you want to link to that page directly from the Address Card.
To see a contact’s webpage, open the contact record, click the More button on the Contact tab of the Ribbon, and choose Web Page (or press Ctrl+Shift+X). Your web browser launches and opens the page.
In your web browser, you can see a webpage by entering the URL for the page in the Address box. If a person or company in your Outlook Contacts list has a webpage, you can enter the URL for that page in the Web Page Address text box.
URL is a fancy name for the address of a page on the World Wide Web. When you see ads on TV that refer to www.discovery.com or www.dummies.com, what you’re seeing is a Uniform Resource Locator (the even fancier term that URL stands for — essentially an Internet address).
15. Click in the Notes box at the bottom right of the form and type in anything you want.You can enter directions, meeting details, the Declaration of Independence — anything you want (preferably something that can help you in your dealings with the contact).
Format the text in the big text box, as shown here, by clicking the Format Text tab of the Ribbon and using the buttons on that tab. The tools on the Format Text tab are just like the ones that all other word processing programs use: font, point size, bold, italic, justification, and color. Select the text you want to format. You can change the formatting of a single letter or the whole text box. You can’t format the text in the smaller data text boxes in the other parts of the Contact form — only the text in the Notes box.
 Have fun with formatting in the Notes text box.
16. When you’re done, click the Save & Close button on the Contact tab of the Ribbon.
After you enter anything you want or need (or may need) to know about people you deal with at work, you’re ready to start dealing.