
For those times, you need to use the command buttons that appear in the Header & Footer Elements group of the Design tab on the Header & Footer Tools contextual tab in Excel 2019. These command buttons enable you to blend your own information with that generated by Excel into different sections of the custom header or footer you’re creating.
In Excel 2019, the command buttons in the Header & Footer Elements group include
- Page Number: Click this button to insert the
&[Page]code that puts in the current page number. - Number of Pages: Click this button to insert the
&[Pages]code that puts in the total number of pages. - Current Date: Click this button to insert the
&[Date]code that puts in the current date. - Current Time: Click this button to insert the
&[Time]code that puts in the current time. - File Path: Click this button to insert the
&[Path]&[File]codes that put in the directory path along with the name of the workbook file. - File Name: Click this button to insert the
&[File]code that puts in the name of the workbook file. - Sheet Name: Click this button to insert the
&[Tab]code that puts in the name of the worksheet as shown on the sheet tab. - Picture: Click this button to insert the
&[Picture]code that inserts the image that you select from the Insert Picture dialog box that enables you to select a local image (using the From File option) or download one from an online source (using the Bing Image Search, OneDrive, or Facebook and Flickr options). - Format Picture: Click this button to apply the formatting that you choose from the Format Picture dialog box to the
&[Picture]code that you enter with the Insert Picture button without adding any code of its own.
- Put your worksheet into Page Layout view by clicking the Page Layout View button on the Status bar or by clicking View →Page Layout View on the Ribbon or pressing Alt+WP.
In Page Layout view, the text Click to Add Header appears centered in the top margin of the first page and the text Click to Add Footer appears centered in the bottom margin.
- Position the mouse pointer in the top margin to create a custom header or the bottom margin to create a custom footer and then click the pointer in the left, center, or right section of the header or footer to set the insertion point and left-align, center, or right-align the text.
hen Excel sets the insertion point, the text Click to Add Header and Click to Add Footer disappears and the Design tab on the Header & Footer Tools contextual tab becomes active on the Ribbon.
- To add program-generated information to your custom header or footer (such as the filename, worksheet name, current date, and so forth), click the information’s corresponding command button in the Header & Footer Elements group.
Excel inserts the appropriate header/footer code preceded by an ampersand (&) into the header or footer. These codes are replaced by the actual information (filename, worksheet name, graphic image, and the like) as soon as you click another section of the header or footer or finish the header or footer by clicking the mouse pointer outside of it.
- (Optional) To add your own text to the custom header or footer, type it at the insertion point.
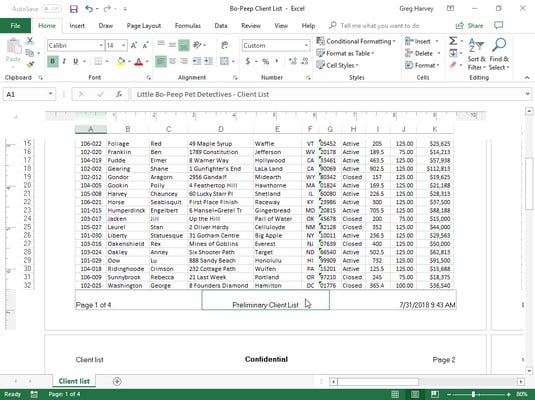
When joining program-generated information indicated by a header/footer code with your own text, be sure to insert the appropriate spaces and punctuation. For example, to have Excel display Page 1 of 4 in a custom header or footer, you do the following:
- Type the word Page and press the spacebar.
- Click the Page Number command button and press the spacebar again.
- Type the word of and press the spacebar a third time.
- Click the Number of Pages command button.This inserts Page &[Page] of &[Pages] in the custom header (or footer).
- (Optional) To modify the font, font size, or some other font attribute of your custom header or footer, drag through its codes and text, click the Home tab, and then click the appropriate command button in the Font group.
In addition to selecting a new font and font size for the custom header or footer, you can add bold, italic, underlining, and a new font color to its text with the Bold, Italic, Underline, and Font Color command buttons on the Home tab.
- After you finish defining and formatting the codes and text for your custom header or footer, click a cell in the Worksheet area to deselect the header or footer area.
Excel replaces the header/footer codes in the custom header or footer with the actual information, while at the same time removing the Header & Footer Tools contextual tab from the Ribbon.
 Spreadsheet in Page Layout view showing the custom footer.
Creating first-page headers and footers in Excel 2019
Excel 2019 enables you to define a header or footer for the first page that’s different from all the rest of the pages. Simply click the Different First Page check box to put a check mark in it. (This check box is part of the Options group of the Design tab on the Header & Footer Tools contextual tab that appears when you’re defining or editing a header or footer in Page Layout view.)After selecting the Different First Page check box, go ahead and define the unique header and/or footer for just the first page (now marked First Page Header or First Page Footer). Then, on the second page of the report, define the header and/or footer (marked simply Header or Footer) for the remaining pages of the report.
Use this Excel 2019 feature when your spreadsheet report has a cover page that needs no header or footer. For example, suppose that you have a report that needs the current page number and total pages centered at the bottom of all pages except the cover page. To do this, select the Different First Page check box on the Design tab of the Header & Footer Tools contextual tab on the Ribbon. Then define a centered Auto Footer that displays the current page number and total pages (Page 1 of ?) on the second page of the report, leaving the Click to Add Footer text intact on the first page.
Excel will correctly number both the total number of pages in the report and the current page number without printing this information on the first page. For example, if your report has six pages (including the cover page), the second page footer will read Page 2 of 6; the third page, Page 3 of 6; and so on, even if the first printed page has no footer.Creating even and odd page headers and footers in Excel 2019
If you plan to do two-sided printing or copying of your Excel 2019 spreadsheet report, you may want to define one header or footer for the even pages and another for the odd pages of the report. That way, the header or footer information (such as the report name or current page) alternates between being right-aligned on the odd pages (printed on the front side of the page) and being left-aligned on the even pages (printed on the back of the page).To create an alternating header or footer for a report, you click the Different Odd & Even Pages check box to put a check mark in it. (This check box is in the Options group of the Design tab on the Header & Footer Tools contextual tab that appears when you’re defining or editing a header or footer in Page Layout view.)
After that, create a header or footer on the first page of the Excel report (now marked Odd Page Header or Odd Page Footer) in the third, right-aligned section of the header or footer area and then re-create this header or footer on the second page (now marked Even Page Header or Even Page Footer), this time in the first, left-aligned section.
For more information, check out these top ten Excel 2019 features.