
If you've been entering bills from vendors into QuickBooks Online, then, at some point, you need to pay those bills. Most people sit down once or twice a month and pay outstanding bills. To pay bills in QBO, follow these steps:
Click the Create plus (+) sign and, from the Create menu that appears, choose Pay Bills in the Vendors column.
QBO displays the Pay Bills page shown.
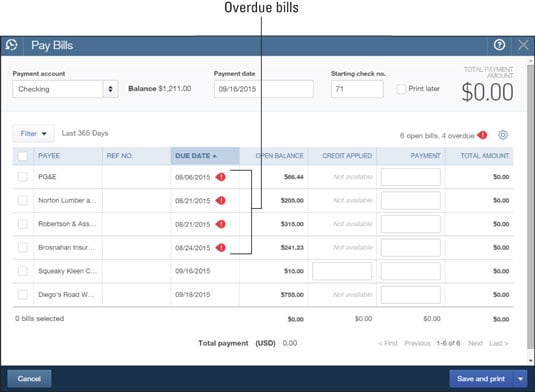 The Pay Bills page lists bills you owe but have not yet paid.
In the Payment Account list, select an account to use to pay the bills.
QBO shows the balance in that account.
Provide a payment date on the bottom-left side of the screen.
Enter the number of the first check you'll use to pay bills.
You can select the Print Later button to identify bills to pay and schedule them to print later; at the time you print the checks, QBO lets you establish the starting check number.
In the Filter list, select an option to specify the outstanding bills you want to consider paying.
By default, QBO displays unpaid bills for the last year, but you can limit what appears onscreen for your consideration by a variety of dates and even for selected payees.
Overdue bills display a red flag.
By clicking the appropriate column heading, you can opt to sort the listed bills by Payee, Reference Number, Due Date, or Open Balance.
Select the check box in the column at the left side of each bill you want to pay.
As you select bills to pay, QBO updates the Payment column using the bill amount as the default payment amount. You can change the payment amount of any bill by typing in the Payment column.
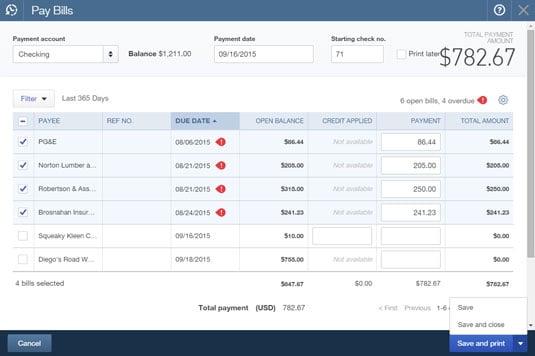 QBO uses the bill amount less any vendor credits to calculate a payment amount.
If a vendor credit exists, QBO assumes you want to apply outstanding vendor credits to reduce the amount you owe a particular vendor.
Click Save and Print, or click the arrow beside Save and Print to choose either Save or Save and Close.
Click Save or Save and Close to mark the bills paid without printing any checks. Click Save and Print to print checks and mark the bills paid.
If you choose to pay the bills using a credit card instead of a bank account, no options appear related to printing checks, just as you'd expect.
If you opted, in Step 4, to print checks later, you can print those checks by choosing Create→Print Checks. The Print Checks option appears in the Vendors column of the Create menu.