Which options are you going to need all the time? Which ones are you going to need now and then? Which ones can you ignore altogether? Here are some various text and type variables, along with a few general guidelines on which options are most (and least) frequently required.
Take a look at this figure, in which you can see (in all their glory) the most commonly used text attributes, all of which are available to you from the Options bar whenever a type tool is active.
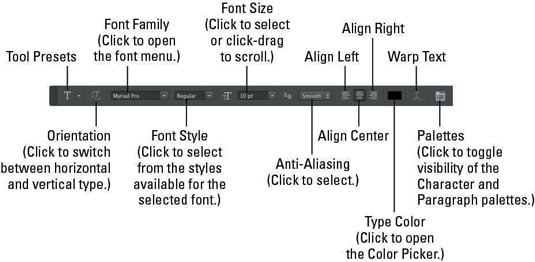
You can change the following text attributes via the Options bar, which is usually available at the top of your screen:
-
Tool Presets: The Tool Presets panel enables you to select a predefined set of options that you’ve already saved. Set up each as a preset and then activate all the options with a single click.
-
Orientation: The Orientation button toggles existing type layers between horizontal and vertical. Regardless of what text is selected, the entire type layer is flipped when you click this button.
-
Font menu: Click the triangle to the right of the Font Family field to open the Font menu, showing all your active fonts in alphabetical order. You can also click in the field itself and use the arrow keys to switch fonts. Alternatively, you can type the first letters of a font in the Font text field to display fonts. For example, type AD to view all Adobe fonts installed on your system.
If you select some type with a type tool first, using an arrow key automatically applies the change to the selected characters. If no characters are selected, you change the entire type layer.
-
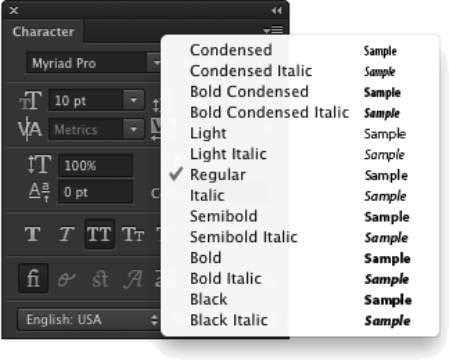
Font Style: When a font has multiple styles built in, you can choose a variation of the font from the Font Style menu. Styles include Regular (or Roman), Bold, Semibold, Italic, Condensed, Light, and combinations thereof (as you see in the figure). Some fonts, however, have no built-in styles.
-
Font Size: You can select a font size in three ways: by typing a number in the Font Size field, by clicking the triangle to the right of the field and selecting a font size from the pop-up menu that appears, or by clicking the tT icon to the left of the Font Size field and then dragging left or right to change the value in the field.
Font size is generally measured in points (1 point = 1/72 inch), but you can elect to use pixels or millimeters. Make the units change in Photoshop’s Preferences (choose Preferences→Units & Rulers, not Preferences→Type). Keep in mind that when type is measured in points, the image’s resolution comes into play.
-
Anti-aliasing: Anti-aliasing softens the edges of each character so that it appears smooth on-screen. As part of this process, anti-aliasing hides the corners of the individual pixels with which the text is created. When outputting to a laser printer or other PostScript device, anti-aliasing isn’t required.
It is, however, critical when printing to an inkjet or when producing web graphics or designing for tablets and smart phones. Smooth is a good choice unless your text begins to look blurry, in which case you should switch to Crisp.
Use the Strong option with very large type when the individual character width must be preserved. When designing for on-screen projects (web pages, tablets, smart phones, and so on), choose System or System Gray for anti-aliasing.
Never choose System or System Gray for text that will be printed, either on an inkjet or using a PostScript device. These two anti-aliasing methods are designed to help text appear properly in web browsers.
-
Alignment: The three alignment choices on the Options bar determine how lines of type are positioned relative to each other. The buttons do a rather eloquent job of expressing themselves, wouldn’t you say? Note: Don’t confuse the term alignment with justification, which straightens both the left and right margins (and is selected in the Paragraph panel).
-
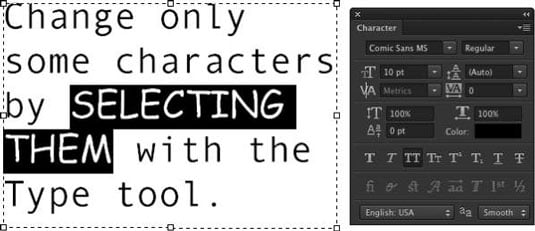
Type color: Click the color swatch on the Options bar to open the Color Picker and select a type color. You can select a color before adding text, or you can change the color of the text later. If you start by selecting a type layer from the Layers panel, you’ll change all the characters on that layer when you select a new color in the Color Picker.
Alternatively, use a type tool to select one or more characters for a color change, as you can see in the figure.
-
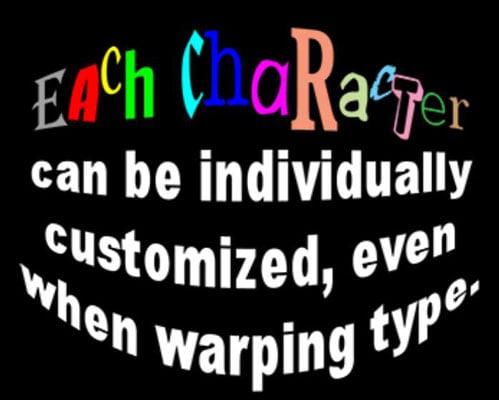
Warp Text: Warp Text bends the line of type according to any number of preset shapes, each of which can be customized with sliders. (The text in the figure uses the Arc Lower warp style.) Keep in mind, however, that the Warp Text feature isn’t available when the Faux Bold style is applied through the Character panel.
- Palletes: Click this icon to display the Character and Paragraph panels. In the Character panel, you can fine tune the look of text by choosing options, such as small caps, underline text, strikethrough text, and more. The Paragraph panel is used to align text, justify text, indent text, and more.
Each character in a type layer can have its own attributes. Click and drag over one or more characters with a type tool and then use the Options bar or Character panel to change the text attributes. Color, font, style — just about any attribute can be assigned, as you see.
Like many word processing programs, you can select an entire word in Photoshop by double-clicking the word (with a type tool). Triple-click to select the entire line. Quadruple-click to select the entire paragraph. Click five times very fast to select all the text.