There are guidelines to prevent someone from spamming the network with purely promotional information or information that provides no value. LinkedIn catalogs all of its help pages for long-form posts, including its guidelines.
There are a couple of ways for you to publish a post. From your LinkedIn home page, you can click the Publish a Post link next to the Share an Update and Upload a Photo links. From the LinkedIn Pulse home page, you can click the Publish a Post button in the top right corner.
When you are ready to write your post, follow these steps:
Click the Publish a Post link from either your home page or the LinkedIn Pulse home page.
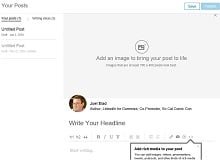
This brings up the Your Posts page. Along the left side, you will see links for Your Posts and for Writing Ideas to help you come up with topics for your post.
(Optional) Add an image to be associated with your article by clicking the Image icon.
LinkedIn allows you to upload an image that helps represent what your post is about. LinkedIn guidelines recommend using an image with a 700-by-400 pixel size for optimal viewing. When you click the Image icon, LinkedIn opens a window for you to find the image file on your computer and upload it to LinkedIn. You can also click the X in the top right corner of this box to remove the option of adding an image.
Write your post headline in the Write Your Headline space.
When you hover your mouse over the words “Write Your Headline,” those words disappear and you can type in your own headline in the space provided. Think of the appropriate headline that captures the essence of your post with an appealing message that will encourage people to click and read it.
Write a headline that would appeal to your target audience, and don’t forget to use some of the appropriate keywords that’ll be picked up by search engines and the human eye. You should save some of your keywords for the body of your post, which you will write next.
Write your post in the window provided.
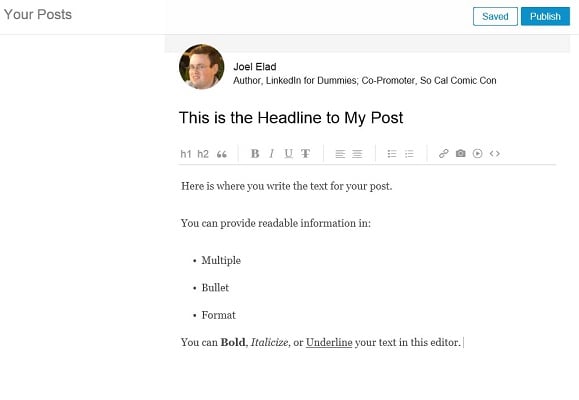
You will notice a series of icons above the text area for your post, similar to a word processor like Microsoft Word. Think of this area as your publishing editor. You can copy and paste, or type your text directly into the publishing editor, then use the formatting buttons to format the text as you want it to appear on-screen.
You can add images, videos, presentations, tweets, podcasts, and other kinds of rich media to your post by clicking the < >, or Embed icon, from the row of buttons in your publishing editor.
There is no fixed minimum or maximum length to your posts, but if you want your post to be read and have an impact, you should pick a length that makes the point without becoming an actual novel in length. Daniel Roth wrote a great article for LinkedIn Pulse containing seven tips for writing a killer post, and when it came to length, he stated that “800–2,000 words was the sweet spot,” but he also added that the demands of your content should dictate the length of your post, not what statistical data shows.
Also, at the bottom of your post, be sure to write a brief biography (one or two sentences) of who you are, what you are doing, and how you can help other people. This can include links to your own website, blog, or even a call to action to gather leads of your own.
LinkedIn created an informative slide presentation of tips to help you publish a post on its site.
Create tags to assign topics to your post so it can be easily found.
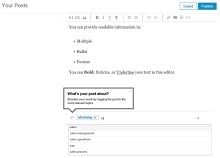
If you want your post to be associated with a specific topic or topics, you can create tags for your post. This way, LinkedIn and the reading public will know what topic(s) this post belongs to, and it will help LinkedIn’s algorithms know when and where to display the post.
At the bottom of the text area, click the Tag icon and start typing topic keywords. LinkedIn displays applicable tags and you can click the correct one to assign a tag. You can repeat the process by assigning more tags, but be careful: If you assign too many tags, they lose any sense of being a valuable identifier for your post.
When you’re ready, click the blue Publish button to publish your post.
That’s it! LinkedIn publishes your post, and there will be a section on your LinkedIn profile, entitled Posts, that catalogs and displays your posts. Based on LinkedIn’s algorithms, this post could show up in other people’s LinkedIn Pulse, and your first-degree connections will see your post in their home page feed, as well as receive a notification that you have published a post.
If you cannot complete your post in one sitting, click the Save (or Saved) button next to the Publish button. When you come back to this screen later, you will see your saved draft in the Your Posts section on the left side of the screen. As you write your post, you will see this button as Saved when LinkedIn automatically saves your work after a certain amount of time.