Currently, LinkedIn is able to sync with major e-mail providers such as Gmail, Yahoo! Mail, and Outlook, along with address books like Google Contacts, Yahoo! Address Book, Outlook Address Book, and the iPhone Address Book. In addition, you can sync information with systems such as Evernote and TripIt.
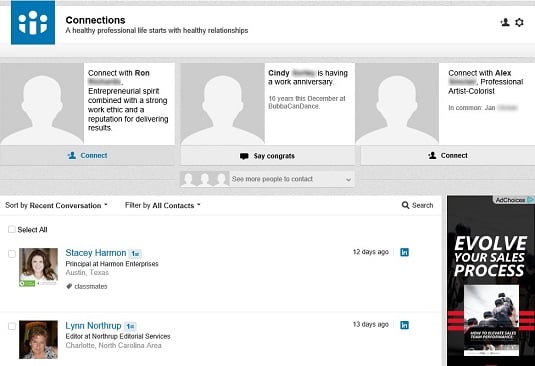
To get started, you click the Connections link in the top navigation bar. You should see the Connections screen. Along the top of the screen, LinkedIn displays a tiled bar of contacts who have either reported a new event or potential new contacts of someone in your network. Each element in that bar has a suggested action, such as “Say Congrats” or “Connect,” that you can click, which encourages some interaction with that person.
You can also hover your mouse over any of these tiles and click the Skip link at the bottom right of each tile area to bring up another potential contact, or click the See More People to Contact link to bring up another row of contact tiles.
Below that bar is your list of contacts, sorted by Recent Conversation by default. This way, you see the LinkedIn contacts you’ve most recently talked to, and next to each name, LinkedIn shows the length of time that has passed since your last interaction.
You can click the down arrow next to Sort By to change the sort order of your contacts. Currently, your choices for sorting are:
- Recent Conversation
- First or Last Name (based on each contact’s first or last name)
- New (starting with the newest connections to your network or your Contacts system)
To the right of the Filter By option is a Search link. When you click it, a text box appears that you can use to search your contact list. Simply type the desired first or last name in the box and then press Enter to run the search.


