
To understand this interface, let’s look at what an I2C bus is. An I2C bus is often used to communicate with chips or sensors that are on the same board or located physically close to the CPU. I2C was first developed by Phillips (now NXP Semiconductors).
To get around licensing issues (that have largely gone away), often the bus will be called TWI (Two Wire Interface). SMBus, developed by Intel, is a subset of I2C that defines the protocols more strictly. Modern I2C systems take policies and rules from SMBus, sometimes supporting both with minimal reconfiguration needed. Both the Arduino and the Raspberry Pi support the I2C bus.
I2C provides good support for slow, close peripheral devices that need to be addressed only occasionally. For example, a temperature-measuring device will generally only change very slowly and so is a good candidate for the use of I2C, whereas a camera will generate lots of data quickly and potentially changes often.
I2C uses only two bidirectional open-drain lines (open-drain means the device can pull a level down to ground, but cannot pull the line up to Vdd. Hence the name open-drain. Thus a requirement of I2C bus is that both lines are pulled up to Vdd. This is an important area and not properly pulling up the lines is the first and most common mistake you make when you first use an I2C bus.
The Pi2Grover board contains 10K Ohm pullup resistors so you should not have to worry about this. The two lines are SDA (serial data line) and the SCL (serial clock line). There are two types of devices you can connect to an I2C bus: Main devices and Secondary devices. Typically, you have one Main device (The Raspberry Pi, in our case) and multiple Secondary devices, each with their individual 7-bit address.
 The I2C bus.
When used on the Raspberry Pi, the Raspberry Pi acts as the Main and all other devices are connected as Secondaries.
The I2C protocol uses three types of messages:
- Digital single message where a main writes data to a secondary
- Digital single message where a main reads data from a secondary
- Digital combined messages, where a main issues at least two reads and/or writes to one or more secondaries
Exploring I2C on the Raspberry Pi
To use the I2C bus on the Raspberry Pi, you need to make sure that it is enabled in the operating system. Check out this tutorial from Adafrui9t on how to do just that.Did you do it right? The easy way to check for this is to type the following command in your terminal window:
I2cdetect -y 1If it returns:
-bash: i2cdetect: command not foundThen you have not enabled your I2C bus. Repeat the tutorial to fix this.
On the other hand, if it returns:
0 1 2 3 4 5 6 7 8 9 a b c d e f
00: -- -- -- -- -- -- -- -- -- -- -- -- --
10: -- -- -- -- -- -- -- -- -- -- -- -- -- -- -- --
20: -- -- -- -- -- -- -- -- -- -- -- -- -- -- -- --
30: -- -- -- -- -- -- -- -- -- -- -- -- -- -- -- --
40: -- -- -- -- -- -- -- -- -- -- -- -- -- -- -- --
50: -- -- -- -- -- -- -- -- -- -- -- -- -- -- -- --
60: -- -- -- -- -- -- -- -- -- -- -- -- -- -- -- --
70: -- -- -- -- -- -- -- --
Then you have been successful! Note that all dashes mean there are no sensors on the I2C bus. Next, you are going to add a simple one.
Now, let’s talk about how to communicate with I2C devices in Python.
Talking to I2C devices with Python
In order to talk to an I2C device, you should have one on the bus. A good one to start with is the HDC1080 temperature and humidity sensor. (You can get one of these inexpensive sensors on store.switchdoc.com or on amazon.com.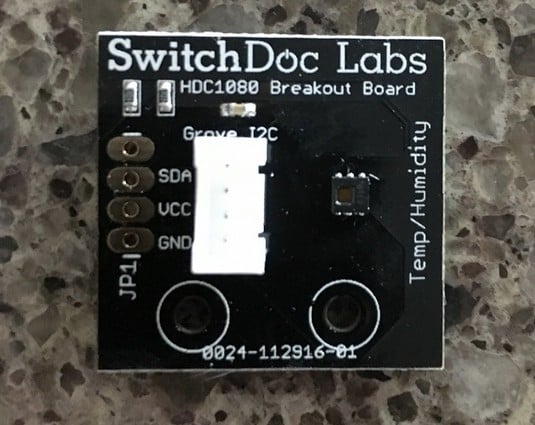 HDC1080 temperature and humidity sensor.
Note: If you buy one on Amazon, you will need a female-to-Grove patch cable. The SwitchDoc Labs HDC1080 already comes with a Grove connector. You will also need the Pi2Grover Raspberry Pi-to-Grove converter, which is also available on store.switchdoc.com or on amazon.com.
Now let’s install the HDC1080 I2C sensor on our Raspberry Pi. Follow these steps:
- Shut down your Raspberry Pi. When the yellow LED has stopped blinking, unplug the power from your Raspberry Pi.Never plug anything into or pull anything out a Raspberry Pi without shutting the computer down. Exceptions to this are USB ports, audio cables, and Ethernet cables, which are designed to support “hot-plugging.” The rest of the Raspberry Pi is not.
- Plug a Grove cable into the HDC1080.
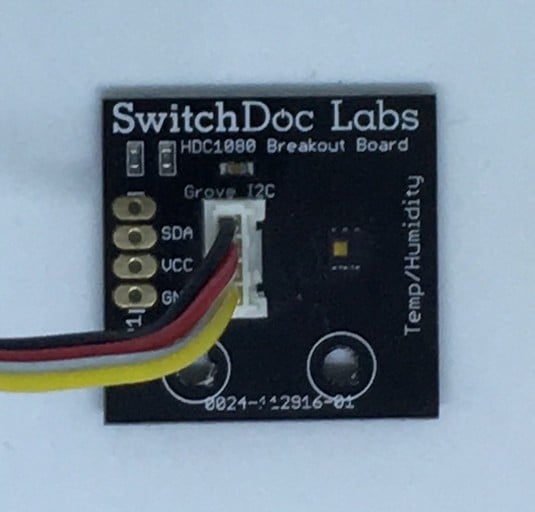 HDC1080 with the Grove cable plugged in.
This project calls for the SwitchDoc Labs HDC1080; if you are using an Amazon device, make sure to use a Grove patch cable.
Always shut down your Raspberry Pi by first typing
sudo halton the command line (or by selecting Shutdown from the GUI menu). Wait until the yellow LED on the Raspberry Pi stops blinking before removing the power cord. This ensures that the SDCard on the Raspberry Pi has been prepared for shutdown and you won't corrupt it. Just unplugging your Raspberry Pi may not corrupt the card, but unplugging it without shutting it down increases the likelihood of corruption. Corrupting your SDCard may not be fatal, but repairing it is a long, technical, irritating process. - Plug the other end of the Grove cable into one of the Grove connectors marked I2C on the Pi2Grover that plugged on top of your Raspberry Pi.
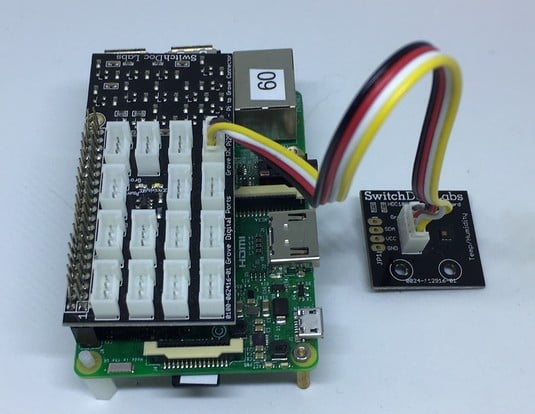 The HDC1080 hooked up to the Raspberry Pi.
Note: The I2C is a bus, which means you can use any of the four I2C connectors.
- Power up the Raspberry Pi and open a terminal window.
- Type into the terminal
sudo i2cdetect -y 1and you will be rewarded with this:
0 1 2 3 4 5 6 7 8 9 a b c d e f
00: -- -- -- -- -- -- -- -- -- -- -- -- --
10: -- -- -- -- -- -- -- -- -- -- -- -- -- -- -- --
20: -- -- -- -- -- -- -- -- -- -- -- -- -- -- -- --
30: -- -- -- -- -- -- -- -- -- -- -- -- -- -- -- --
40: 40 -- -- -- -- -- -- -- -- -- -- -- -- -- -- --
50: -- -- -- -- -- -- -- -- -- -- -- -- -- -- -- --
60: -- -- -- -- -- -- -- -- -- -- -- -- -- -- -- --
70: -- -- -- -- -- -- -- --
Remember the 0x40 address of the HDC1080? There it is in the output above.
Next, you’ll use Python to read the temperature and humidity from this sensor.
Reading temperature and humidity from an I2C device using Python
The use of Python libraries are key to being productive in writing Python applications. Here, you will be using the SDL_Pi_HDC1080_Python3, available on github.com.To read the temperature and humidity, follow these steps:
- First, create a directory in your main directory:
cd
mkdir I2CTemperature
cd I2CTemperature
Now you are in theI2CTemperaturedirectory. - Before looking at the Python code for reading your temperature, install the library on our Raspberry Pi. You do this by “cloning” the library located at github.com by using the following command in your terminal window:
git clone https://github.com/switchdoclabs/SDL_Pi_HDC1080_Python3.git
Heregit cloneclones the git repository located at the address and copies it to your Raspberry Pi. If you enterlsin the terminal window, you will see the following output: - Using nano (or your favorite text editor), open up a file called
temperatureTest.pyand enter the following code:
import sys
sys.path.append('./SDL_Pi_HDC1080_Python3')
import time
import SDL_Pi_HDC1080
# Main Program
print
print ("")
print ("Read Temperature and Humidity from HDC1080 using I2C bus ")
print ("")
hdc1080 = SDL_Pi_HDC1080.SDL_Pi_HDC1080()
while True:
print ("-----------------")
print ("Temperature = %3.1f C" % hdc1080.readTemperature())
print ("Humidity = %3.1f %%" % hdc1080.readHumidity())
print ("-----------------")
time.sleep(3.0)
You are now reading environmental data from an I2C device. Your Raspberry Pi is connected to the real world.
Try this experiment. Blow on the HDC1080 sensor board and watch the humidity go up! You will see something like this:
Read Temperature and Humidity from HDC1080 using I2C bus
-----------------
Temperature = 24.2 C
Humidity = 32.9 %
-----------------
-----------------
Temperature = 24.2 C
Humidity = 32.9 %
-----------------
-----------------
Temperature = 24.2 C
Humidity = 32.9 %
-----------------
Breaking down the Python program
The first line imports the Pythonsys library:
import sysThe next line tells Python to search the
SDL_Pi_HDC1080_Python3 directory below our current directory so it can find our library:
sys.path.append('./SDL_Pi_HDC1080_Python3')
More imports:
import time
import SDL_Pi_HDC1080
This statement instantiates the hdc1080 object and initializes it:
# Main Program
print
print ("")
print ("Read Temperature and Humidity from HDC1080 using I2C bus ")
print ("")
hdc1080 = SDL_Pi_HDC1080.SDL_Pi_HDC1080()
These statements read the temperature and humidity and print them out to the terminal window. Note: You see that all the complexity of using an I2C device is hidden by use of the HDC1080 library:
while True:
print ("-----------------")
print ("Temperature = %3.1f C" % hdc1080.readTemperature())
print ("Humidity = %3.1f %%" % hdc1080.readHumidity())
Sleep for three seconds and then repeat:
print ("-----------------")
time.sleep(3.0)
Now that you have this program, you could add all sorts of things to it, such as turning on a red LED if it gets too hot, or turning on a blue LED if it gets to cold.
You could even tweet your temperature and humidity by using the Twitter Python library.