Creating a Stacked and Tabbed Navigation Application
In iOS, you often encounter applications that combine the use of stacked and tabbed navigations. Creating this kind of design is easy to accomplish using SwiftUI. The following figure shows how such an application may look.
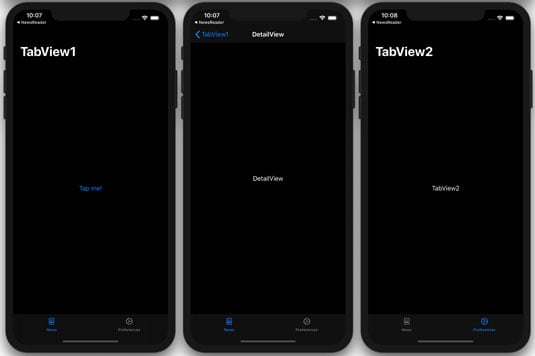
The application has two tab items:
TabView1corresponds to the first tab item.TabView2corresponds to the second tab item.
In TabView1, there is a button that says “Tap Me!” When the user taps this button, the application navigates to DetailView.
To implement this in SwiftUI, you just need to create three views (you can create them in separate Swift files, or put them all in one single file):
import SwiftUI

struct TabView1: View {
    var body: some View {
        NavigationView {
            NavigationLink(destination: DetailView()) {
                Text("Tap me!")
            }
            .navigationBarTitle("TabView1")
        }
    }
}

struct TabView2: View {
    var body: some View {
        NavigationView {
            Text("TabView2")
            .navigationBarTitle("TabView2")
        }
    }
}

struct DetailView: View {
    var body: some View {
        Text("DetailView")
        .navigationBarTitle("DetailView",
            displayMode: .inline)
    }
}
NavigationLink is a button that, when pressed, triggers a navigation presentation. NavigationView is for presenting a stack of views representing a visible path in a navigation hierarchy.
To create the tab items, use the TabView view:
struct ContentView: View {
    var body: some View {
        TabView {
            TabView1()
                .tabItem {
                    Image(systemName: "doc.richtext")
                    Text("News")
                }

            TabView2()
                .tabItem {
                   Image(systemName: "gear")
                   Text("Preferences")
                }
        }
    }
}
The tabItem() modifier displays a tab item for each view.
Creating Shake Fail Feedback Using Animation
Most iOS users are familiar with this: If you enter an incorrect passcode when unlocking your iPhone, the dots (representing your entered passcode) on your iPhone “shake,” letting you know that your passcode is wrong. This shaking is a useful form of UI feedback — it lets the user know that the login has failed.
How about implanting this animation in your own app using SwiftUI? Turns out, it isn’t that difficult! You can make use of SwiftUI’s animation() modifier.
The following code snippet contains a SecureField view with the animation() modifier set:
struct ContentView: View {
    @State var offset:CGFloat = 0
    @State private var username: String = ""
    @State private var password: String = ""

    var body: some View {
        VStack {
            Text("Username")
            TextField("Enter username", text:$username)
                .frame(width: 300, height: 30)
                .border(Color.black)

            Text("Password")
            SecureField("Enter a password",
                text: $password)
                .frame(width: 300, height: 30)
                .offset(x: offset)  // amount to "shake"
                .animation(
                  offset != 0 ?
                     Animation.default
                       .repeatCount(5).speed(4)
                    :
                    nil) // if offset is not zero, animate
                .border(Color.black)

            Button(action: {
                if true {  // simulates login failed
                    self.offset = 20 // set "shake" amount

                    // after a delay of 0.5 seconds, set
                    // offset to 0 to bring back the
                    // SecureField to its original
                    // position
                    DispatchQueue.main.asyncAfter(
                        deadline: .now() + 0.5) {
                        self.offset = 0
                    }
                }
            }) {
                Text("Login")
            }
        }
    }
}
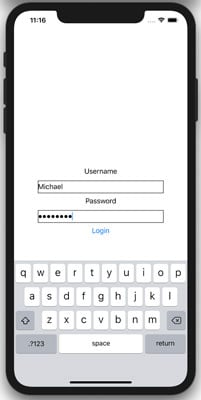
The SecureField view has its offset set to a value stored in the offset state variable, which is in turn bound to the animation() modifier. If the login fails, the offset state variable is set to 20 and the SecureField will start to animate to its new location.
This animation is repeated five times and, by speeding it up, the “shaking” effect is created. One side effect of the animation is that, at the end of the animation, the SecureField will be permanently offset by 20 points. To remedy this, half a second after the animation starts, you set the offset state variable back to 0, which effectively brings the SecureField back to its original location at the end of the animation. The following figure shows the UI containing the SecureField.
Displaying the Share Sheet
The Share Sheet is an action sheet that shows the item that you’re sharing, with optional buttons at the bottom. Using the Share Sheet, you can easily share items of interest with other users through AirDrop, Messages, Mail, Notes, and other apps on your device.
The following code snippets shows an Image view showing an image of a Macintosh SE computer. It also has a navigation button at the top showing a share icon (see the figure):
struct ContentView: View {
    func shareURLButton() {
        let img = UIImage(named: "Macintosh_SE")
        let avc = UIActivityViewController(
            activityItems: [img!],
            applicationActivities: nil)

        UIApplication.shared.windows.first?
            .rootViewController?.present(
            avc, animated: true, completion: nil)
    }

    var body: some View {
        NavigationView {
            Image("Macintosh_SE")
                .resizable()
                .frame(width: 200.0, height: 220.0)
                .navigationBarItems(trailing:
                    Button(action: {
                        self.shareURLButton()
                    }) {
                       Image(systemName:
                           "square.and.arrow.up")
                    }
                )
               .navigationBarTitle("Share Sheet Example")
        }
    }
}
When the Share icon is tapped, the Share Sheet displays, as shown on the right side of the figure. Users will be able to copy the image, save a copy of it to the Photos app, assign it to a contact, and so on.
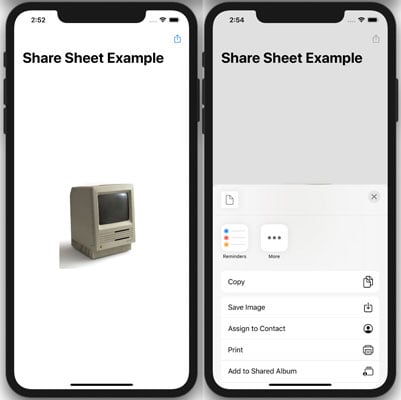
If you want to allows users to save the image to the Photos app, you need to add the NSPhotoLibraryAddUsageDescription key to the Info.plist file and assign it a value.
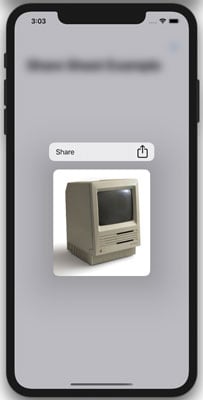
You can also make the Image view context sensitive using the contextMenu() modifier:
    var body: some View {
        NavigationView {
            Image("Macintosh_SE")
                .resizable()
                .frame(width: 200.0, height: 220.0)
                .navigationBarItems(trailing:
                    Button(action: {
                        self.shareURLButton()
                    }) {
                       Image(systemName:
                           "square.and.arrow.up")
                    }
                )
                .contextMenu {
                    Button(action: {
                        self.shareURLButton()
                    }) {
                        Text("Share")
                        Image(systemName:
                            "square.and.arrow.up")
                    }
                }
               .navigationBarTitle("Share Sheet Example")
        }
    }
The following figure shows the context menu displaying after long-pressing the image.
Tapping the Share menu displays the Share Sheet.