Moving data between local drives and the AWS cloud is one of the most common activities you perform, so this exercise is important, even if it seems a bit simplistic. The following steps help you through the process of working with files in the cloud.
Click Sign in to the Console or choose My Account →AWS Management Console.
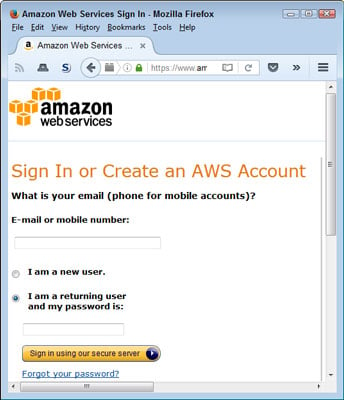
You see a sign-in page similar to the one shown, even if you just completed the sign-up process.
Sign in to your account.
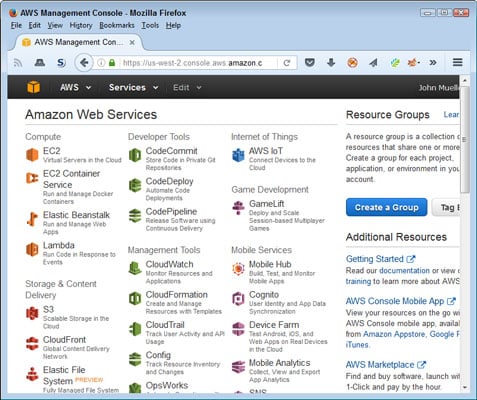
You see a list of Amazon Web Services like the one shown. The console provides access to all the services you can use. Remember that not all these services are free. Only the services in the free tier are free to use.
Click S3 in the Storage & Content Delivery group (you may need to select S3 from the Services drop-down at the top of the page).
You see an introduction to the Sample Storage Service (S3) page. This page explains a little about S3. Make sure to read the text before you proceed.
To use S3, you must first create a bucket. The bucket will hold the data that you transfer to AWS. In this case, you use the bucket to hold a file.
Click Create Bucket.
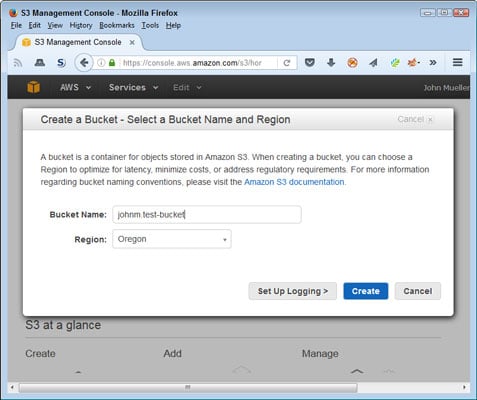
You see the Create a Bucket dialog box. The Bucket Name field is simply the name that you want to give to your bucket. Choose a name that seems appropriate for the bucket’s use. (See the restrictions for naming buckets). The Region field tells where your bucket is physically stored. A local bucket will respond faster, but a bucket somewhere else in the world may provide additional resilience because it won’t be as susceptible to local events, such as storms.
Type a bucket name (the example uses johnm.test-bucket) and select a region (the example uses Oregon); then click Create.
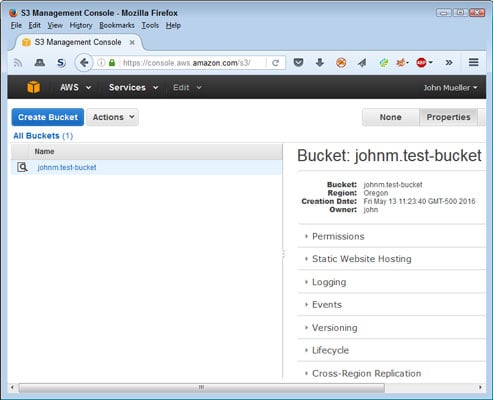
You see a new page with a list of all your buckets. You can configure each bucket differently using the properties shown on the right side of the screen. For now, use the default properties to work with a file.
Click the bucket entry you just created. You see a console for that bucket that tells you the bucket is empty.
Click Upload. You see an Upload – Select Files and Folders dialog box.
Click Add Files. You see a File Upload dialog box that will conform to the standard used for your platform.
Select the file you want to upload (the example uses the outline for this book) and click Open.

The Upload – Select Files and Folders dialog box now contains a list of the files you plan to upload, as shown.
Click Start Upload.
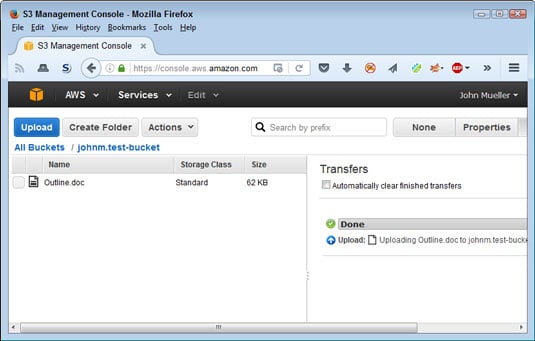
The file IS added to your bucket, as shown. Check the box next to the file you uploaded. Your browser displays a dialog box asking what to do with the file. Depending on the browser’s capabilities, you can open the file for editing or simply download it to your system.
- Click Cancel to close the dialog box without doing anything with the file.
- Choose Actions→Delete. You see a dialog box asking whether you want to delete the file.
- Click OK. S3 deletes the file. Your bucket is now empty again. Congratulations! You have now used S3 to perform the first set of tasks for the book.
- Choose <Your Name> → Sign Out. AWS logs you out of the console. Logging out when you finish a session is always a good idea.