
The following steps show the easiest, fastest method for creating an EC2 instance. However, keep in mind that you can do a lot more with EC2 setups. This procedure assumes that you have already logged in and selected the same region used for your EBS volume.
- Select Instances → Instances in the Navigation pane.
AWS tells you that you don’t have any EC2 instances running.
- Click Launch Instance.
You see a series of AMI entries. Amazon owns all these AMIs. You can also choose to use your own AMI or obtain access to an AMI through the AWS Marketplace or Community.
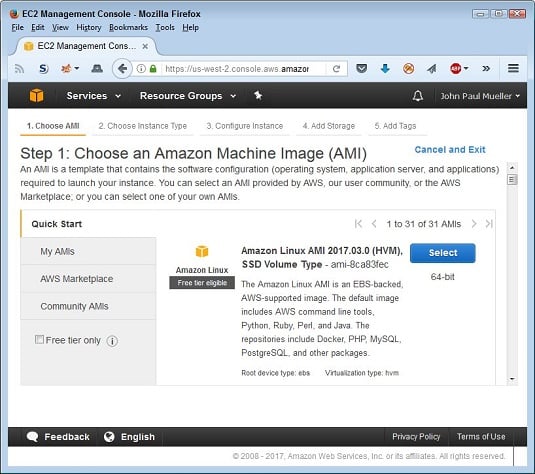 To start an instance, you must select one of the available AMIs.
Note that the first AMI is marked as Free Tier Eligible. Unless you want to pay for using EC2, you must select one of the Free Tier Eligible entries, which include Amazon Linux, Red Hat Linux, SUSE Linux, Ubuntu Linux, and Windows Server (all in various versions). To ensure that you don’t accidentally choose a paid option, select the Free Tier Only check box on the left side of the page.
- Click Select next to the Amazon Linux AMI 2017 entry.
You see a listing of instance types. One of the instance types is marked Free Tier Eligible. You must choose this option unless you want to pay for your EC2 instance.
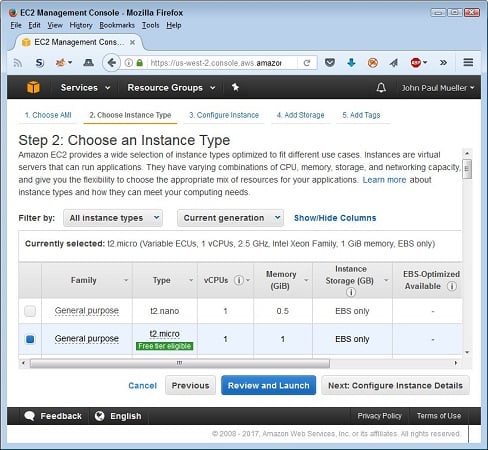 Choose the kind of instance you want to create.
Choosing to configure the instance details or change storage requirements will create a new instance type. The new instance type won’t be free-tier eligible. You can view the various configuration options available, but click Cancel instead of creating the instance if you want to continue working with AWS free of charge.
- Select the instance type that you want to create and then click Review and Launch.
You see the Step 7: Review Instance Launch page. The figure shows the Security Groups section. When you create your instance, Amazon warns you that anyone can access it. Given that you probably want to work with EC2 privately, you must modify the security group settings to reduce the risk of prying eyes.
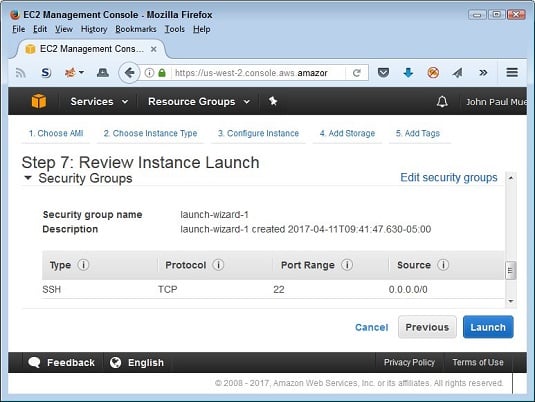 Review the instance configuration before you launch it.
 - Click Edit Security Groups.
You see the Step 6: Configure Security Group page.
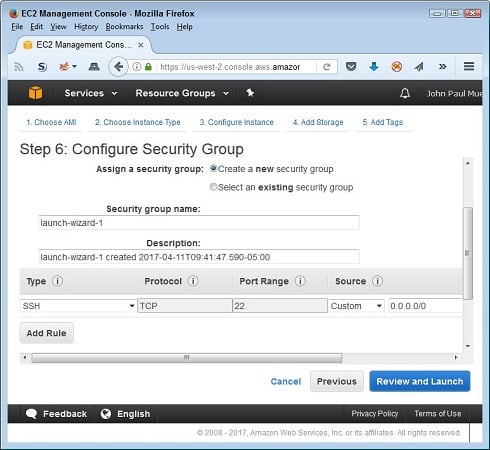 Create a new, more secure security group for your EC2 setup.
 - Type Default-Launch in the Security Group Name field.
Use a group name that’s both short and meaningful to avoid potential confusion later.
- (Optional) Type a group description in the Description field.
- Choose All Traffic in the Type field.
Using this option gives you maximum EC2 access. However, in a real-world setup, you limit the Type field entries to just the protocols you actually plan to use. For example, if you don’t plan to use Secure Shell (SSH) to interact with EC2, don’t include it in the list of allowed protocols.
- Choose My IP in the Source field.
By limiting the access to just your IP, you reduce the likelihood that anyone will access the EC2 setup. However, intruders can find all sorts of ways around this precaution, such as by using IP spoofing.
- Click Add Rule.
AWS adds the rule to the list. Click the X next to the new rule that AWS automatically generates in some cases to remove it; you don’t need it.
- Click Review and Launch.
The EC2 Management Console takes you back to the Step 7: Review Instance Launch page.
- Click Launch.
You see a Select an Existing Key Pair or Create a New Key Pair dialog box.
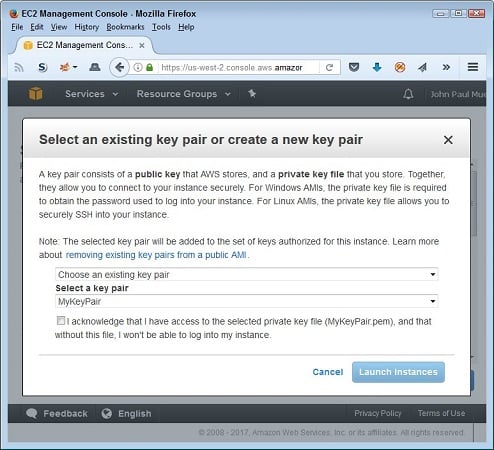 Choose the key pair that you want to use.
 - Select Choose an Existing Key Pair in the first field.
- Select MyKeyPair in the second field.
- Select the check box to acknowledge that you have access to the private key and then click Launch Instances.
AWS starts your EC2 instance. A dialog box provides additional information about your instance. Note the link for your instance in the Your Instances Are Now Launching box.
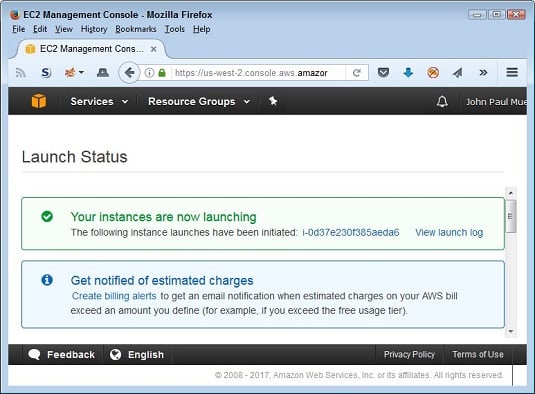 Amazon provides additional information about your instance while you wait for it to start.
 - Click the link for your instance.
You see the running instance information.
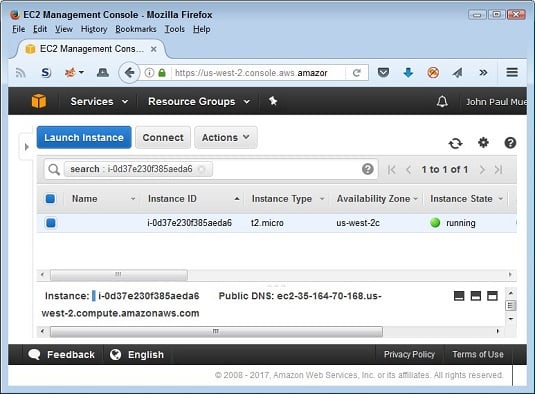 Verify that your instance is running before you attempt to connect to it.