- Sign in to AWS using your user account.
- Navigate to the Elastic Beanstalk Console.
You see a Welcome page that contains interesting information about Elastic Beanstalk and provides links to additional information and sample applications. In the upper-right corner, you see Create New Application.
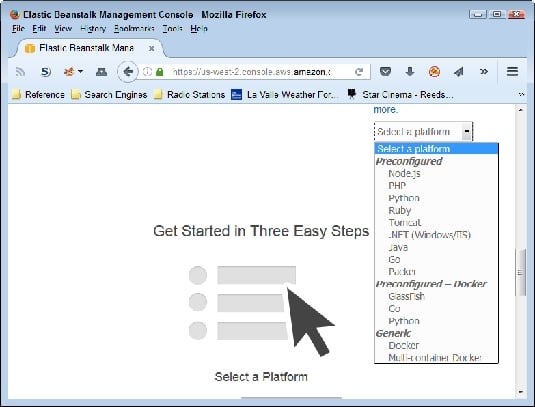 Avoid using the one-click, Select a Platform option whenever possible.
At the bottom of the page, you see the Select a Platform list box. This list box lets you create a test setup that requires only a single click. However, the default options include configuring your environment to use both load balancing and autoscaling. Consequently, when you try to complete the setup, you see an error message stating that the application can’t start until you upgrade your EC2 configuration. The upgrade will cost you money.
- Click Create New Application.
You see the Application Information page. You need to provide an application name (identity) and, optionally, describe it.
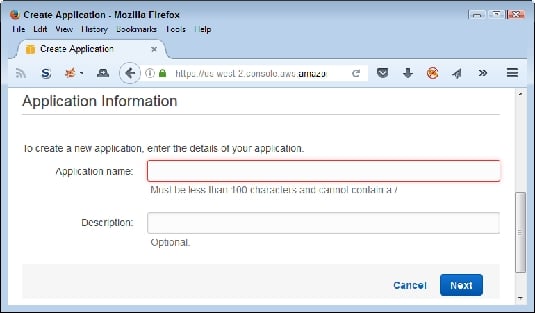 Identify your application and describe it.
 - Type TestApp in the Application Name field, type A test application. in the Description field, and then click Next.
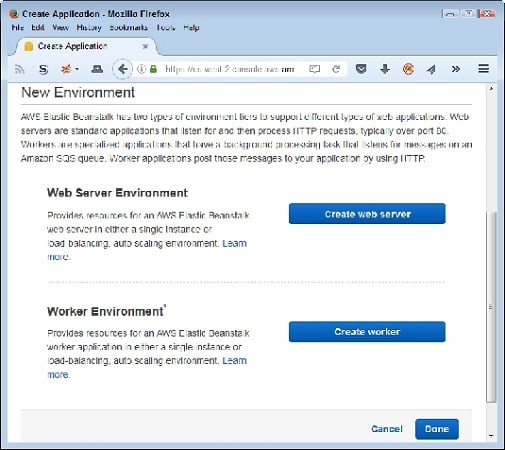 Choose an application environment.
You see the New Environment page. EB provides two default environments:
- Web Server Environment: Lets you run web applications using any of the languages that support web development.
- Worker Environment: Creates a background application that you can call on in a variety of ways. Background applications don’t provide user interfaces, so you normally use this option to create support for another application.
- Click Create Web Server.
EB asks you to configure the environment type. The Preconfigured Configuration field contains a listing of languages that you can use. The Environment Type field defines how to run the application: single instance or using both load balancing and autoscaling.
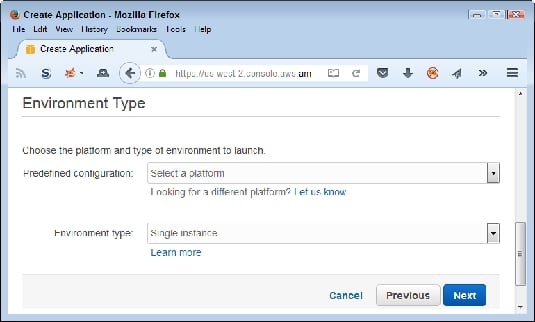 Define the application environment type.
 - Choose PHP in the Preconfigured Configuration field, choose Single Instance in the Environment Type field, and then click Next.
You see options for an application source. Normally you upload your own application or rely on an application defined as part of a Sample Storage Service (S3) setup. However, because this is an example, the next step will ask you to use a sample application. Working with sample applications makes experimenting easier because you know that nothing is wrong with the application code to cause a failure.
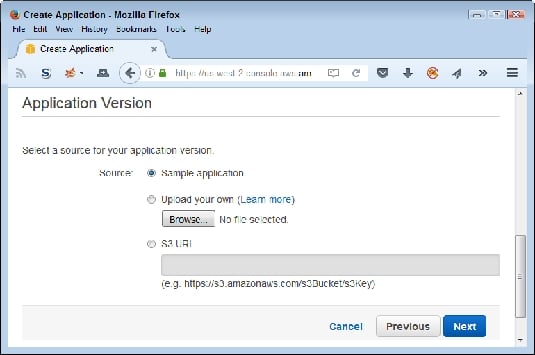 Specify the source of the application code.
 - Select the Sample Application option and click Next.
EB displays the Environment Information page. You must create a unique environment name for your application.
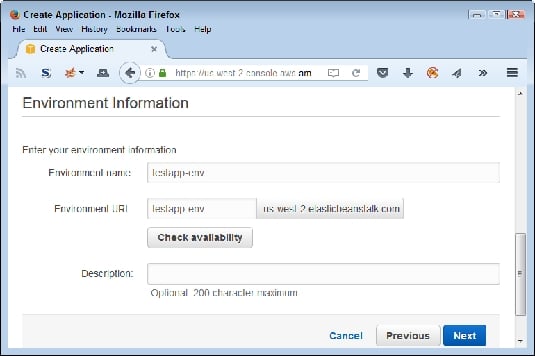 Provide a name for the application environment.
 - Type MyCompany-TestEnv in the Environment Name field.
Note that EB automatically provides an Environment URL field value for you. In most cases, you want to keep that URL to ensure that the URL will work properly. The Environment URL field automatically provides the location of your EC2 instances to run the web application, so normally you won’t need to change this value, either.
- Click Check Availability.
The square around the Environment URL field changes to green if the check is successful. Otherwise, you need to provide a different Environment Name field entry.
- Type A test environment. in the Description field and then click Next.
EB asks about the use of additional resources. Remember that additional resources generally incur fees, so keep these options blank when working with a test application. The RDS DB option creates a link to a database to use with the application. The VPC option creates a Virtual Private Cloud (VPC) to run the application.
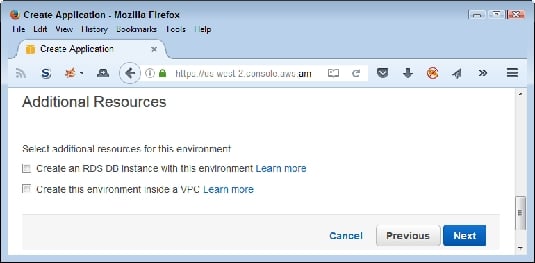 Avoid using additional resources unless you actually need them.
 - Click Next.
At this point, you need to define the configuration details. The options you use depend on how you want to run the application. However, the steps tell you how to maintain a free setup. Using other Instance Type field settings could incur costs.
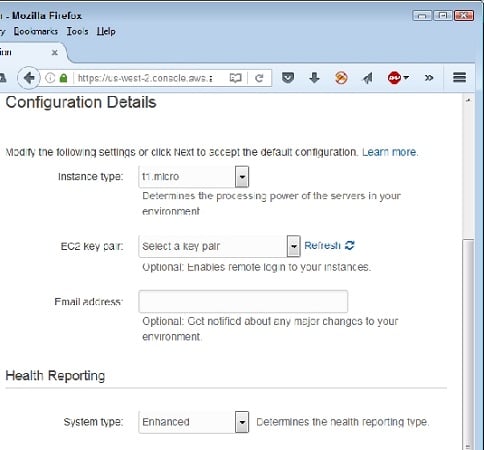 Specify the instance environment for running the application.
 - Choose t2.micro in the Instance Type field and the key pair that you want to use.
- (Optional) Type your email address in the Email Address field.
- Choose Basic in the System Type field (Health Reporting section) and then click Next.
EB asks whether you want to define Environment Tags. These are key value pairs used to help configure your application. The sample application doesn’t require any tags.\
- Click Next.
You see the Environment Tags page. This page can become important to developers who need to configure environment tags as part of an application setup. The tags use name value pairs, just as you use when configuring your environment variables in any localized operating system. This example doesn’t require any tags, but you should keep them in mind.
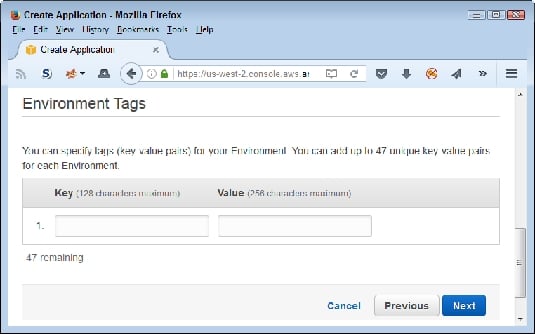 Define any environment tags needed to support your application.
 - Click Next.
The Permissions page contains options for creating or using permissions. The test setup doesn’t contain any permissions, so you won’t see any options in the Instance Profile or Service Role fields. If you had already defined another application, these fields would allow you to reuse those existing permissions. EB creates a set of default permissions for you, which you can later modify as needed.
 The Permissions page lets you reuse permissions as needed.
 - Click Next.
You see a Review page that contains all the settings made so far in the procedure. Check the settings to ensure that you made the entries correctly.
- Click Launch.
You see EB launching your application. Be patient: This process can require several minutes to complete.
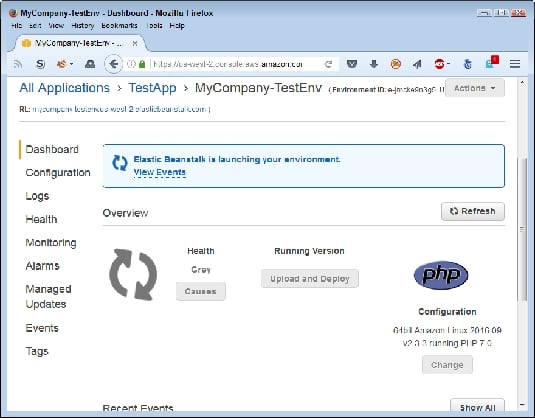 Wait for the application to deploy.
You can find some sample applications from AWS.