
Live View on your Nikon D7200 can be helpful for shooting still-life photos. Being able to see the scene on the monitor saves you from having to repeatedly check the viewfinder while you're arranging objects in the scene. (You can always use Live View while composing your shot and then exit Live View to actually take the picture, which is my normal course of action.)
Here are the steps to take a Live View picture in Auto or Auto Flash Off mode using autofocusing and the default picture settings:
Set the Mode dial on top of the camera to Auto or Auto Flash Off.
Set the Live View switch to the Still Photo position, and then press the LV button to engage Live View.
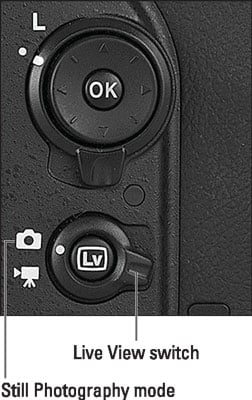 Set the Live View switch to the still-camera position and then press the LV button to turn on the Live View display.
The viewfinder goes dark, and the scene in front of the lens appears on the monitor, along with some shooting data.
Press the Info button to cycle through the available Live View displays.
Compose your shot.
Check the position of the focusing frame. If necessary, adjust the frame so that it's over your subject.
The autofocus frame that appears depends on your subject:
Portraits: By default, the camera uses an autofocusing option called Face Priority AF-area mode. If it detects a face, it displays a yellow focus box over it (refer to the left side of the following figure). In a group portrait, you may see several boxes: The one that includes the interior corner marks (refer to the figure) indicates the face that will be used to set the focusing distance. To use a different face as the focus point, use the Multi Selector to move the focus box over it.
Other subjects: Anytime the camera can't detect a face, it switches to Wide Area AF-area mode, with the focus area indicated by a red box in the center of the screen (refer to the right side of the figure). Again, use the Multi Selector to move the focus box over your subject. Press the OK button to move the focus box quickly back to the center of the frame.
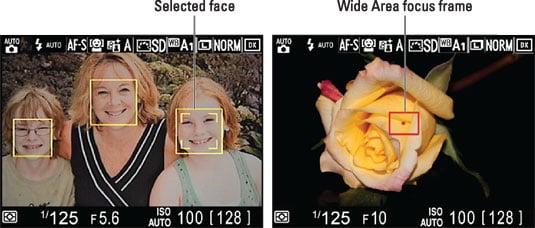 If the camera recognizes faces, you see yellow focus frames over each face (left); otherwise, the red, rectangular focus frame appears (right).
Press the shutter button halfway to set focus and initiate exposure metering.
When focus is set, the focus box turns green. In dim lighting, the built-in flash pops up if you selected the Auto exposure mode in Step 1.
In Live View mode, the camera always locks focus when you press the shutter button halfway, even if the subject is moving.
Press the shutter button all the way down to record the picture.
The photo appears briefly on the monitor, and then the live preview reappears.
A few additional tips for getting the best Live View results:
Cover the viewfinder to prevent light from seeping into the camera and affecting exposure. The camera ships with a cover designed for this purpose. Slide the rubber eye-cup that surrounds the viewfinder up and out of the groove that holds it in place; then slide the cover down into the groove. (Orient the cover so that the Nikon label faces the viewfinder.)
Aiming the lens at the sun or another bright light can damage the camera. Of course, you can cause problems by doing this even during viewfinder shooting, but the possibilities increase when you use Live View. You can harm not only the camera's internal components but also the monitor (not to mention your eyes).
Some lights may interfere with the Live View display. The operating frequency of some types of lights, including fluorescent and mercury-vapor lamps, can create electronic interference that causes the monitor display to flicker or exhibit odd color banding. Changing the Flicker Reduction option on the Setup menu may resolve this issue. At the default setting, Auto, the camera gauges the light and chooses the right setting for you. But you also can choose from two specific frequencies: 50 Hz and 60 Hz. (In the United States and Canada, the standard frequency is 60 Hz; in Europe, it's 50 Hz.)