
Use the Straighten tool to level a tilting horizon line.
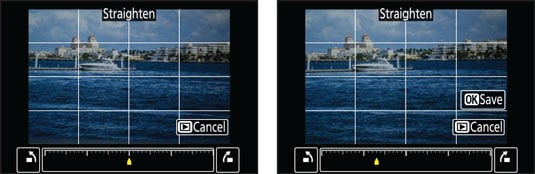
Even with the viewfinder grid displayed as a guide, you might have trouble keeping the horizon level in the frame. Luckily, the Straighten tool can rotate images into proper alignment.
When you select the tool, a grid appears to guide you in making the repair, as shown on the left. The yellow marker on the scale at the bottom of the screen shows the current degree of rotation, with 0 degrees (no change) at the center point.
To rotate the picture clockwise, press the Multi Selector right or tap the box at the right end of the scale. To rotate the image counterclockwise, press left or tap the box at the left end of the scale. Each press or tap spins the picture by 0.25 degrees; the maximum rotation is 5 degrees. Press OK or tap the OK symbol to create the straightened copy.
You may be able to fix barrel distortion by applying the Distortion Control tool from the Retouch menu.
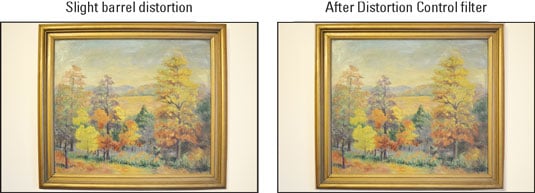
Try this filter to conquer barrel distortion, which causes straight lines to bow outward, as shown. You can also correct the opposite problem, pincushion distortion (lines curving inward). The filter offers two options: Auto and Manual. For the most control, choose Manual, which displays the same sort of adjustment scale as the Straighten filter. Move the yellow marker to the right to reduce barrel distortion; move it left to reduce pincushioning.
If a particular lens consistently produces either kind of distortion, also try enabling the Distortion Control option found on the Shooting menu. When you do, the camera tries to fix the problem as it’s saving the shot you just took to the memory card.
Use the Perspective Control to remove the illusion that the monument was leaning backwards.
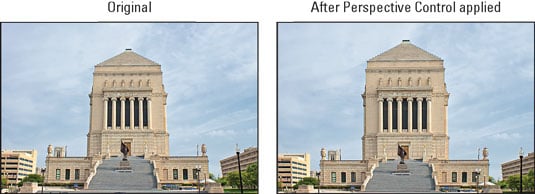
When you photograph a tall building and tilt the camera upward to fit it all into the frame, an effect that’s referred to as convergence or keystoning occurs. This effect causes vertical structures to tilt toward the center of the frame. Buildings sometimes even appear to be falling away from you, as shown in the left image. (If the lens is tilting down, vertical structures instead lean outward, and the building appears to be falling toward you.) Using the Perspective Control feature, you can right those tilting vertical elements to create the corrected image shown on the right in the figure.
This filter offers two scales. Move the yellow marker on the bottom scale to rotate the scene horizontally; shift the marker on the vertical scale to rotate the object toward or away from you. When you’re happy with the results, tap OK or press the OK button.
To do their magic, all three tools must crop your image and enlarge the remaining area to fill the frame. (The same thing occurs if you use similar tools in a photo-editing program.) The camera updates the display as you rotate the photo so that you can get an idea of how much of the original scene may be lost.
When shooting subjects that you anticipate might need some help from these tools, frame the subject a little loosely. That way, you don’t lose important parts of the scene due to the correction.