
When should you use Highlight Tone Priority? When a scene contains both very dark and very bright areas, achieving a good exposure can be difficult. If you choose exposure settings that render the shadows properly, the highlights are often overexposed, as in the left image below.
Although the dark lamppost in the foreground looks fine in the first shot, the white building behind it became so bright that all detail was lost. The same thing occurred in the highlight areas of the church steeple.
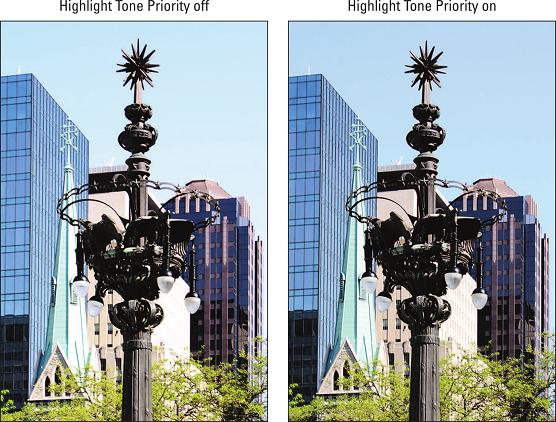 Highlight Tone Priority can help prevent overexposed highlights.
To produce a better image in this situation, try enabling Highlight Tone Priority, which helps keep highlight areas intact without darkening shadows. The feature did the trick for the scene above; the results appear in the second image above. The difference is subtle, but the windows in the building are at least visible, the steeple regained some of its color, and the sky, too, has a bit more blue.
Highlight Tone Priority is available only in the P, Tv, Av, and M modes. It’s turned off by default, which may seem like an odd choice after looking at the improvement it made to the scene you see above. What gives? The answer is that in order to do its thing, Highlight Tone Priority needs to play with a few other camera settings, as follows:
- The ISO range is reduced to ISO 200–25600. The camera needs the more limited range in order to favor the image highlights. (If you enable the feature for movie recording, the top end of the ISO range is 12800.)
- Auto Lighting Optimizer is disabled. This feature, which attempts to improve image contrast, is incompatible with Highlight Tone Priority.
- You can wind up with more noise in shadow areas of the image. Again, noise is the defect that looks like grains of sand.
The only way to enable Highlight Tone Priority is via Shooting Menu 2, shown directly below. Choose D+ for the standard amount of adjustment (this setting was used in the image above) or select D+2 for a stronger effect. Canon says that whether the stronger effect actually produces any greater impact on the highlights depends on the lighting conditions, however. Also, D+2 isn’t available for movie recording.
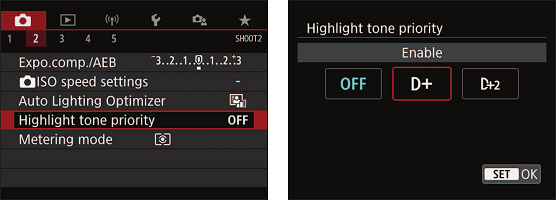 Enable Highlight Tone Priority from Shooting Menu 2.
As a reminder that Highlight Tone Priority is enabled, a D+ or D+2 symbol appears near the ISO value in the Quick Control and Live View displays, as shown in the image below. The same symbol appears with the ISO setting in the viewfinder and in the shooting data that appears in Playback mode. Notice that the symbol that represents Auto Lighting Optimizer, also labeled below, is dimmed because that feature is disabled automatically as soon as you turn on Highlight Tone Priority.
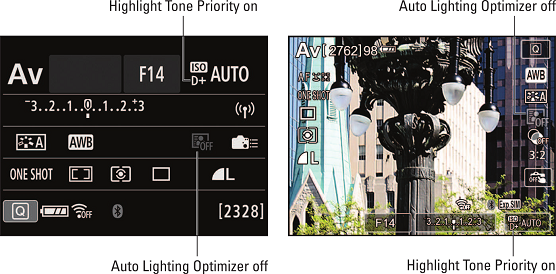 These symbols indicate that Highlight Tone Priority is enabled and Auto Lighting Optimizer is disabled.
In case you’re wondering why the letter D is assigned to this feature, it’s related to the term dynamic range, or the range of brightness values, from black to white, that an imaging device can capture.
Want to learn more? Check out our Canon EOS Rebel T8i/850D Cheat Sheet.