
One of the many advantages of investing in the Canon EOS 70D is that you can customize its performance to suit the way you like to shoot. Here's a quick rundown of options that each item in Setup Menu 1 offers:
Select Folder: Through this option, you can select the folder on the memory card that will store your images. By default, the camera creates the initial folder for you and stores all your images there; stick with the default settings for now. When you're ready to get more sophisticated you can create custom folders. You might create one folder to hold your work images and one to store family photos, for example.
File Numbering: This option controls how the camera names your picture files.
Continuous: This is the default; the camera numbers your files sequentially, from 0001 to 9999, and places all images in the same folder. The initial folder name is 100Canon; when you reach image 9999, the camera creates a new folder, named 101Canon, for your next 9,999 photos. This numbering sequence is retained even if you change memory cards, which helps to ensure that you don't wind up with multiple images that have the same filename.
Auto Reset: The camera restarts file numbering at 0001 each time you put in a different memory card or create a new folder. This isn't a good idea, for the reason just stated.
With both this option and Continuous, beware one gotcha: If you swap memory cards and the new card contains images, the camera may pick up numbering from the last image on the new card, which throws a monkey wrench into things. To avoid this problem, format the new card before putting it into the camera. (See the upcoming bullet point for help.)
Manual Reset: Select this setting if you want the camera to begin a new numbering sequence, starting at 0001, for your next shot. The camera then returns to whichever mode you previously used (Continuous or Auto Reset).
Auto Rotate: If you enable this feature, your picture files include a piece of data that indicates whether the camera was oriented in the vertical or horizontal position when you shot the frame. Then, when you view the picture on the camera monitor or on your computer, the image is automatically rotated to the correct orientation.
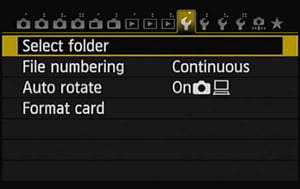
To automatically rotate images both in the camera monitor and on your computer monitor, stick with the default setting. In the menu, this setting is represented by On followed by a camera icon and a monitor icon, as shown in the figure. If you want the rotation to occur just on your computer and not on the camera, select the second On setting, which is marked with the computer monitor symbol but not the camera symbol. To disable rotation for both devices, choose the Off setting.
Note, though, that the camera may record the wrong orientation data for pictures that you take with the camera pointing directly up or down. Also, whether your computer can read the rotation data in the picture file depends on the software you use; the programs bundled with the camera can perform the auto rotation.
Format Card: The first time you insert a new memory card, use this option to format the card, a maintenance function that wipes out any existing data on the card and prepares it for use by the camera.
If you used your card in another device, such as a digital music player, be sure to copy those files to your computer before you format the card. You lose all data on the card when you format it, not just picture files. Also, some cards, including Eye-Fi cards, hold software that you need to install on your computer before you format.
When you choose the Format option, you can opt to perform a normal card formatting process or a low-level formatting. The latter gives your memory card a deeper level of cleansing than ordinary formatting and thus takes longer to perform. Normally, a regular formatting will do.
Eye-Fi Settings: If an Eye-Fi memory card is installed, this menu option appears to enable you to control the wireless transmission between the camera and your computer. When no Eye-Fi card is installed, the menu option is hidden, as it is in the figure.