From tips to dealing with the BURN message, to creative tricks to using your Instant Pot accessories in multiple ways, to saving money, to gifting, we swear you won’t walk away without something new and useful to try with your pot!
 ©Arina P. Habich/Shutterstock.com
BURN, baby, BURN: Dealing with a burn error message
Trust us: We’ve been there. You’re not alone in seeing a BURN error message. This section helps you avoid the message in the first place and resolve it if it does occur.To prevent the BURN error message from appearing, always ask yourself the following questions before you get started:
- Is there enough water-based liquid for the size pot you’re using? Water and/or water-based liquids (like animal and vegetable broths) are essential for pressurized cooking. If you don’t use enough, the pot can’t come to pressure and/or whatever ingredients are on the bottom of the pot may signal the pot to show This is a great advantage, because it reminds you to add more liquid!
- Is your steam release valve set to Sealing? If your valve is in the wrong position, like Pressure Release when it should be sealed for cooking, steam can release, causing pressure to become altered in the pot, resulting in a BURN Double-check your valve, as well as the sealing ring on the lid, to make sure both are in the correct position.
- Are you using tomato products? Tomato products are thick and require more liquid. If you’re using tomato paste, add 3/4 cup of liquid for every tablespoon of tomato paste. If you’re using canned tomatoes, add 2 cups of liquid for every 1 cup of tomatoes.
No one is perfect and sometimes the BURN message happens. We’ve got you covered if it does! Just try the following:
- Press Cancel, perform a Quick Release, and remove the lid. The recipe isn’t ruined. You just need to get whatever is stuck to the bottom of the metal pot off so the cooker base stops signaling to the Instant Pot that something is burning. This method will help halt the cooking so you can figure out what’s going on.
- Use a spatula and remove food particles from the bottom of the metal pot. If BURN is reading because you may have forgotten to deglaze the pot before you started to pressure cook, don’t sweat it. You can use a spatula and a little elbow grease to remove whatever is sticking, and then stir, ensuring you have enough water or water-based liquid in the pot, and start the cooking process again.
- Add more water or broth. If you do this, do it in small portions, like 1/4 cup at a time, to prevent a watery soup. If you do happen to have a bit too much water in your final recipe, you can fix this by allowing the recipe to cook over the Sauté function to help absorb some of the excess water.
- Use the pot-in-pot (PIP) cooking method. If you can salvage whatever you have in the pot, take that and place it inside an Instant Pot–safe dish. Cover it with aluminum foil and resume cooking.
Try some mind-blowing tricks with your Instant Pot
We were late to the game on these tricks, and we’ve made it our mission to ensure you aren’t! The beauty of having others walk the path ahead of you is that you can relish in the bounty of tricks that’ll save you more time and frankly, are just really cool!
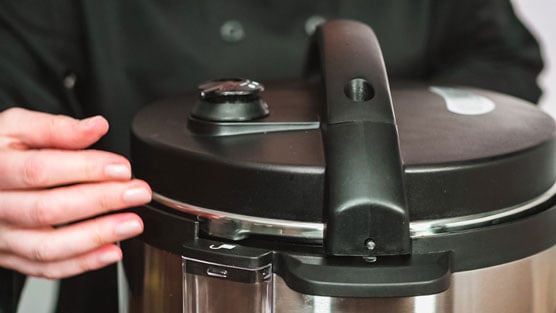
Take a look at the following tricks and smile, knowing you’ve invested in a kitchen appliance that offers so many possibilities:- The lid has two special holders — they’re on the top sides cooker base. Take a look at the top of your cooker base. See the symmetrical pot holders? Those aren’t just for carrying your pot. Set the lid right into one of them so you can keep it out of the way while sautéing, especially if you’re in a tight space!
- The rice spoon can rest on the side of the pot — there’s a space just for it. Keep your kitchen tidy and let the spoon rest right on the side of the pot. Not sure where it is? Just look on the cooker base — you’ll find it right there!
- You can make muffins in the egg bites mold. No need to buy premade muffins or order another piece of special equipment! If you have the silicone egg mold, it doubles as a mini muffin pan. Assemble muffins as the recipe states and portion by the spoonful into the mold. Repeat until all batter is used.
- If you don’t own an egg bite mold, use silicone muffin liners to make muffins. The silicone can withstand the high temperature achieved inside the Instant Pot and will result in a light and fluffy muffin under the Pressure Cook setting found on all pots.
- Mason jars can double as individual cheesecake pans or individual cake or muffin pans; they can also be used to make yogurt. These multifunctional glass jars are a must with your Instant Pot.
- Freeze meal prep in round molds. If you’re a planner, you’ll love this trick. Prep your meals in round bowls that can fit into your Instant Pot. Then, when it’s time to cook, all you need to do is dump in the mix and lock in the pressure. No need to worry about whether the frozen contents will fit!
Save on your energy bill with the Instant Pot
Did you know that pressure cooking can help save money on your electricity bill? The Instant Pot is one of the greenest kitchen appliances you can have in your arsenal. Compared to other kitchen appliances (like your oven or stove), the Instant Pot uses 70 percent less electricity.Plus, the Instant Pot cooks food much quicker than other appliances, meaning less energy is used during the entire recipe process. The Instant Pot cooks most food in 70 percent less time!
The Instant Pot is designed specifically to focus on cooking the food under a specific pressure level programmed into the pot instead of heating the entire cooker base or using a higher pressure than is needed for the particular food. For instance, think about the last time you cooked soup in a large pot on the stove. Typically, the pot’s outer surface is very hot to touch. But thanks to the design of the Instant Pot, and the dual layer of air pockets between the inner pot and the cooker base, the energy is concentrated on cooking the food and not the appliance.
Another important feature built into the Instant Pot is the sealing mechanism, which requires significantly less water for cooking (resulting in less steam produced as well). This is actually a double whammy because not only will you save from less energy being used for cooking, but it’ll also help keep your house cooler versus using an oven and hopefully preventing have to turn on the air-conditioning!
Finally, peak energy usage hours are typically from 4 to 9 p.m., typically prime dinner hours. Enlisting the help of your Instant Pot, you can keep your costs down while still putting a homemade, delicious meal on the table in a matter of minutes.
Make edible gifts for every occasion
Nothing says “I appreciate you” more than a homemade gift, in our humble opinions. Plus, do it yourself (DIY) gifts are a budget-savvy way to spread a little cheer throughout the year. Whether you’re making something for Teacher Appreciation Day or spreading the holiday spirit to your coworkers, we’ve got just the gift idea for you.- Vanilla extract: Unless you’re buying the imitation kind, pure vanilla extract can cost a pretty penny. Spread the holiday baking magic by whipping up a batch of your own in the Instant Pot. To make it, you need the following:
- Four 3-ounce Mason jars, sanitized
- Two vanilla bean pods, cut in half
- 1-1/2 cups of high-quality vodka
Place the vanilla bean pods into the Mason jars and pour 3 ounces of vodka over each one. Secure the lids and place the jars on the metal trivet in the Instant Pot with 1 cup of water. Pressure cook for 1 hour. Carefully remove and store in a cool, dark place.
- Limoncello: Everyone wants to vacation in Italy, right? Bring the taste of Italia to your friends by surprising them with their own batch of limoncello! This is also perfect for a bridal party gift. To make it, you need the following:
- Four 8-ounce Mason jars, sanitized
- 32-ounces of vodka
- 2 cups of lemon rinds
- 4 tablespoons cane sugar (or sweetener of choice)
Pour 8 ounces of vodka into each Mason jar. Then put 1/2 cup of lemon rinds in each jar. Place the jars on the metal trivet in your Instant Pot with 1 cup of water. Pressure cook for 30 minutes. Carefully remove the jars. Add 1 tablespoon of sweetener to each jar, and store in the fridge.
- Coffee liqueur: Share the spirit of a fun after-dinner drink with all your friends! This is the perfect holiday gift to spread joy. Serve over ice cream or with cream. To make it, you need the following:
- Six 8-ounce Mason jars, sanitized
- 4 cups of strong brewed coffee
- 2 cups of sugar
- 2 teaspoons of vanilla extract
- 2 cups of vodka
In the Instant Pot, sauté together the brewed coffee and sugar until it simmers and the sugar is dissolved, stirring every couple minutes. Turn off the Sauté function and whisk in the vanilla extract and vodka. Divide the coffee liqueur evenly among the Mason jars, and store in a cool, dark cabinet for at least two weeks before serving. It gets better with age!
- Apple or pumpkin butter: Whip up a batch of pumpkin bread and put this beside it in the bag. Your friends will thank you later, we promise! To make it, you need the following:
- Two 8-ounce Mason jars, sanitized
- 1-1/2 to 2 pounds of apples or pumpkin
- 1 teaspoon of ground cinnamon
- 1/2 teaspoon of ground nutmeg
- 1/4 teaspoon of salt
Place the apples or pumpkin on the metal trivet inside the Instant Pot with 1/2 cup of water and steam for 5 minutes. Remove the lid and carefully discard the skins. Drain the excess water and return the apples or pumpkin to the inner pot. Using a potato masher or wooden spoon, mash the cooked apples or pumpkin. Using the Sauté function, heat the puree and stir in the spices. (If you’re making pumpkin butter, you can stir in 2 teaspoons of pumpkin pie spice, too.) You can keep this free of added sugar or add a bit of brown sugar for a sweeter taste. Store the butter in Mason jars and refrigerate for up to 3 months.
- Make your own dry mixes: Make a few dry mixes and keep them on hand for when you need a last-minute hostess gift. Omit the butter, yogurt, milk, vanilla extract, water from the jar, or any wet ingredients. Attach a note that reads how to assemble the recipe with the remaining ingredients that need to be added. You can even include the DIY vanilla extract (earlier in this list) as part of the gift bundle!