
Conditional formatting in Smartsheet can come in handy when you need to automatically apply formatting to a cell or row based on the contents of the cell. For example, if you have a list of project issues that need to be addressed, you may want to color code them by severity — blue for minor, yellow for major, red for showstopper, and so forth. This enables you and your collaborators to quickly identify what needs the most attention.
Conditional formatting changes only the formatting of rows and cells, not the contents.
Let’s use the example of a project issues list (see Figure 1). Just follow these steps to apply conditional formatting based on severity.
Log in to Smartsheet and view the sheet you want to work with.
Click the Conditional Formatting button on the left; the button is highlighted in Figure 1.
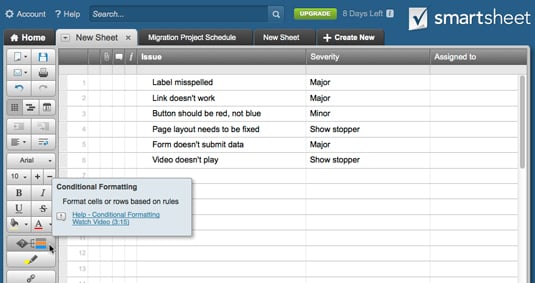 Figure 1: An example project issues list.
Source: smartsheet.com
In the Conditional Formatting dialogue box, click Add New Rule. You see a new rule that says “If
then apply this format to the entire row.” The underlined links are the criteria you set for the rule. Click “
”. You see the list of columns in your sheet. Click Severity, which shows the different values mentioned earlier.
Click Major and click OK.
Click “this format”. You can choose various formatting options, from different fonts and sizes to bold and italic. For this exercise, choose yellow from the Background Color drop-down menu and click OK.
If you want the entire row highlighted, then leave “entire row” as is. If you want to change the formatting of a single cell in the row, click “entire row” link and choose which column you want to change the formatting of.
Click OK.
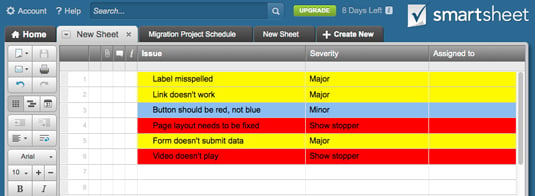
You see all the rows with a severity of major highlighted in yellow. Now, click the Conditional Formatting button again and add new formatting rules for the other two degrees of severity. When finished, your project issues list may look something like Figure 2. When you add new issues to the list, the formatting of the row will automatically change based on what you choose for the severity of the issue.
Source: smartsheet.com
Next to each rule in the Conditional Formatting dialogue box, you can choose some advanced options from the drop-down menu. Here’s what you can do:
Add Condition: This adds another
item to the rule, so you can set multiple conditions that must be met for the formatting to be applied. Clone Rule: This creates a copy of the rule, which you can then modify. This is handy if you have a complicated rule that you want to replicate but need to change only one of the criteria.
Move Rule Up or Down: This just changes the order of the rules in the list.
Disable/Delete Rule: This is pretty self-explanatory. Use Disable when you don’t want the rule to be in effect, but don’t want delete it. Use Delete if you’re sure you don’t need the rule anymore.