
Many problems can be solved by doing the following three things:
- Restart your Fitbit.
- Update your Fitbit’s software.
- Reset your Fitbit to its factory default settings.
Try restarting your Fitbit to see if it solves your problem. If not, move on to updating the software (assuming an update is available) and see if that helps. If there’s still no joy, only then should you try resetting your Fitbit to its factory default settings.
How to restart your Fitbit
If your Fitbit is having trouble connecting to Wi-Fi, syncing, or doing any of its normal duties, by far the most common solution is to restart the device. By rebooting the device, you reload the system, which is often enough to solve many problems.When you restart your Fitbit, you don’t lose any stored data, your settings are preserved, and you keep connections such as Wi-Fi networks and Bluetooth devices.
How you restart depends on which Fitbit you have:- Ace, Alta, or Alta HR: Clip your charging cable to your Fitbit and plug the other end of the cable into a USB port. On the USB end of the cable, locate the small button and press it three times within eight seconds, pausing briefly between each press.
- Aria 2: On the bottom of the Aria, remove the battery cover, remove the batteries, wait ten seconds, reinsert the batteries, and then replace the battery cover.
- Charge 3: If your device interface still works, open the Settings app and tap Reboot Device. If your device is locked up, attach one end of your charging cable to the Fitbit and the other to a USB port, and then press and hold down the device’s button for eight seconds.
- Flex 2: Remove the Flex 2 from its wristband, clip your charging cable to your Fitbit, and plug the other end of the cable into a USB port. Find the small button on the USB end of the cable and press the button three times within five seconds, pausing briefly between each press.
- Ionic or Versa: Press and hold down the Back and Bottom buttons until you see the Fitbit logo.
- Inspire or Inspire HR: Press and hold down the device button for five seconds.
- Zip: Use the battery door tool to open the battery door. Then remove the battery, wait impatiently for ten seconds, reinsert the battery (making sure the side with the + icon is facing you), and then close the battery door.
How to update your Fitbit
Your Fitbit uses internal software — often called firmware — to perform all sorts of tasks, including operating the sensors, storing data, keeping time, and running apps. If your Fitbit is acting wonky and restarting the device doesn’t help, you can often de-wonkify the device by updating the Fitbit system software. Sometimes installing a fresh version of the software is all you need to make your problem go away. In other cases, updating the software may fix a software glitch that was causing your problem.Happily, all Fitbits update their software automatically. When an update is available, the Fitbit app displays a notification similar to the one shown. Tap the Update icon (downward-pointing arrow) to perform the update.
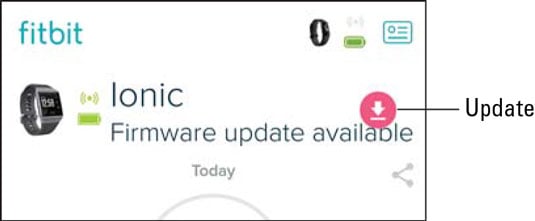 When a Fitbit firmware update is available, you see a notification similar to this.
Every once in a while, you might find that a firmware update fails to start, fails to finish, or goes south on you in some other way. If updates aren’t happening for you, here, in order, are some troubleshooting steps to try:
- Restart your tracker, and then try updating again.
- Restart the phone, tablet, or PC that has the Fitbit app installed, and then try the update once more.
- Install the Fitbit app on a different phone, tablet, or PC, configure your Fitbit account on that device, set up your Fitbit, and then try updating.
- Make sure your watch is either charging or has a battery charge of at least 40 percent.
- If you’re updating over Wi-Fi, here’s a list of a few troubleshooting items that you should check to solve any wireless connectivity problems you’re having with your Fitbit watch or Aria 2 scale:
- Restart your device(s). Most Wi-Fi devices these days are all-in-one gadgets that combine both a Wi-Fi router and a modem for Internet access. If that’s what you have, turn off the Wi-Fi device, wait a bit, turn the device back on, and then wait for the device to connect to your Internet provider. Restart your Fitbit.
Otherwise, if you have a separate router and modem, do the following tasks, in order:
- Restart your device(s). Most Wi-Fi devices these days are all-in-one gadgets that combine both a Wi-Fi router and a modem for Internet access. If that’s what you have, turn off the Wi-Fi device, wait a bit, turn the device back on, and then wait for the device to connect to your Internet provider. Restart your Fitbit.
1. Turn off your modem.
2. Turn off your Wi-Fi router.
3. After a few seconds, turn the modem back on and wait until the modem reconnects to the Internet, which may take a few minutes.
4. Turn on your Wi-Fi router.
5. Restart your Fitbit.
-
- Look for interference. Devices such as baby monitors and cordless phones that use the 2.4 GHz radio frequency (RF) band can play havoc with wireless signals. Try either moving or turning off such devices if they’re near your Fitbit or Wi-Fi device.
Keep your Fitbit and Wi-Fi router well away from microwave ovens, which can jam wireless signals.
- Check your range. Your Fitbit may be too far away from the Wi-Fi router. You usually can’t get much farther than about 230 feet away from most modern Wi-Fi devices before the signal begins to degrade (the range drops to about 115 feet for older Wi-Fi devices). Either move the Fitbit closer to the Wi-Fi router or turn on the router’s range booster if it has one. You could also install a wireless range extender.
- Check your password. Make sure you’re using the correct password to access your Wi-Fi network. It’s also possible that your Wi-Fi device requires both Wi-Fi Protected Access (WPA) and Wi-Fi Protected Access II (WPA2) for extra security. Fitbit can deal with only one of these security types at a time, so if possible, configure your Wi-Fi device to use only WPA or WPA2. See your Wi-Fi device documentation to find out how to configure the device’s security settings.
- Update the wireless router firmware. The wireless router firmware is the internal program that the router uses to perform its various chores. Wireless router manufacturers frequently update their firmware to fix bugs, so you should see whether an updated version of the firmware is available. Check your device documentation to find out how firmware updating works.
- Update and optionally reset your Fitbit. Make sure your Fitbit is up to date and, if you still can’t connect to Wi-Fi, reset your Fitbit.
- Reset the Wi-Fi device. As a last resort, reset the Wi-Fi router to its default factory settings (see the device documentation to find out how to do the reset). Note that if you reset the router, you need to set up your network again from scratch.
- If you’re updating over Bluetooth, try the following:
- Android: Tap Settings→Connections, and then tap the Bluetooth switch to On.
- iOS: Tap Settings→Bluetooth, and then tap the Bluetooth switch to on (green).
- Windows 10: Click Start→Settings→Devices, make sure the Bluetooth and Other Devices tab is displayed, and then click the Bluetooth switch to On.
- Using the appropriate method in the preceding bullet, turn or your phone, tablet, or PC Bluetooth setting, and then turn it back on again.
- Remove the Fitbit from the list of paired Bluetooth devices on your phone, tablet, or PC, remove the device from the Fitbit app, and then set up the device again in the Fitbit app:
- Android: Tap Settings→Connections→Bluetooth, tap the Settings icon (gear) to the right of your Fitbit device, and then tap Unpair.
- iOS: Tap Settings→Bluetooth, tap the Info icon (i), and then tap Forget This Device.
- Windows 10: Click Start→Settings→Devices, make sure the Bluetooth and Other Devices tab is displayed, click your Fitbit, and then click Remove Device.
How to reset your Fitbit
If your problem is particularly ornery, restarting or updating the device won’t solve it. In that case, you need to take the drastic step of a factory reset, which means resetting your Fitbit to its original factory settings. I describe the factory reset as drastic because it means you lose your data and settings and you have to go through the Fitbit setup process again. Ouch. Therefore, only head down reset road if restarting and updating your device don’t solve the problem.However, not all Fitbits come with a factory reset option. Specifically, there’s no reset for you if you own any of the following models:
- Ace
- Alta
- Alta HR
- Flex 2
- Inspire
- Inspire HR
- Zip
- Aria 2: On the bottom of the Aria, remove the battery cover, remove the batteries, and then press and hold down the button just above the battery slots. While holding down the button for at least ten seconds, reinsert the batteries. When you’re finished, replace the battery cover.
- Charge 3: Open the Settings app and then tap About→Clear User Data.
- Ionic or Versa: Open the Settings app and then tap About→Factory Reset.