There are a few last steps you must take before you can take off flying your drone. These are more universal as they pertain specifically to launching; however, each task may be slightly different from drone to drone. So refer to your user’s manual when in doubt. When you’re getting ready to launch your drone, your attention must be solely on the task at hand. If you have other distractions, you must put them aside so that you don’t injure yourself, and then follow these steps:
Place your drone on the ground in a location that is safe for taking off and for landing.
Keep in mind that if your drone has an auto-return mode, it will return to this location on autopilot. Most auto-return modes do not have the capability to avoid collisions. For this reason, you definitely want an open area if you intend to use this feature. Ensure your drone is pointed away from you and that your takeoff and landing pad is at least 10 feet in front of you.
Using your own launching pad ensures that you always have a clean and level location for your drone to take off and land.
If your camera is integrated with your drone, make sure that the lens cap is removed, and set your camera to the desired mode for flight.
If your camera is an add-on like a GoPro, power on your camera and ensure the cap is removed, and then set your camera to the desired mode for flight.
Verify that your transmitter is off and throttle is set to zero before connecting your drone battery.
The chances of your drone firing up when a battery is connected are slim, but you still want to proceed with caution.
Connect the drone battery, and power it on.
Calibrate your drone.
Your drone contains several high-end sensors that need to be calibrated before each flight to ensure that your controls aren’t confused. When calibrating, make sure that you are away from any electro-magnetic sources, such as speakers and power lines.
Initiate GPS lock.
GPS lock is the same as establishing a home location. Several drones come with an auto-return mode. You will want to reconfigure before every flight if you change takeoff and landing locations. If you do not update your home position, your drone may attempt to return to an old location which could be far away.
If you plan to fly in heads free mode, when your drone GPS locks, it will orient controls to the current location.
Arm your drone.
Arming your drone means it is ready to fly. This also means do not handle your drone. If you are using any sort of assisted flying mode (meaning you aren’t in manual mode), picking up your drone might cause the drone to think that it needs to spin the motors to correct and level out. When your drone is armed, stay at least 10 feet away.
Slowly increase throttle to spin-up your motors and get airborne.
After you have taken off, you may want to hover above the ground about 10–20 feet for a minute to verify that your drone is under control. Before heading out, perform one last check of your controls to ensure that you have directional stability as well. Here is a drone hovering a good distance above the ground for verifying aerial stability.
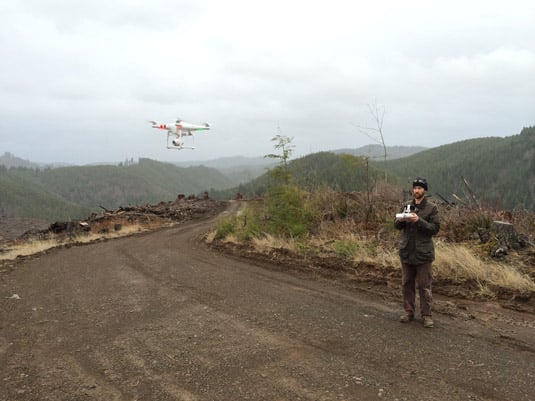 Credit: Source: Sam Beebe/Creative CommonsUse your body as a reference for how high to hover your drone to verify stability.