
Select the Show Accessibility Status in Menu Bar check box at the bottom of the window on the left to see the status of all Accessibility Preferences in your menu bar.
The pane has five sections listed on the left — General, Vision, Media, Hearing, and Interaction — each of which has one or more subsections.The Vision section’s Display subsection lets you alter the behavior of the screen display. Select the Use Grayscale check box to desaturate your screen into a grayscale display (so it looks kind of like a black-and-white TV). Enable the Invert Colors option to reverse what you’d see onscreen. For example, the Accessibility System Preferences pane looks like the following figure with Invert Colors enabled.
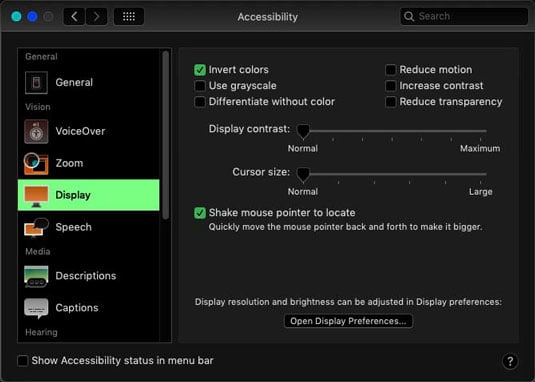 The Accessibility System Preferences pane with its colors inverted.
Enable the Shake Mouse Pointer to Locate check box and the pointer will grow much larger and easier to see when you wiggle the mouse back and forth quickly a couple of times.
The Vision section’s Zoom subsection is where you can turn on a terrific feature called hardware zoom, which lets you make things on your screen bigger by zooming in on them. To control it by keyboard, select the Use Keyboard Shortcuts to Zoom check box. Then you can toggle it on and off with the shortcut Command +Option+8 and zoom in and out using the shortcuts Command +Option+= (equal sign) and Command +Option+– (hyphen), respectively. Finally, the More Options button lets you specify minimum and maximum zoom levels, display a preview rectangle when zoomed out, and toggle image smoothing on or off.Try this feature even if you’re not disabled or challenged in any way; it’s actually a great feature for everyone.
Explore the remaining sections and subsections of the Accessibility System Preferences pane at your leisure. Until then, you might find the following useful:
- If you want the screen to flash whenever an alert sound occurs, choose Audio.
- To treat a sequence of modifier keys as a key combination, choose Keyboard and then enable Sticky Keys.
In other words, you don’t have to simultaneously hold down Command while pressing another key. For example, with Sticky Keys enabled, you can do a standard keyboard shortcut by pressing Command, releasing it, and then pressing the other key. You can select check boxes to tell you (with a beep and/or an onscreen display) what modifier keys have been pressed.
As useful as Sticky Keys can be, they’re really awkward in applications like Adobe Photoshop, Adobe Illustrator, and other applications that toggle a tool’s state when you press a modifier key. So, if you’re a big Photoshop user, you probably don’t want Sticky Keys enabled.
- To adjust the delay between a keypress and its activation, choose Keyboard and then enable Slow Keys.