
An Apple ID identifies you and your devices in all things Apple that you do: registering new products, purchasing media and apps from the iTunes Store, the Book Store, and the App Store, as well as signing in to your iCloud account.
iCloud is Apple’s remote syncing and storage service.
You might already have an Apple ID. You can use the same Apple ID for everything, iCloud and Apple Music included, or create separate Apple IDs for separate accounts. Note: If you’ve used Apple products long enough that you still have one of the very old Apple IDs that isn’t an email address, you do have to set up a new account to use iCloud.
In this article, we explain two ways to create an Apple ID.
If you don’t have an email address or want to create an @icloud.com email as your Apple ID and use it for all your Apple interactions, set up a new Apple ID from within iCloud in System Preferences, not during the Mac setup. When you set up an Apple ID during the Mac setup, you must use an existing non-Apple domain email address — because if you have an Apple domain email address, that is your Apple ID and you use that to sign in.
How to create an Apple ID during Mac setup
When you first turn on your Mac, the onscreen dialog prompts you to sign in with your Apple ID or create a new one. Read through these steps to see what to expect:1. Click one of the following on the opening screen:
- Sign In with Apple ID: Type in your existing Apple ID and password and then click Continue.
- Create Apple ID: The Apple ID website opens. Type the information requested in the fields on the form: Use an existing email address as your Apple ID, choose three security questions and answers, and provide your date of birth and an optional rescue email that’s different than your Apple ID email. Complete the form with your mailing address (so the products you order online can be shipped to you), select your preferred language from the pop-up menu, select the email you want to receive from Apple, type the Captcha word, select the check box to concede your agreement to the Terms of Service, and finally, click the Create Apple ID button.
- Use Separate ID for iCloud and Apple Music: The iCloud icon is highlighted in the center of the screen. Enter the Apple ID you use with iCloud or click Create Apple ID, which takes you to the Apple ID website as we explain in the previous bullet. Click Continue. The iTunes and App Stores icons are highlighted; type in the Apple ID you use with them or click Create Apple ID and repeat as above. (Using separate Apple IDs is not necessary.)
If you want to create an Apple ID with an @icloud.com suffix, click Don’t Sign In and confirm your choice by clicking the Skip button in the dialog that appears. Go to the next section to create an Apple ID and email address in iCloud.
- Turn on Find My Mac, which we suggest you do.
- Choose three security questions and answers.
- Agree to the Terms of Service.
Use two-factor authentication
Online security is a bigger concern than ever these days. There are three highly recommended techniques for keeping yourself safe online:- You can use yourself (that is, your fingerprint or face). This is called biometric security. Touch ID, which is available on the latest MacBooks, can implement a biometric feature.
- Devices with cameras that support FaceID can use your face for login.
- Two-factor authentication requires you to use two devices to log in. It is highly secure, and don’t panic: You don’t need two Macs (but they will work). If you happen to have your iPad or iPhone nearby, you can use it for authentication. This means that you need to authenticate yourself to your iPhone and your Mac.
Here’s what two-factor authentication looks like after you’ve established two devices with the same Apple ID or provided your phone number and turned the two-factor authentication on when you’re setting up your iCloud account. This is an example of a case in which you’re logging into your Mac and using your iPhone as the second factor (the process is the same if you log into your iPhone and use your Mac as the second factor).
1. Log into your Mac with your Apple ID as usual.
You receive an automated message on your iPhone, as shown in this figure. It contains a six-digit verification code that can only be used once. (This code is sent either to your Apple ID devices or to your phone.)
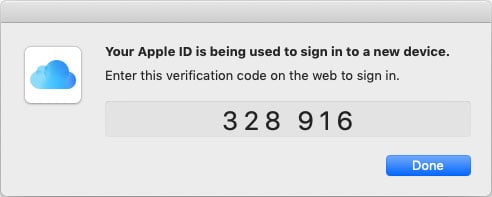 Log in and receive a verification code on your iPhone.
2. On your Mac, enter the code that appeared on your phone, as shown here.
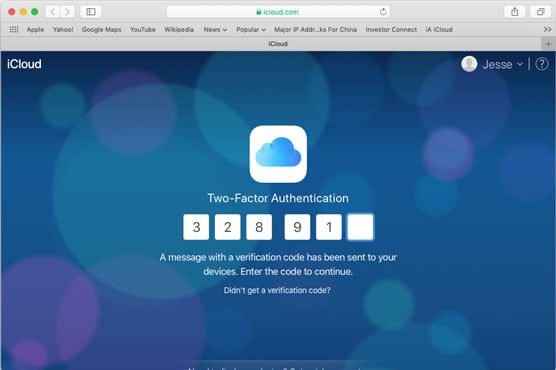 Enter your verification code on your Mac.
If you want an alternate verification code, you can ask for it by clicking Didn’t Get a Verification Code, as shown.
3. If you’re asked if you trust the browser, click Trust.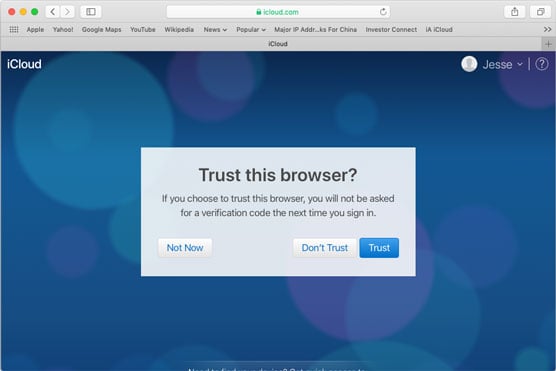 Verify that you trust the browser.
How to create an Apple ID in iCloud
We find creating and using an@icloud.com email address as your Apple ID convenient because you need remember only one password for all your interactions with Apple, and we like to think there’s added security for the information you sync across devices using iCloud when using an Apple domain rather than Google mail, Yahoo!, or one of the other email service providers.
If you use the iCloud email only for exchanges with Apple, notifications about product updates or invoices don’t get lost in the shuffle of myriad messages in a more active email account.
Here we show you how to create an Apple ID with iCloud and then segue into managing your iCloud preferences in the next section.1. Choose Apple→System Preferences or click the System Preferences icon on the Dock. Then click the Internet Accounts button.
The Internet Accounts window opens.
2. Click the iCloud button in the left columnThe iCloud preferences window opens.
3. Click Create Apple ID.4. Enter your Date of Birth, and then click Next.
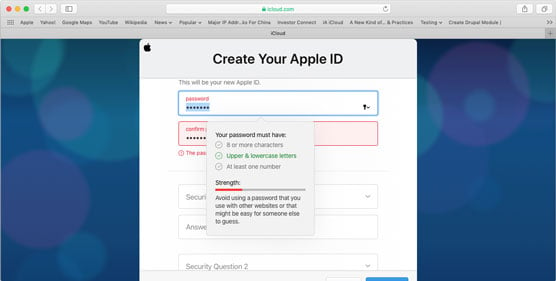
The Create an Apple ID window opens, as shown.
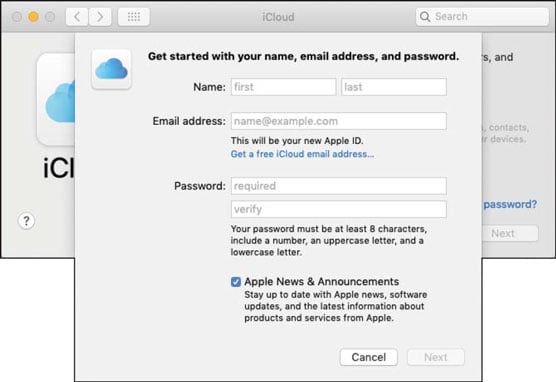 Create an iCloud email address to use as your Apple ID.
5. Select the Get Free iCloud Email Address link.
This appears right below the “This will be your new Apple ID” Message.
6. Type in your email address, first name, last name, and password.Your password must be at least eight characters and contain at least one number, one uppercase letter, and one lowercase letter.
7. (Optional) Select the Email Updates check box for Apple news and update information.8. Click Next.
If someone else already uses the name you chose, you’re prompted to type an alternative. It may take a few tries to find an unused name.
9. Select three security questions and answers from the pop-up menus that appear on the next window.10. Type in a rescue email, which is different than the iCloud email address you just created.
Apple uses this address to communicate with you in the event you completely forget your iCloud email address and password. There are various services that let you create an email address that is free like Gmail; however, check that “free” doesn’t mean that you’re allowing access to your data in exchange for the email account.
11. Click Next.12. Select the check box to confirm that you read and agree to the Terms of Service, and then click Continue.
13. The iCloud activation screen opens, as shown.
Leave both check boxes checked.
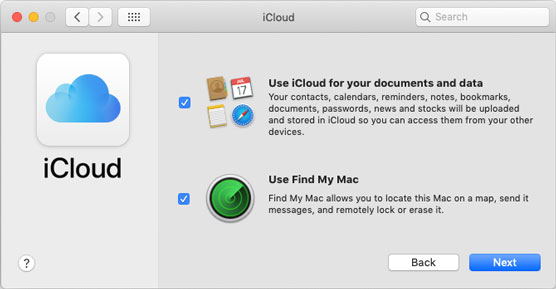 Activate iCloud syncing and Mac locating features.
14. Click Next.
You’re asked to provide security features for your account. These features change from time to time as Apple tightens security. Among the options you may be asked for are passphrases you can use, as well as a device that you can use to confirm access (known as two-factor authentication).
This figure shows some of the security mechanism in use at the time of this writing.
 Create an Apple ID security code here.
15. When requested, type a mobile phone number that will be used to send approval codes to your mobile phone when you access iCloud Keychain from another device.
This adds additional security to iCloud Keychain access.
16. Click Next.iCloud opens, as shown in the following figure.
A list of Apple apps that work with iCloud appears, and check marks indicate which are active. The data in checked apps can sync across all devices — computers, iPhones, iPads, iPod touches — that sign in to the same iCloud account. Some apps have options that you can use to refine what is or isn’t allowed for that app when it interacts with iCloud.
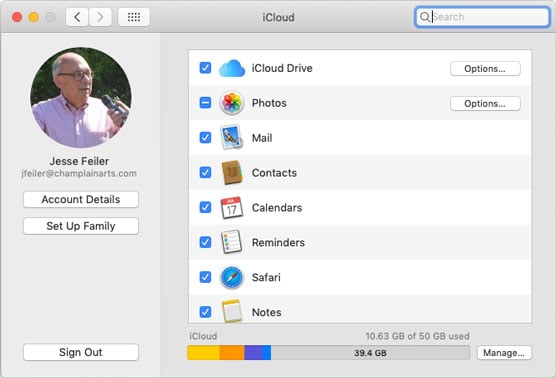 Sync apps with iCloud across all your devices.