
 Setting the options for Remote Desktop Connection.
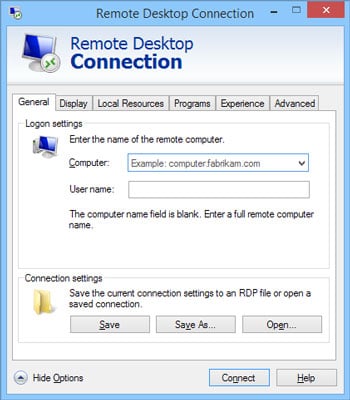
This figure shows the General tab of the Remote Desktop options. On this tab, you can enter the name or IP address of the computer you want to access remotely and the username you want to connect with. You can also save the settings you’ve created via the other tabs or open a settings file you’ve previously saved.
When you click the Save or Save As buttons, your settings are saved to an .rdp file. .rdp files are associated with the Remote Desktop Connection program, so you can double-click an .rdp file to open a saved connection. In other words, an .rdp file is a handy shortcut to a remote connection.
The following sections describe the additional options that are available on the other Remote Desktop Connection tabs.Setting the Display options
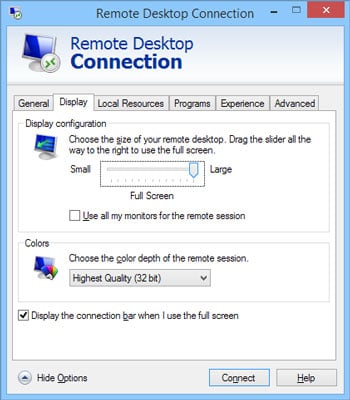
The figure shows the Display tab of the Remote Desktop Connection dialog box. The following paragraphs describe each of the options available from this tab:- Display Configuration size slider: Use this control to set the size of your remote desktop display. If you drag the slider all the way to the right, the remote desktop will be displayed in full-screen mode. As you move the slider to the left, various display resolutions will appear. Choose the display size you want the remote computer to open up in.
- Use All My Monitors for the Remote Session: If your computer has more than one monitor, select this check box to use all your monitors for the remote session. If you want to open the remote desktop in full-screen mode on just one of your monitors, leave this box deselected.
- Choose the Color Depth of the Remote Session drop-down list: Use this drop-down list to choose the color quality of the remote desktop. Over slower connections, reducing the color depth will help performance.
- Display the Connection Bar When I Use the Full Screen: The connection bar is a thin bar at the top of the screen that enables you to switch back to normal windowed mode. If you deselected this box, you'll have to remember that you can press Ctrl+Alt+Break to switch between full-screen and windowed mode.
 Setting the Display options for Remote Desktop Connection.
Setting the Local Resources options
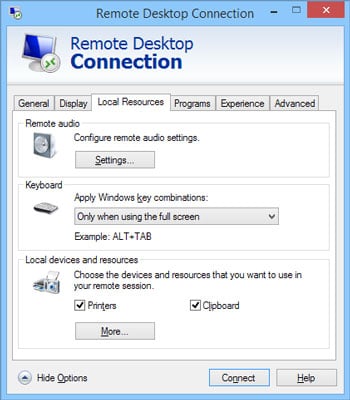
The Local Resources tab, shown in the following figure, lets you set the following options:- Remote Audio: Click the Settings button to bring up a dialog box that lets you choose whether to play audio on the remote computer using the remote computer’s sound card, the local computer’s sound card, or not at all. This display box also lets you choose whether to allow audio recording during the remote session.
 Setting the Local Resources options for Remote Desktop Connection.
- Apply Windows Key Combinations drop-down list: This drop-down list lets you specify how Windows keyboard shortcuts are to be interpreted — on the remote computer, on the local computer, or on the remote computer only when it’s running in full-screen mode.
- Local Devices and Resources: The Printers check box lets you access local printers from the remote session. The Clipboard check box synchronizes the local and remote clipboards, so that when you copy something to the Clipboard in the remote session, you can return to the local session and paste the Clipboard contents (or vice versa).
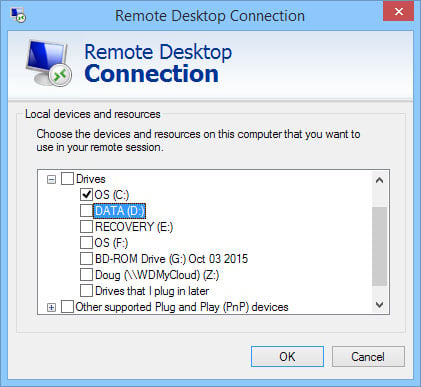 Sharing drives with the remote computer.
Setting the Programs options
The Programs tab, shown here, lets you specify a program that will automatically run when you connect to the remote computer. You can specify the path to the program’s executable file, and you can also specify the working directory for the program. Setting programs to automatically run in a remote session.
For example, if you always want Active Directory Users and Computers to start when you log in to your domain controller, you can set up an .rdp file with the start program set to the path to Active Directory Users and Computers (%SystemRoot%System32\dsa.msc). Then, you don’t have to manually start this program when you log in to your domain controller.
Setting the Experience options
The options on the Experience tab, shown in the following figure, control various settings that affect the responsiveness of your remote connection. The options are as follows:- Choose Your Connection Speed to Optimize Performance drop-down list: This allows you to optimize the amount of information sent back and forth over the network based on your expected connection speed. At slower speeds, features such as the desktop background, font smoothing, window animations, and so on, will be suppressed. The default setting is to let Windows choose which features to use based on the actual speed of the connection.
- Persistent Bitmap Caching: If you select this box, copies of bitmap images are stored on the local computer so they don’t have to be transferred across the network every time they’re needed.
- Reconnect If the Connection Is Dropped: If you select this box, the connection will be automatically reestablished if the connection is broken.
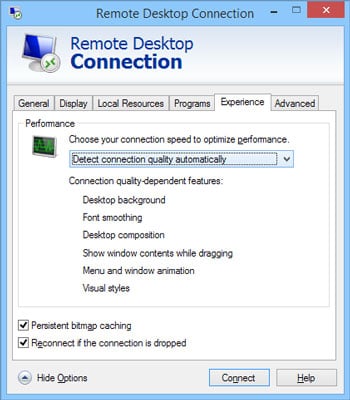 Setting the Experience options for a Remote Desktop session.
Setting the Advanced options
The Advanced tab of the Remote Desktop Connections window, shown here, lets you control two features:- Server Authentication: Determines what to do if an authentication problem such as an unknown security certificate is encountered when connecting to the server. The default action is to warn the user, but allow the user to continue if desired. You can change this setting to always connect in spite of the authentication problem, or to never connect when a problem is encountered.
- Connect from Anywhere: These settings are used only when you use an advanced server role called Remote Desktop Gateway to manage remote access to computers on your network. For more information about this server role, search the Internet for Remote Desktop Gateway.
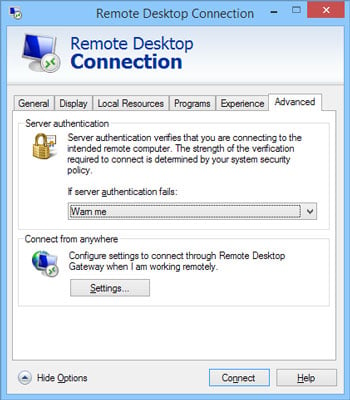 Setting the Advanced options for a Remote Desktop session.