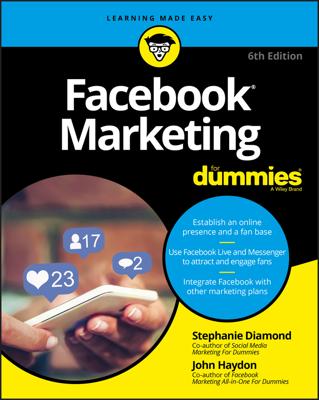
Facebook Marketing For Dummies book cover

Facebook Marketing For Dummies

Overview

Add Facebook to your marketing plan—and watch your sales grow

With 2 billion monthly active users across the world, Facebook has evolved into a community of consumers, creating a primary resource for marketers. This presents a demand for knowledge about how to strategically plan, execute, and analyze a successful Facebook marketing campaign. Now, the trusted Facebook Marketing For Dummies has been fully updated to cover the newest tools and features important to marketers and Facebook page owners.

If you’re a marketer looking to effectively add Facebook to your overall marketing mix, consider this book the mecca of Facebook marketing. Inside, you'll discover the psychology of the Facebook user, establish a social media presence, increase your brand awareness, integrate Facebook marketing with other marketing strategies, learn to target a specific audience, and much more. 

  • Develop a desirable community
  • Sell products and services
  • Use Facebook events to drive sales
  • Get new business tips and avoid common mistakes

Whether you're a novice or a pro, you’re no stranger to the power of Facebook. And this book makes Facebook marketing that much more exciting and easy!

Add Facebook to your marketing plan—and watch your sales grow

With 2 billion monthly active users across the world, Facebook has evolved into a community of consumers, creating a primary resource for marketers. This presents a demand for knowledge about how to strategically plan, execute, and analyze a successful Facebook marketing campaign. Now, the trusted Facebook Marketing For Dummies has been fully updated to cover the newest tools and features important to marketers and Facebook page owners.

If you’re a marketer looking to effectively add Facebook to your overall marketing mix, consider this

book the mecca of Facebook marketing. Inside, you'll discover the psychology of the Facebook user, establish a social media presence, increase your brand awareness, integrate Facebook marketing with other marketing strategies, learn to target a specific audience, and much more. 

  • Develop a desirable community
  • Sell products and services
  • Use Facebook events to drive sales
  • Get new business tips and avoid common mistakes

Whether you're a novice or a pro, you’re no stranger to the power of Facebook. And this book makes Facebook marketing that much more exciting and easy!

Facebook Marketing For Dummies Cheat Sheet

Facebook's social networking website offers a free, online location to market your business, organization, or individual to the Facebook community. The Facebook page for business is fun and easy to set up, and it provides a powerful set of online tools that lets you fully engage with your customers. But to efficiently market your business in Facebook, it helps to understand the underlying principles that make all these connections possible.

Articles From The Book

25 results

Marketing Articles

How to View and Link Your Personal and Business Facebook Profiles

When you have a Facebook business page, you have two separate profiles with Facebook: your personal profile and your business page profile. Each profile allows you to view Facebook, post status updates, and comment on other posts. But depending on which profile you’re using, you show up as either your personal profile (you) or your business page profile. In addition, each profile has its own news feed:

  • Your personal profile news feed: Based on your friends’ status updates and the business pages you’ve liked as your personal profile

  • Your business page profile news feed: Based solely on the pages you’ve liked as your page

Switch your profile view

Start by changing your profile view from personal profile to page profile. To do that, follow these steps:
  1. Log in to Facebook as you normally do.

  2. Click the Account drop-down arrow in the top-right corner of the page.

  3. From the drop-down menu, choose the business page link that you want to use.

    This menu is where you toggle among your personal and page profiles. If you’re an Admin of several pages, you need to select the correct page.

After you click the preferred page link, you’re taken directly to that page. Now you’re viewing your business page “as” your page, not as your personal account with admin privileges for the page. This point is an important one to understand, and you may need to switch between your personal profile and your page profile to see the differences. When you change over to working as your page, you should see your page’s Admin panel expanded to include these sections: Notifications, Messages, New Likes, Insights, and Page Tips.

Your business page news feed

We’re sure that you’re used to seeing your personal account news feed. Well, a business page can have a news feed, too! Your page profile news feed is based solely on the pages you’ve liked as your page. To see that news feed, click the link in the top-right of the page called Home. This feed functions just the same as your personal profile news feed, except that it’s filled with posts from other Facebook pages that you have liked. If you haven’t liked any pages yet as your page, you won’t have anything in this news feed. You can’t like a personal account as a page, so this feed shows only page updates. To switch back to your personal profile, follow these steps:
  1. Click the Account link in the top-right corner of the page.

  2. From the drop-down menu, choose Use Facebook as your personal account name.

    This menu is where you toggle your personal and page profiles.

There’s one more little view that you need to understand. When you’re on Facebook as yourself, and you go to your page, you see a notification bar at the top of the page. Notice the word Voice and the link to change to yourself. But wait! You might say, “But I am myself!” This Voice notification and link replace what was previously called Posting Preference and was part of the editing dashboard. Facebook pulled it out to make it very obvious “who” you are while you’re on your page: your personal account or your page.

Tips for switching between personal and business pages

Now that you’ve had a chance to see your profile options and are comfortable switching between them, here are a few tips:
  • If you’re viewing Facebook with your page profile, and you go to another business page for which you’re an Admin, you won’t be able to do any Admin stuff (editing, posting as that page, and so on) until you switch back to your personal profile.

  • You can’t post as your page on anyone’s personal Facebook profile, but you can post as your page on another page.

  • Try not to be too spammy by posting as your page all the time. Yes, this option is a great way to promote your page, but remember that Facebook is a social network, not a place to go dropping your business name everywhere!

How to link to your profiles

If your Facebook business page is a service that you offer, go back to your personal Facebook profile, and add a little bit to your About tab about your new page’s location. If your business is something that you want to keep completely separate from your personal profile on Facebook, skip these steps. To link to your business page from your personal profile, follow these steps:
  1. Click your name in the top right corner of any page on Facebook.

    This step takes you to your personal timeline.

  2. Find the About link below your picture, and click it.

    This brings you to an interface in which you can edit all the bits and pieces of your personal account.

  3. Click the Work and Education Edit button.

    You can use the Work and Education section to add your new page address.

  4. Type the name of your new business page.

  5. When you see the page come up in the suggestions, click it to add it to your Work section.

    Fill in your position and any other important information (address and so on).

  6. Click the Add Job button.

  7. Click the Done Editing button.

Make sure that the viewing option is set to Public so that people will be able to see your page linked and be able to click through to it. You can change the icon by clicking the drop-down arrow while you’re in Editing view and selecting the world icon (public). Another creative idea is to put your business page URL on your personal profile’s cover photo. You have to do a little photo editing, but the result will help move people over to your page. Or you can put your website address on the image.

Facebook Articles

How to Use Facebook Messenger Chatbots

You can use Facebook Messenger chatbots to help you stay in touch with your customers. You may have heard the term chatbot and wondered what it is. A chatbot is a piece of interactive software that uses artificial intelligence (AI) to respond to chat in a conversational way. If you have created a chatbot for your Facebook Page, your customers will be able to type questions into a chat window and receive preprepared content that answers their questions. The content can include text, video, links, and images. One good example of a chatbot used to educate and entertain a company's users appears on the Food Network Facebook Page. If you click the Send Message button, you see preset text saying that a company representative will instantly respond. It asks you to click the Get Started button. When you click that button, you are asked whether you want fun food facts sent to you; you can also ask for a recipe. This entire exchange is done by the chatbot. Another great example is the chatbot used by 1-800 Flowers. Its chatbot lets customers order right from the Messenger app on their Facebook Page. You can see how this encourages people to make a simple order. Facebook has built-in settings that you can use to provide two-way customer service to your users. There are two Settings links that you need use to configure Messenger:

To set up Messaging, go to Settings at the top of your Facebook Page and follow these steps:
  1. Click the Messaging link.
  2. Go to General Settings and click Yes or No to the following choices:
    • Use the Return Key to Send Messages: The default is Yes. Leave the default choice if you're used to hitting the Return key after typing a line and want to do this when using the chatbot.
    • Prompt Visitors to Send Messages: The default is No. If you click Yes, Page visitors will see indications that you are responsive to their messages.
    • Go to Response Assistant and click Yes or No to the five choices you see.
    • Send Instant Replies to Anyone Who Messages Your Page: The default is No. If you click Yes, you see a prewritten message that says, “Thanks for messaging us. We try to be as responsive as possible. We’ll get back to you soon.” You can choose to edit this message by clicking the Change button.When you click the Change button, a window pops open, showing you how your message will look on a mobile device. You can refine the message and click the Add Personalization link, which gives you the option to insert the person’s first name, last name, or full name, as well as your Facebook URL into your reply. When you're done editing, click the Save button.
  3. (Optional) Personalize the name for each of the following settings.The name is pulled from the person’s profile. Displaying people's real names may make them feel more welcome. Decide what you think your target audience would prefer:
    • Stay Responsive When You Can’t Get to Your Computer or Phone: The default is No. If you click Yes, you see a message that says, “Hi [customer name], thanks for your message. We are not here right now, but we’ll get back to you soon!” You can choose to edit this message by clicking the Change button. If you do, a window pops open, showing you how your message will look on a mobile device. You also see a Schedule link that lets you set up the days and times on which the message will show when you are Away or Available. When you're done editing, click the Save button.
    • Show a Messenger Greeting: The default is No. If you click Yes, you see a message that says, “Hi [customer name]! Thanks for getting in touch with us on Messenger. Please send us any questions you may have.” You can choose to edit this message by clicking the Change button. If you click Change, a window pops open, showing you how your message will look on a mobile device. The greeting message is displayed and then the visitor’s question appears. When you're done editing, click the Save button.
    • Pre-Appointment Reminders: The default is No. If you click Yes, you will see a message that says, “We’re looking forward to your next appointment.” You can choose to edit this message by clicking the Change button. If you do, a window pops open, showing you how your message will look on a mobile device. When you're done editing, click the Save button.
    • Send Follow Up to Anyone Who Books an Appointment: The default is No. If you click Yes, you see a message that says, “Hi [customer name]! It’s been a while since we last saw you. We’d love to have you back!” You can choose to edit this message by clicking the Change button. If you do, a window pops open, showing you how your message will look on a mobile device. If you click the Schedule link, you can choose the number of times and the hour, day, week, month, or year that the follow-up message is shown after the previous appointment is booked. For example, if you're a dentist, you may choose to have the message pop up 3–4 months after a person's last appointment. When you're done editing, click the Save button.

Facebook Articles

Reviewing Facebook’s Local Report to Learn about Activity Nearby

The Local report on Facebook shows you the activity going on around your business location. You can see peak hours of action, demographic info, and Ad performance as it relates to people who are near your physical location. To view the Local report, click the Local tab within Facebook Insights. You see a visual of your business location. You can choose to view data within a specific date range (One Week, One Month, and One Quarter) and Region. (All the data is anonymous, so you're not invading anyone’s privacy.) Next, you see a breakdown of age and gender for the people nearby. You also see the hours of the day and the day of the week when activity near your location is highest. This helps you determine what hours your store or service business should be open for business. The Ad performance graph displays the percentage of people who saw your ad on Facebook who were within 165 feet of your business in relation to your ad spending. This shows you which days were high-performing days. The People Nearby graph shows you data concerning people within 165 feet of your location hourly (for a 24-hour period), weekly (days of the week for one week), overall (trend data that shows you people nearby in relation to people nearby who saw your ads) and by check-ins (the number of people who checked into your business). The Demographics graph shows you people within 165 feet of your business within the last month. You can display this information in a bar graph or line graph format depending on which display button you choose. The data is broken out by

  • Age: Gives the percentage of each age range of people nearby
  • Gender: Gives the percentage of each gender of people nearby
  • Home Locations: Shows people who live within 165 feet of your business, or people who travel from 165 feet to get to your business
  • Age and Gender: Shows the aggregate of age and gender of people nearby