
Pro Tools track types
When you work with tracks in Pro Tools, you have to keep in mind that you’re sure to end up dealing with six distinct flavors of tracks. They are- Audio tracks: An audio track contains audio files and can be mono or stereo.
- Auxiliary Input tracks: These tracks are used as effects sends, for submixes, or for other routing purposes.
- Master Fader tracks: This track type contains the summed output for all the tracks routed to it. Master Fader tracks can be mono or stereo; stereo is most common.
- VCA Master tracks: This type of track does not pass audio but instead is used to control groups of tracks. VCA Master tracks are often used for controlling a group of tracks without needing to route them to an Auxiliary Input track. This is an easy way to route several submixes to one master fader.
- MIDI tracks: MIDI tracks contain MIDI data — instructions to MIDI devices on how to create specific digital sounds.
- Instrument tracks: Instrument tracks are blends of Audio and MIDI tracks that allow you to insert virtual instruments (such as software synthesizers) into your session. You can also route real instruments with their corresponding audio outputs into the same track. These tracks contain MIDI data while also allowing you some audio capabilities to make it easy to use both software and hardware instruments.
Pro Tools track formats
Pro Tools offers a bit less variety when it comes to track formats. Unless you are using Pro Tools HD or HDX, you get two — count ’em, two — choices:- Mono: A mono (monaural) track consists of a single channel of audio or MIDI data. It uses, as its name implies, just one voice.
- Stereo: A stereo (stereophonic) track consists of two channels of audio and uses two voices. A MIDI track can’t be stereo.
Setting up your Pro Tools tracks
Setting up your recording project is a little like setting up a railroad: It’ll take you somewhere only if you first put the tracks in place. Getting that done is what the following information is about.Creating new Pro Tools tracks
To create a new track, choose Track → New from the main menu or press ⌘ +Shift+N (Mac) or Ctrl+Shift+N (PC). Either method opens the New Tracks dialog box, where you get to choose the following:- Number of new tracks: The default here is 1, but you can pretty much create as many tracks as your version of Pro Tools allows.
- Track format: Here you choose stereo or mono.
- Track type: Clicking the arrows opens a drop-down menu that lets you choose between an Audio, an Auxiliary Input, a Master Fader, a VCA Master, a MIDI, or an Instrument track.
- Samples or ticks: You can choose between samples or ticks (bars/beats) for your new tracks.
- Plus sign: Clicking this adds another tracks selection row containing all the options listed in this section so that you can add more than one type of track without having to open the New Track window repeatedly.
 Create a new track here.
Make your selections and then click Create to create your new track. This track then appears in the Edit and Mix windows and in the Show/Hide list located on the right side of the Edit window. If the Show/Hide list isn’t visible, click the double arrow at the lower-left corner of the Edit window.
Use these keyboard shortcuts to help make your Pro Tools more efficient.
Duplicating Pro Tools tracks
You can duplicate tracks — creating a new track that mirrors all the input, output, effects send settings, and insert settings of your original track — in two easy steps:- Click the name of the track in the Mix or the Edit windows.
To select more than one track to duplicate, hold the Shift key while you click each track’s name.
The name is highlighted.
- Choose Track → Duplicate from the main menu.
The new track appears in the Mix and the Edit windows to the right of the track you’re duplicating and just below the duplicated track in the Show/Hide list.
Naming Pro Tools tracks
When you open a new track (choose Track → New), Pro Tools creates a default name for the track — something really helpful, like Audio 1 — but you can change the name to anything you want. You do this by double-clicking the name of the track in either the Mix or the Edit windows. A dialog box like the one below opens, from which you can use the fields to both change the name of the track and add any comments you want to include about the track. After you enter your track name and comments, click OK — you’re set!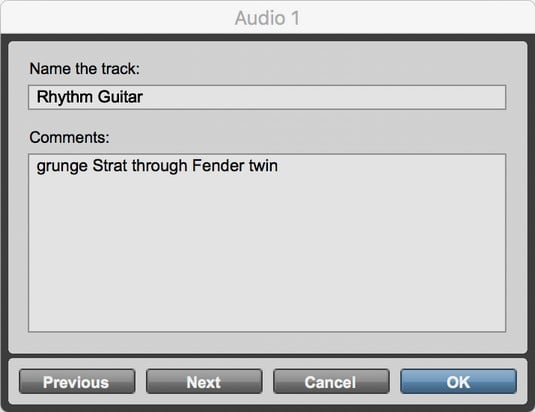 Choose a track name and add comments here.
It's recommended that you name your new tracks right away; give each a name that describes what you plan to record on it. Some examples include Vox (or Vocals), Ld Gtr, Snare, Kick, and so on. This will save you confusion later on when you start to mix.
Assigning inputs and outputs in Pro Tools
To record with your new track, you need to assign an input to it so Pro Tools knows where your source sound is coming from. To hear the track play, you need to choose an output so Pro Tools can send the sound out to your monitors or to your headphone jack.That makes sense, right? Now, to actually assign an input to your track, do the following:
- Choose View → Edit Window Views → I/O from the main menu to open the I/O section of the Edit window.
The I/O section shows the inputs and outputs for each track.
- Within the I/O section of your track in the Edit window, click and hold the Input selector until the Input contextual menu pops up.
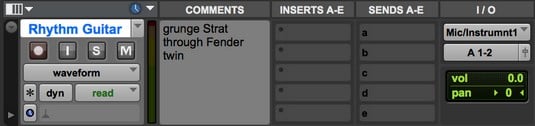 Assign an input or output here.
 - While still holding down your mouse button, move the mouse over the Input menu until it rests on the input listing you want.
- Release the mouse button to select your choice from the Input contextual menu.
This menu closes, and the input you select appears in the Input selector.
If you have an output you want to use for your session, such as Analog 1-2, you can set this as the default in the I/O Setup dialog box. To do this, follow these steps:
- Choose Setup → I/O to open the I/O Setup dialog box.
- Click the Output tab.
- Choose your output from the New Track Default Output drop-down menu.
- Click OK.
Altering your view of Pro Tools tracks
Pro Tools gives you lots of options to change how tracks look in the Mix and the Edit windows. You can change a track’s color, size, location, and even whether you can see it.Showing and hiding Pro Tools tracks
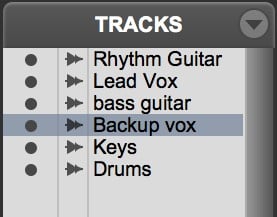
Both the Edit and the Mix windows have the option of including an audio tracks list in the window view. In this list, the Tracks list, you can show or hide selected tracks or groups of tracks. This list is located on the left side of either window. If it’s not visible, click the double arrows at the bottom-left of either window to open the list in that window.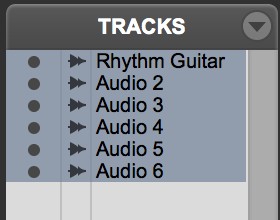 Use the list to show, hide, or sort your tracks.
You can show and hide tracks in two ways:
- Use the drop-down menu. Click and hold the title bar of the Show/Hide Tracks list until a menu opens up. Then just choose the option you want.
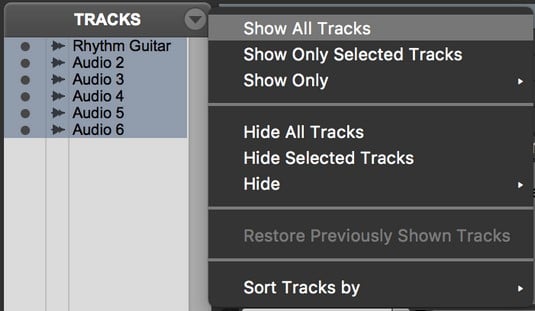 Use this menu to set how you want to see your tracks.
The Show Only Selected Tracks option and the Hide Selected Tracks option require that you first highlight your desired tracks in the main part of the Edit or the Mix windows. To select one track, just click the track’s name. To select more than one track, hold down the Shift key while clicking each track you want. When you then use the Show Only Selected option, for example, all non-highlighted tracks are hidden.
- Click the track name in the Show/Hide Tracks list. Clicking directly on the track name located in the Show/Hide Tracks list toggles between hiding and showing the track. You can even move a track around by clicking and dragging it to where you want it in relation to the others.
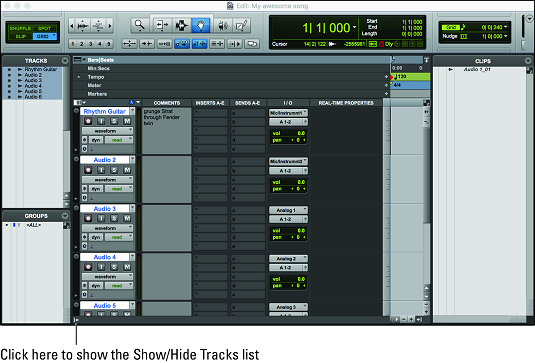 To show the Show/Hide Tracks list, click the arrows in the lower left of the Edit or Mix windows.
If the Show/Hide Tracks list isn’t showing, click the double arrow at the bottom-left corner of the window to open it.
You can also use the Show/Hide Tracks list drop-down menu to sort tracks by name, type, edit group, mix group, or voice. This menu is opened by clicking and holding the Show/Hide Tracks list title.
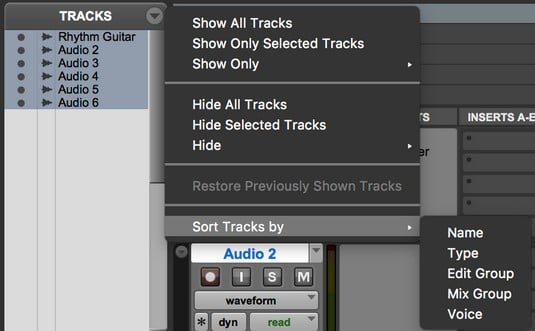 You can sort your tracks in the Edit or Mix window.
Assigning track color in Pro Tools
To make all your tracks easier to keep track of when you’re working, you can assign color groups to the waveform display for each track in the Edit window. To do this, choose Setup → Preferences from the main menu and then click the Display tab in the Preferences dialog box. This opens the Preferences dialog box.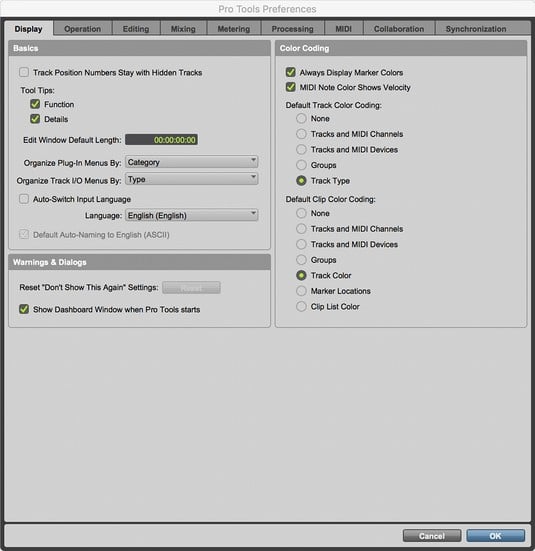 Choose how to color-code your tracks.
On the right side of this dialog box is the Default Track Color Coding section. Here you can choose from several radio buttons:
- None: Makes the display for all the tracks the same color.
- Tracks and MIDI channels: Assigns colors to each waveform display based upon the audio track number and the MIDI channels assigned for each MIDI track.
- Tracks and MIDI Devices: Bases the colors for the waveform display on the audio track number and the MIDI device used.
- Groups: Colors the waveform display for your tracks according to a track’s group membership.
- Track Type: Assigns colors according to the type of track in your session.
Changing Pro Tools track size
You can alter the viewed size of tracks in the Edit or the Mix windows. This can be a godsend, for example, when you have a ton of tracks in a session, and you want to see them all onscreen (pick a small size) or if you have a track that you want to edit (choose a giant-size one). Here are your options:- Edit window: The Edit window allows you to choose from several different-size track views. Your options include Micro, Mini, Small, Medium, Large, Jumbo, Extreme, Fit to Window, and Expanded Track Display. You access these options by clicking the Track Height Selector (the little arrow to the left of the track name) or the ruler bar at the far-left side of the waveform display of the track.
 Change track height here.
To make track size adjustments even easier, you can simply drag your track larger or smaller by clicking and dragging your mouse up or down at the bottom of your track.
- Mix window: In the Mix window, you can toggle between Narrow and Regular channel strip views by choosing View → Narrow Mix Window or View → Regular Mix Window, respectively. Pressing Option+⌘ +M (Mac) or Shift+Ctrl+M (PC) also toggles between the two views.
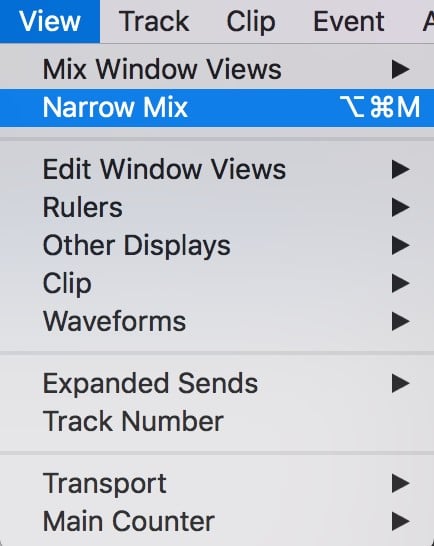 Choose between Regular and Narrow channel strips in the Mix window.
Moving your Pro Tools tracks around
You can move tracks around and arrange them in your Mix or Edit windows as you want them. This feature is handy if you have a group of tracks that you want to have next to each other, such as percussion and drums. You could place any submixed tracks together to help you keep track of them all without having to move all over the Edit or Mix windows. The following steps show you one way to do this:- Locate the name of the track you’d like to move in the Tracks list.
 Click and drag to move tracks around.
 - Click the track name and then drag the track up or down to where you want it.
- Release the mouse button.
The track stays put where you dragged it.
Moving the track around in one window changes its location in the other.
Deleting Pro Tools tracks
To delete a track, follow these steps:- Select the track by clicking its name in either the Edit or the Mix windows.
- Choose Track → Delete from the main menu.
- Click OK.