After you have access to publish to SharePoint, follow these steps:
- Click the File tab on the Excel Ribbon, choose Save As→Other Web Locations, and then click the Browse button. This step opens the Save As dialog box.
- Enter the URL of your SharePoint site in the File Name input box.
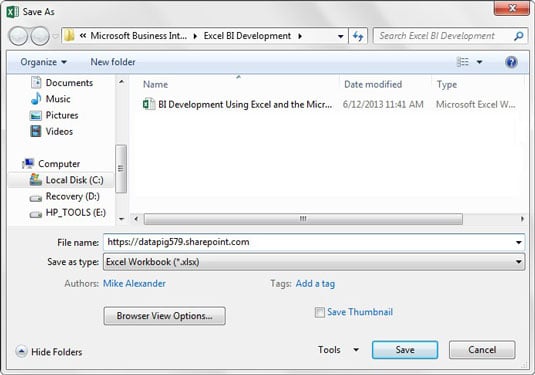
Enter your SharePoint URL in the input box of the Save As dialog box.
-
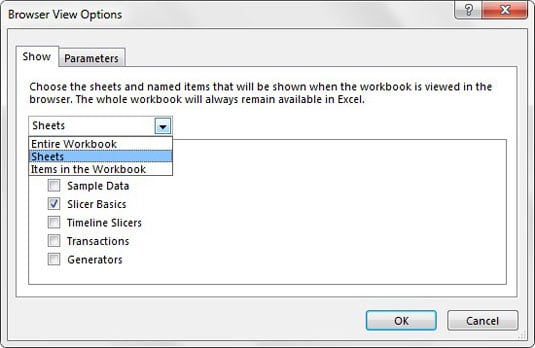
Click the Browser View Options button. The Browser View Options dialog box opens.
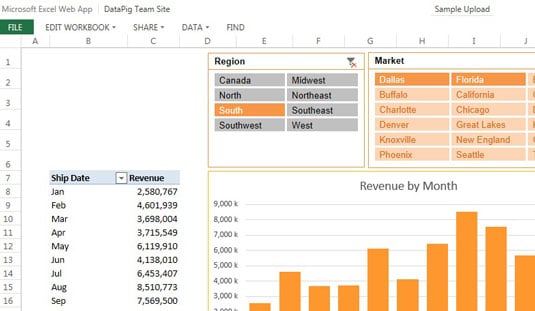
- Select which parts of the workbook will be available on the web, as shown, and then click the OK button.
You can choose to show the entire workbook, only certain sheets, or only specific objects (charts, and pivot tables, for example). You can also define parameters to allow certain named ranges to be editable in the web browser.Select which parts of your workbook will be available on the web.
- Click the Save button to connect to the SharePoint site and see your document library, as shown. You can think of a document library as a directory on the SharePoint site.Double-click the library where you want to save the file, and click the Save button.
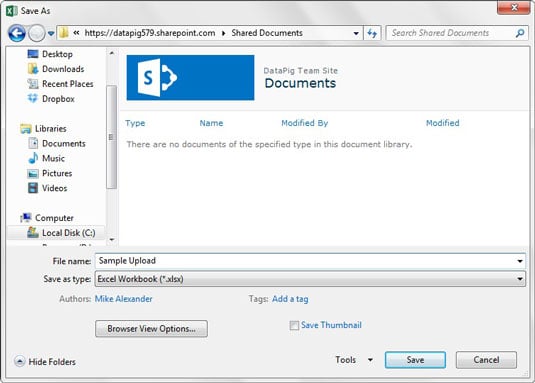
- Enter a filename in the File Name input box, double-click the library where you want the file saved, and then click the Save button.
- Edit Workbook: Either download the workbook or edit the workbook in the browser.
- Share: Email a link to your newly published workbook.
- Data: Refresh any external data connections that are in your workbook.
Workbooks on the web are running in an environment that is quite different from the Excel client application you have on your PC. Excel Services has limitations on the features it can render in the web browser. Some limitations exist because of security issues, and others exist simply because Excel Services hasn't yet evolved to include the broad set of features that come supplied with standard Excel.
In any case, the following list describes some limitations on Excel Services:- Data validation does not work on the web. This feature is simply ignored when you publish your workbook to the web.
- No form of VBA, including a macro, runs in the Excel Web App. Your VBA procedures simply don't transfer with the workbook.
- Worksheet protection doesn't work on the web. Instead, you need to plan for, and use, the Browser View Options dialog box.
- Links to external workbooks no longer work after publishing to the web. Any links or references to other workbooks will no longer work after you publish your file to SharePoint.
- You can use any pivot tables with full fidelity on the web, but you cannot create any new pivot tables while your workbook is on the web. Create any pivot tables in the Excel client on your PC before publishing on the web.
- OfficeArt doesn't render on the web. This includes Shape objects, WordArt, SmartArt, diagrams, signature lines, and ink annotations.