It is best to follow along with the instructions if you can. You can find a sample file that has an image and some text in it in the DummiesCCfiles folder. Open the XD folder and choose the RepeatGrid-Sample file. Then follow these steps:
- Open a file that has elements that you want to repeat vertically (down) the page. As previously mentioned, you can create your own or use the RepeatGrid-Sample file that has been provided at our site.
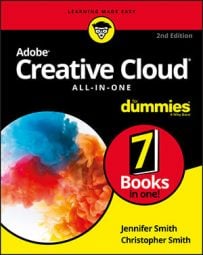
- Select all the items that are to be repeated, and then press the Repeat Grid button in the Properties panel. You could also choose to use the keyboard shortcut, Ctrl+R (Windows) or ⌘ +R (Mac).
Handles appear on the right and bottom sides of your elements.
 Select the items that you would like to repeat and then press the Repeat Grid button in the Properties panel.
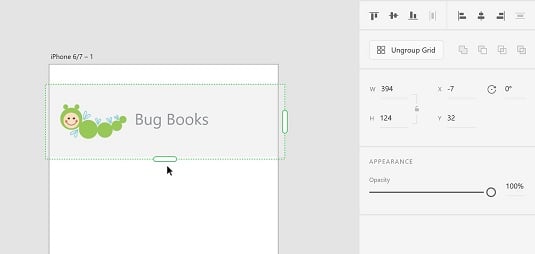
 - Click and drag down on the bottom handle to see that a repeat is created automatically as you drag. Drag beyond the template to extend the artwork outside the bottom.
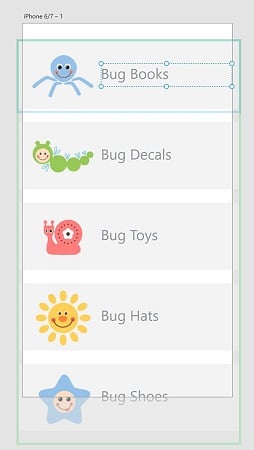
 Repeat selected items easily using the Repeat Grid feature.
 - Go back to your original art and make a simple change. Perhaps change the type size of the title, or scale the image a bit. Notice that as you make changes in this first item the changes are reflected throughout the repeat.
This can be a huge timesaver, but follow along through the next steps to see how you can easily replace the repeated image and text.
Importing updated images into your repeated grid
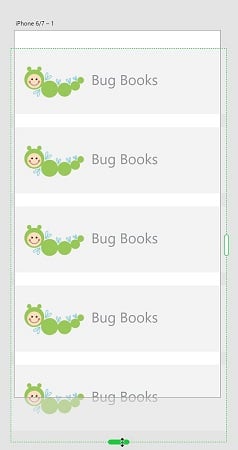
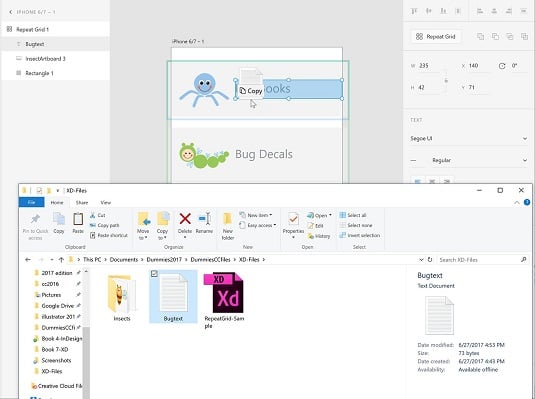
After you have repeated items, you may want to demonstrate how your application is going to work with more realistic content. The repeated element does not provide an opportunity to show the various data that your app may be offering. Below, you take a folder of images and drop them on top of your repeated grid in order to replace your original image. Just follow these steps:- Locate a folder of images in a format that XD supports, such as JPEG, PNG, or GIF. If you are accessing the DummiesCCfiles folder, you can find a folder named Insects inside the XD Files folder.
- Position your XD window that contains the artboard with the repeat so that you can see it and also the folder full of images.
- Make sure to select all the images, and then click and drag them onto the Repeated Grid. The images are replaced.
 You can drag and drop multiple images into the repeated grid to replace your image content.
You can drag images from the Bridge application into Adobe XD as well.
Updating your text in your repeated grid
Here, you discover how to update your text in a repeated grid. This is completed in much the same way as with images, but the .txt format is vital to having this process work:- Create text in any application that can save the file in a Plain Text format — that is, with an extension of .txt. The text can be generated from Notepad, Word, downloaded from Google Docs as Plain Text, or exported from many other applications. For this example, you can use the sample text file named Bugtext.txt in the XD-Files folder on our site.
- Position the folder that contains the text file so that you can see the file and the repeated grid.
- As with the process of replacing the repeated image, click and drag the .txt file over your repeated grid text. The text is replaced with text from your file.
 Click and drag a .txt file over the repeated grid to replace the text.
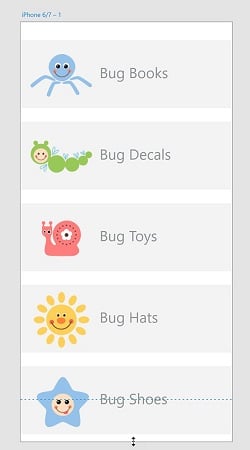
You can see the example as it appears once the imagery and text have been replaced here.
 The repeated grid with new imagery and text.
 - If you extended beyond the viewing area, make sure to click on the artboard name above the artboard to select it.
- Drag the bottom handle to extend to the length of your repeated grid. This allows the screen to be scrolled in the preview. The dotted line represents the area that previews before the scroll.
 Click and drag to extend the viewing area of your repeated grid.
 - Click on the Desktop Preview button and scroll to see your repeated grid in action.