Your Nikon D7000’s Auto White Balance setting recognizes white objects and automatically shifts color settings remarkably well in most situations, which means that you can usually ignore it and concentrate on other aspects of your picture. But if your scene is lit by two or more light sources that cast different colors, the white balance sensor can get confused, producing an unwanted color cast.
You can manually adjust the White Balance setting only in the P, S, A, and M exposure modes. So if you have a color issue and want to use the other exposure modes, you're out of luck.
The current White Balance setting appears in the Control panel and Information display.
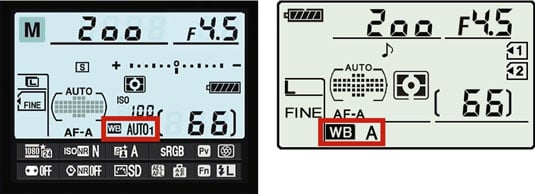
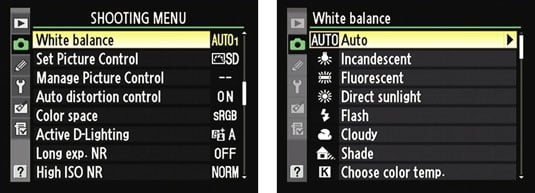
The quickest way to change the setting is to press and hold the WB button as you rotate the Main command dial. But you also can change the setting from the Shooting menu. If you go through the menu, you have access to some additional options. After highlighting the setting you want to use, press OK. For all settings except Auto, PRE (Preset Manual), K, and Fluorescent, you’re taken to a screen where you can fine-tune the amount of adjustment the camera applies to colors.
A few other white balance factoids of note:
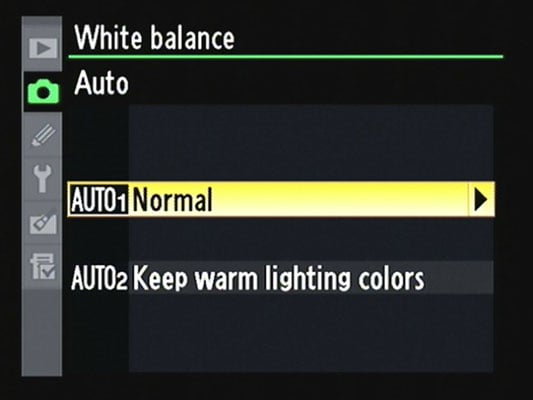
Modifying the Auto setting: You can choose from two Auto White Balance settings. At the default setting, Normal, things happen as you'd expect: The camera analyzes the color temperature of the light and adjusts colors to render the scene accurately. If you use the other setting, Keep Warm Lighting Colors, the warm hues produced by incandescent lighting are left intact.
Specifying a color temperature through the K White Balance setting: If you know the exact color temperature of your light source, you can tell the camera to balance colors for that precise temperature.
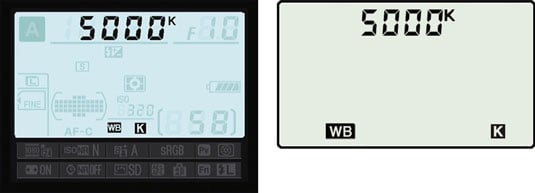
You also can set the temperature through the White Balance option on the Shooting menu. If you do, you see the fine-tuning screen after you select the temperature and press OK. Again, just press OK to exit the screen without making any adjustment.
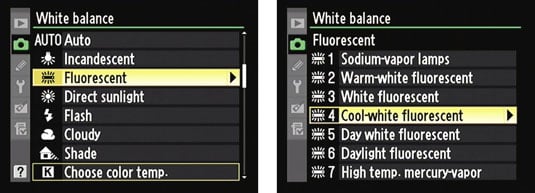
Specifying a fluorescent bulb type: For the Fluorescent setting, you can select a specific type of bulb. To do so, you must go through the Shooting menu. Select Fluorescent as the White Balance setting and then press OK to display the list of bulbs. Select the option that most closely matches your bulbs and then press OK. Press OK again, and you’re taken to the fine-tuning screen. If you don’t want to make any further adjustment, just press OK once more to return to the Shooting menu.
Creating a custom White Balance preset: The PRE (Preset Manual) option enables you to create and store a precise, customized White Balance setting. This setting is the fastest way to achieve accurate colors when your scene is lit by multiple light sources that have differing color temperatures.
Your selected White Balance setting remains in force for the P, S, A, and M exposure modes until you change it. So you may want to get in the habit of resetting the option to the Auto setting after you finish shooting whatever subject it was that caused you to switch to manual White Balance mode.