
Typically, the Set button serves a single function on the Canon EOS 60D: When a menu is displayed, you press the button to lock in menu selections. This setup keeps things simple, but you have the option to use the Set button for one additional task: displaying the Quality settings, the Flash Exposure Compensation setting, or several other handy items. The Set button retains its original purpose, regardless of the additional function you add to it.
To customize the button, take these steps:
Set camera Mode dial to one of the exposure modes in the Creative Zone.
You can’t adjust the performance of the Set button in the Basic Zone (Full Auto, Flash Off, Creative Auto, and Image Zone). Nor does the button perform its new function when the camera is set to those modes.
Press Menu to bring up the menu system and then navigate to the Custom Function group (using the Main dial or the multicontroller).
Using the Quick Control dial or the multicontroller (up or down), highlight C.Fn. IV: Operation/Others.
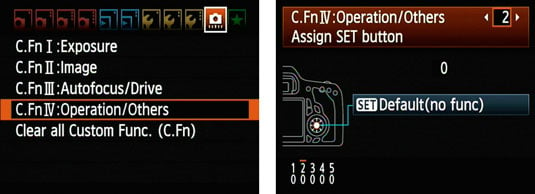
Press Set.
You see one of the functions displayed onscreen. Remember that the first Custom Function you reach might not be the one you’re after. If not, see the next step.
Scroll through the group’s custom functions (Quick Control dial; or multicontroller, left or right) until you reach Assign SET Button, which is Custom Function 2.
In this case, you don’t see a complete list of options. You see the enabled option and an illustration of part of the camera back.
Press the Set button.
You have to press Set to access the options.
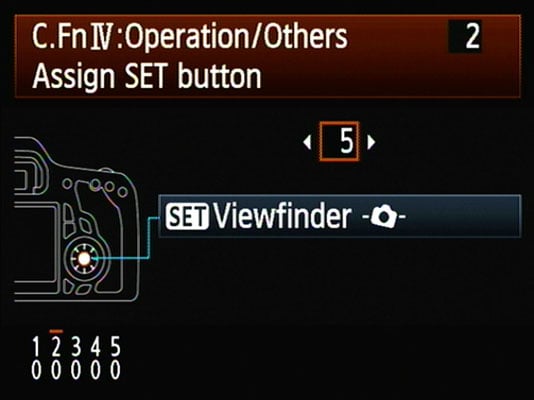
Highlight your choice, using the Quick Control dial or multicontroller (left or right).
0: Pressing Set does nothing extra.
1: Pressing the Set button when no menu is displayed whisks you to the screen where you can change the Image Quality setting.
2: Pressing Set accesses the Picture Style screen.
3: Pressing Set opens White Balance.
4: Pressing Set opens Flash exposure compensation.
5: Pressing Set turns on the electronic level in the viewfinder — but again, only for the Creative Exposure modes.
Press the Set button to lock in changes.
Now whenever you shoot in the Creative Exposure modes and press Set while no menus are displayed, the button takes on the function you just assigned to it. To go back to the default setting, repeat these steps and select option 0 in Step 6. The button then reverts to its original single-minded purpose, which is to lock in menu selections.