
The Notebook Layout view in Word for Mac 2011 for Mac has so many uses. Notebook Layout View is great for students who jot notes, office workers who attend meetings, assistants who track tasks, and professionals who need to record meetings with clients.
Notebook Layout has its own special tabs on the Ribbon: Home, Appearance, and Audio Notes, which we discuss next. Notebook Layout view has the following features:
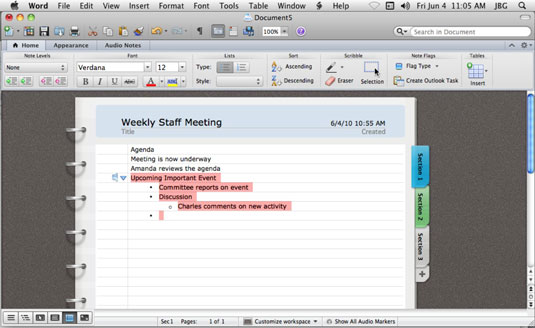
Section tabs: Click a tab to choose a section of your document.
Add section: Click the plus sign to add a section to your document.
Show Audio Markers: Click this button to display or hide all the audio markers within a document. Click in the left margin next to any text to display the audio marker associated with that text.
Customize Workspace: Choose a workspace beautification option.
To see how Word Notebook Layout view looks and works, open a new, blank Word document in Notebook Layout view by following these quick steps:
Choose File→New from Template from the menu bar.
Double-click Word Notebook Layout.
Right away you can see that Notebook Layout view is very interesting; it looks just like a notebook, complete with (optional) spiral bindings and (optional) lined notebook paper. The Ribbon looks different, too, with all sorts of new controls on it. If you take a quick peek at the Word menus, you’ll see that many of the menu items are different. You can use most, but not all, of Word’s Print Layout features in Notebook Layout view.
When you’re typing in Notebook Layout, think in terms of writing an outline. Here are some guidelines that will help:
Use Return to end a paragraph. If you’re using the microphone to record, pressing Return adds an audio marker. We cover recording audio in the next section.
Use the Tab key to indent; use Shift-Tab to outdent. Think of each level of indenting as a Note Level. No indenting is Note Level 1; the first indent is Note Level 2, and so on. Note Levels are styles, so you can see and set them in the Style tab of the Toolbox as well as on the Ribbon.
