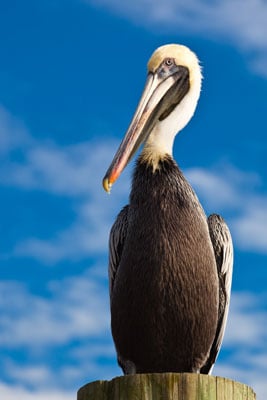
Birds are photogenic. Some birds will just naturally stay put and allow their portrait taken. As a nature photographer, you learn that birds that are used to the presence of humans, and occasionally get a handout, such as pelicans, will stare you right in the eye as you take their picture.

Some birds make it difficult for you to get a portrait. Some stay hidden in trees, and some are quite skittish. But when a bird stays put out of curiosity or doesn’t feel intimidated by the silly human with the goofy third eye, you have a golden opportunity to capture great pictures. Here are some tips for capturing great portraits of birds:
Use a long focal length of at least 150mm. A zoom telephoto lens with a range of 70-200mm is ideal. This lets you zoom in tight on your feathered friend.
Switch to Aperture Priority mode and choose a medium aperture with an f-stop of f/7.1. This ensures that you have sufficient depth of field to see every detail of the bird’s face, but to still render the background as an out-of-focus blur with a telephoto lens.
Switch to an ISO setting that yields a shutter speed that is the reciprocal of the 35mm equivalent of the focal length you’re using to photograph the bird, even if the camera is mounted on a tripod. If the bird makes the slightest movement, or you make the slightest movement and you’re shooting at a slower shutter speed, the bird will be blurry.
Enable image stabilization if your camera or lens has this feature. If your camera is mounted on a tripod, image stabilization is not necessary, and may actually be counter-productive.
Switch to Continuous Auto-Focus mode. In this mode, the camera automatically updates focus if the bird moves.
Switch to Continuous Drive mode. In the event the bird decides to fly away, you can capture a sequence of images as it leaves the cuckoo’s nest.
Switch to a single auto-focus point and achieve focus on the eye that is closest to the camera. If the eye nearest the viewer isn’t in sharp focus, the entire image appears to be out of focus.
If possible, photograph birds on an overcast day, or when the bird is in the shade. Harsh overhead light is not flattering for any type of picture.
Choose times of day when the light is softer and more diffused. If you’re photographing birds in broad daylight, capture your images in the early morning or late afternoon.
If you do photograph the bird straight on in broad daylight, make sure the front of the bird is illuminated. If the light hits the bird on an angle, part of its head, including an eye, will be in shadow.
If you’re photographing the side of the bird’s head in broad daylight, make sure the side of its head is completely illuminated. If the light is coming from a different angle, parts of its head may be in shadow.
You can shed some light on your subjects with an auxiliary flash unit and a product called Better Beamer, which is available for several flash units. The device uses a Fresnel lens to magnify the flash to illuminate distant subjects like birds in trees. The Better Beamer is designed to work with lenses that have a focal length of 300mm or longer.

