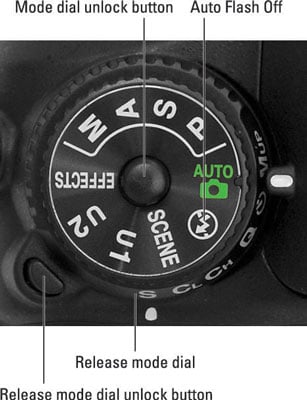
Your first step in taking advantage of easy-breezy shooting on your Nikon D7100 is to set the Mode dial to Auto, or Auto Flash Off or Scene. Remember that you must press and hold the center button in order to rotate the Mode dial.
Here's a recap what each setting offers:
Auto is a general purpose, point-and-shoot type of option.
Auto Flash Off does the same thing as Auto but without flash.
Scene gives you access to 16 automatic modes geared to shooting specific types of pictures.
Even in these automatic modes, you have a few ways to control the camera’s behavior. The most important settings to check before you compose the photo are the following:
Release mode: This setting determines the number of images that are recorded with each press of the shutter button and the timing of each shot. Choose the Release mode via the dial that’s directly under the Mode dial. (Don’t forget to press the little dial unlock button before moving the dial.)
For normal shooting, set the dial to the S (Single Frame) position; at this setting, you get one picture for each press of the shutter button.
Focusing method: You can enjoy autofocusing, if your lens supports it, or focus manually. On the 18–105mm lens, select the lens focus mode via the switch labeled in the figure. Choose A for autofocusing and M for manual focusing.
Also set the camera’s Focus mode selector switch to AF for autofocus or M for manual focusing.
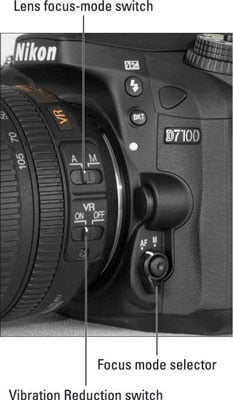
Vibration Reduction (VR): If your lens offers this feature, enabling it helps produce sharper images by compensating for camera movement that can occur when you handhold the camera. On the 18–105 kit lens, turn Vibration Reduction on or off via the switch labeled in the figure. Set the switch to Off when you mount the camera on a tripod.
For other lenses, check the lens manual for details about using this feature.
Image Quality and Image Size (Shooting menu): By default, pictures are recorded at the Large Image Size setting and the Normal Image Quality setting, which creates a JPEG picture file with a moderate amount of compression.
Image Area (Shooting menu): By default, the camera uses the DX setting, which records the photo using the entire image sensor. If you switch to the 1.3x crop setting, a smaller area at the center of the sensor is used, giving you the same result as if you shot the picture using the entire sensor and then cropped the photo. Framing guidelines appear in the viewfinder to show you the smaller image area.
Flash mode: In Auto exposure mode, as well as in many of the Scene modes, the camera automatically raises and fires the built-in flash in dim lighting. In some cases, you can alter the behavior of the flash through the Flash mode setting.
Here’s a look at the basics:
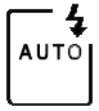
Checking the Flash mode: Symbols representing the current mode appear in the Control panel and Information display, in the areas highlighted. (Press the Info button to bring up the Information display.) The Auto Flash mode, whose symbol appears in the figure and the margin here, means that the camera will automatically fire the flash if it thinks the ambient lighting is insufficient. This Flash mode is the default setting.
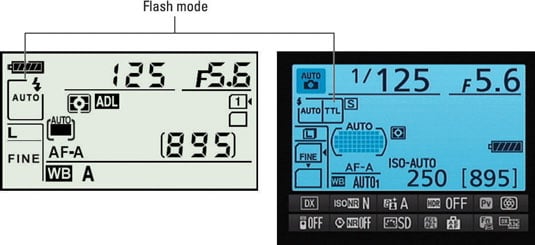
The TTL label that appears with the icon in the Information screen stands for through-the-lens, which refers to the way that the camera measures the ambient light when it calculates how much flash power is needed.

Changing the Flash mode: Press the Flash button while rotating the Main command dial.

Disabling flash: You can’t simply close the flash to disable it — the camera will just raise it again if it thinks extra light is needed. But in some automatic exposure modes, including Auto, you can prevent the flash from firing by choosing Flash Off mode, represented in the displays by the symbol shown.

Using red-eye reduction flash: Auto mode and some Scene modes also offer this feature, represented in the Flash mode display by the little eye icon shown here. In this Flash mode, the camera emits a burst of light from the AF-assist illuminator lamp on the front of the camera before the flash fires. This light constricts the subject's pupils, which reduces the chances of red-eye.
Combining a slow shutter speed with flash: Some Scene modes combine flash with a slow shutter speed in order to produce brighter backgrounds in dimly lit scenes. The word Slow in the Flash mode display indicates that this feature is in force. Because of the slow shutter speed — longer exposure time — use a tripod and ask your subject to remain still during the exposure to avoid a blurry picture.

ISO Sensitivity: You have access to one exposure-adjustment option, ISO Sensitivity, which determines how much light is needed to properly expose the image. (Adjust the setting by holding down the ISO button and rotating the Main command dial.) At the default setting, Auto, the camera adjusts the ISO Sensitivity as needed.
In fact, if you’re not up to sorting through any of these choices, ignore everything but the focusing method, Vibration Reduction setting, and the Release mode setting. After all, the default settings are chosen because they’re the best solutions for most shooting scenarios.