


Taking great digital pictures doesn’t happen overnight. That's why your Canon Digital Rebel has a Creative Auto mode that almost works like a tutorial for digital photography.
Creative Auto mode is set up initially to work the same way as Full Auto. But if you don’t like the results you get, you can make the adjustments for your next shot. Unlike the fully automatic modes like Sports and Portrait, with Creative Auto you can adjust flash, brightness, sharpness, and Picture Style.
Although it’s great for beginners to have an easy way to have a little more input on their pictures, Creative Auto still doesn’t give you anywhere near the level of creative control you get in the advanced exposure modes. For example, you can decide whether you want the flash to fire in Creative Auto mode, but you can’t adjust flash power or change the way the camera calculates the flash exposure, as you can in the P, Tv, Av, M, and A-DEP modes. That said, if you’re feeling overwhelmed by all the new stuff that comes with digital SLR photography and you’re not ready to dive into the more advanced exposure modes, then by all means, Creative Auto is a better choice than the other modes.
Set the Mode dial on the top of the camera to the CA setting.
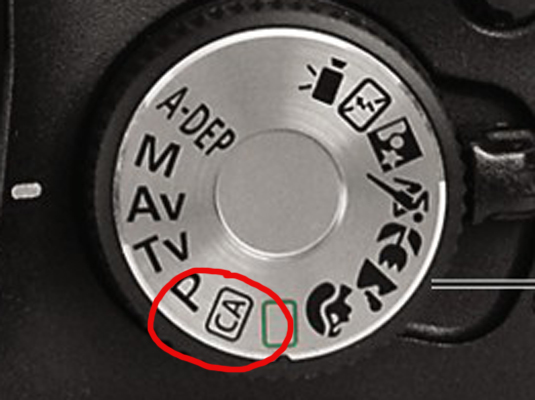
The Mode dial, labeled here, is found on the top of the camera.
Make sure the Creative Auto version of Shooting Settings menu is displayed.
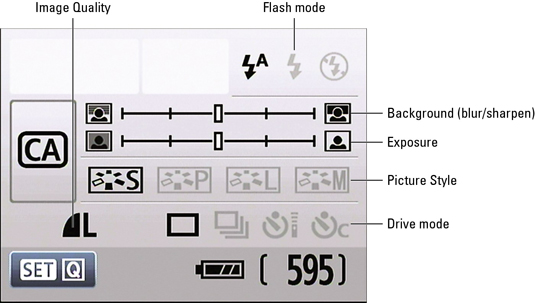
This menu should display automatically. If you don’t see the screen pictured here, press the DISP button or press the shutter button halfway and then release it. The six settings you can adjust in this mode are labeled in the figure.
Press Set.
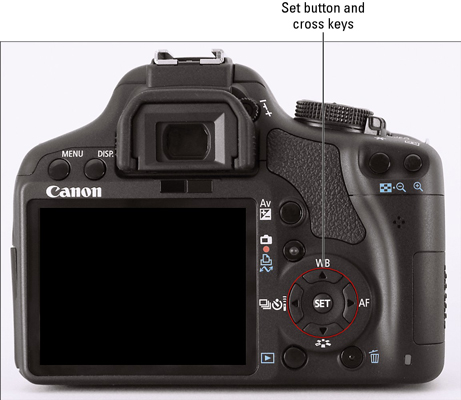
Pressing the Set button, pictured here, shifts the screen into Quick Control mode.
Press the cross keys to move the highlight over the setting you want to adjust.
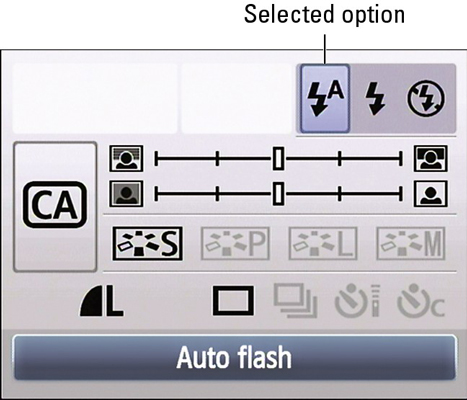
The cross keys allow you to change which of the six adjustable settings is highlighted, and a text label appears at the bottom of the screen to remind you what the highlighted setting does. In this image, for example, the Flash setting is highlighted.
Adjust the highlighted setting by rotating the Main dial.
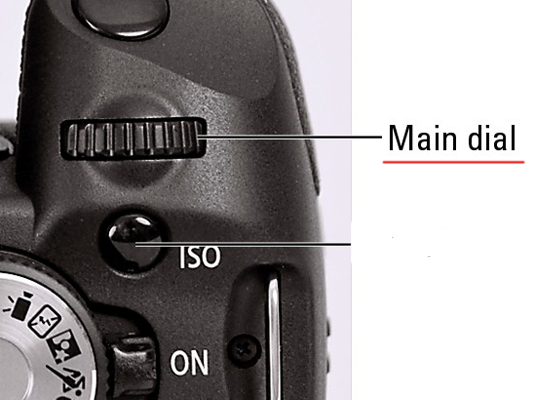
For the Quality and Drive mode options, you also can press Set to display a screen containing all possible settings. After you get to the options screen, rotate the Main dial or use the right and left cross keys to highlight the setting you want to use. Then press Set to return to the Quick Control screen.
To adjust another setting, press the cross keys to highlight it.
After you select all the settings you want to change, press the shutter button halfway and release it.
The monitor returns to the normal Shooting Settings display, shown here, and you’re ready to take your picture.

