


Setting up your e-mail on Kindle Fire involves providing information about one or more e-mail accounts that you’ve already established with a provider such as Gmail.
Follow these steps to set up an e-mail account the first time you use the app:
Tap Apps.
The Apps library appears.
Tap Email.
The Email app opens and displays a Start button the first time you open the app.
Tap the Start button.
A list of account types appears.
Tap Gmail, Yahoo, Hotmail, AOL, or Other.
The dialog box appears.
Enter your username and password in the appropriate fields, and then tap Next.
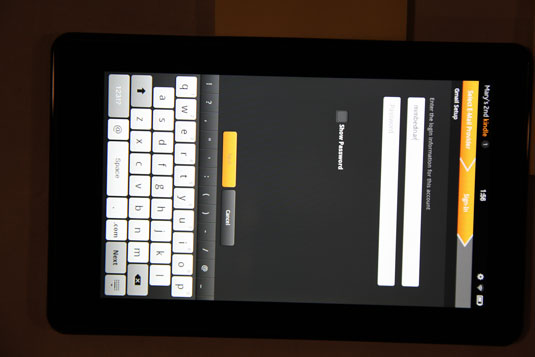
A new screen appears, displaying two fields.
Enter the name that will appear on outgoing messages in the Display Name field and a name in the Account Name field to identify the account for yourself.
The Account Name is optional.
Tap the Send Mail from This Account by Default check box.
Of course, this only applies if you want to set this up as your default e-mail account.
Tap the View your Inbox button to go to the inbox for the account you just set up.
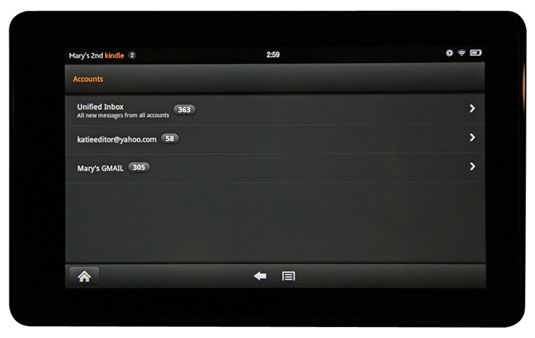
You can set up as many e-mail accounts as you like. When you open the Kindle Fire Email app, you see a Unified Inbox that combines messages from all accounts you set up, as well as individual inboxes for each account.
To delete an account in the Email app, tap the Menu button in the Options bar and then tap Accounts. Press and hold your finger on an account; from the menu that appears, tap Remove Account.

