
Every user who accesses a network must have a user account, and one of the most common network administration tasks is user account creation. To create a new domain user account in Windows Server 2008, follow these steps:
Choose Start→Administrative Tools→Active Directory Users and Computers.
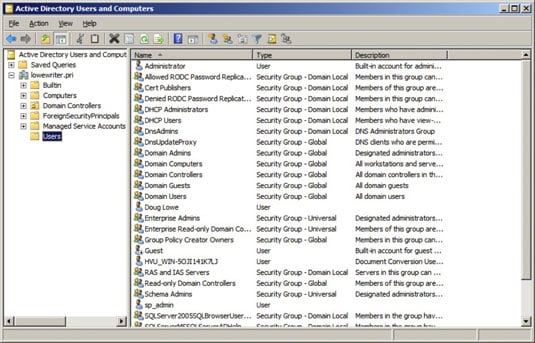
This fires up the Active Directory Users and Computers management console.
Right-click the domain that you want to add the user to and then choose New→User.
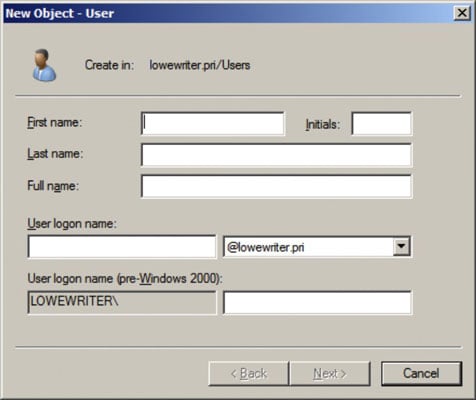
This summons the New Object — User Wizard.
Type the user’s first name, middle initial, and last name.
As you type the name, the New Object Wizard automatically fills in the Full Name field.
Change the Full Name field if you want it to appear differently than proposed.
For example, you may want to reverse the first and last names so the last name appears first.
Type the user logon name.
This name must be unique within the domain.
Pick a naming scheme to follow when creating user logon names. For example, use the first letter of the first name followed by the complete last name, the complete first name followed by the first letter of the last name, or any other scheme that suits your fancy.
Click Next.
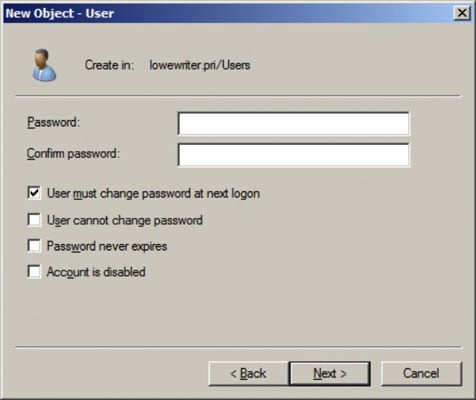
The second page of the New Object — User Wizard appears.
Type the password twice.
You’re asked to type the password twice, so type it correctly. If you don’t type it identically in both boxes, you’re asked to correct your mistake.
Specify the password options that you want to apply.
The password options available include requiring the user to change password at next logon, restricting the user from changing password. Also available is the option to make the password non-expiring and to completely disable the account.
Click Next.
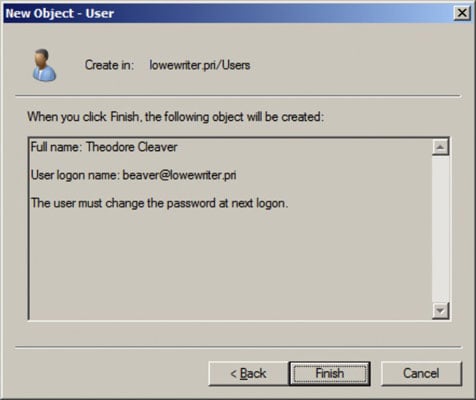
You’re taken to the final page of the New Object — User Wizard.
Verify that the information is correct and then click Finish to create the account.
If the account information is not correct, click the Back button and correct the error. You’re done! Now you can customize the user’s account settings. At a minimum, you’ll probably want to add the user to one or more groups. You may also want to add contact information for the user or set up other account options.