
For example, you can map a shared folder named Data on the server named Win1601 Files to drive K: on your computer. Then, to access files stored in the shared Data folder, you look on drive K:.
To map a shared folder to a drive letter, follow these steps:
- Open File Explorer.
- Windows 7: Choose Start→Computer.
- Windows 8, 8.1, and 10: Open the desktop and click the File Explorer icon on the taskbar, and then click Computer in the Location list on the left side of the screen.
- Open the Map Network Drive dialog box.
- Windows 7: Access this dialog by clicking the Map Network Drive button located on the toolbar.
- Windows 8 and 8.1: Click Map Network Drive on the ribbon.
- Windows 10: Click the Computer tab, and then click Map Network Drive.The image below shows the Map Network Drive dialog box for Windows 10. The dialog box for earlier versions of Windows is similar.
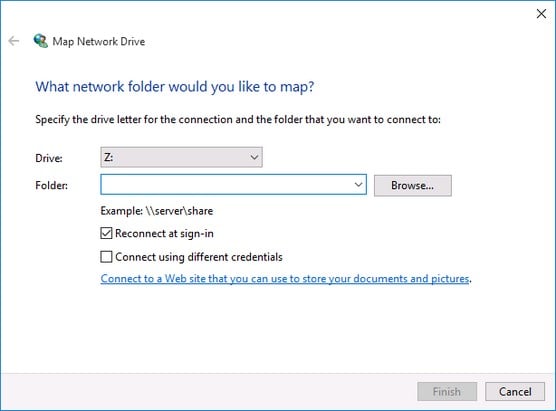 The Map Network Drive dialog box.
- (Optional) Change the drive letter in the Drive drop-down list.You probably don’t have to change the drive letter that Windows selects. If you’re picky, though, you can select the drive letter from the Drive drop-down list.
- Click the Browse button.The dialog box shown below appears.
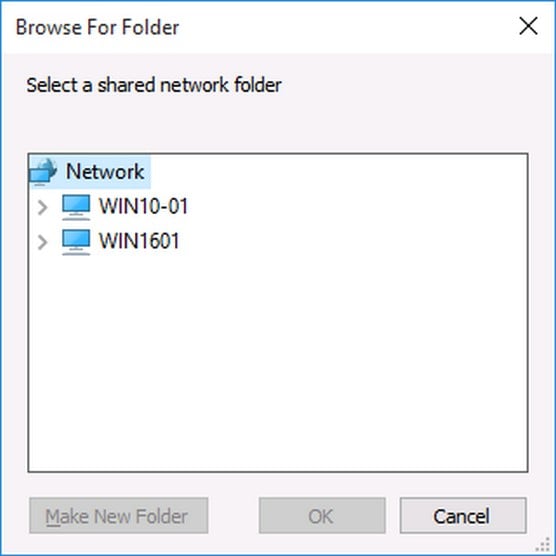 Browsing for the folder to map.
 - Use the Browse for Folder dialog box to find and select the shared folder you want to use.You can navigate to any shared folder on any computer in the network.
- Click OK.The Browse for Folder dialog box is dismissed, and you return to the Map Network Drive dialog box.
- (Optional) If you want this network drive to be automatically mapped each time you log on to the network, select the Reconnect at Sign-in check box.If you leave the Reconnect at Sign-in check box deselected, the drive letter is available only until you shut down Windows or log out of the network. If you select this option, the network drive reconnects automatically each time you log on to the network.
Be sure to select the Reconnect at Sign-in check box if you use the network drive often.
- Click OK.You return to the This PC folder. Here, you can see the newly mapped network drive.
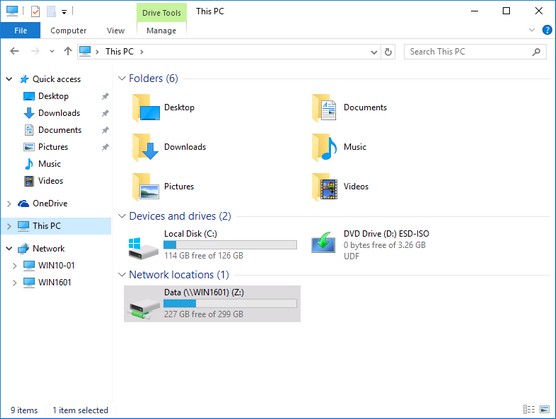 The This PC folder shows a mapped network drive.
Here are a few additional tips for mapping a network drive:
- Assigning a drive letter to a network drive is called mapping the drive, or linking the drive, by network nerds. “Drive Q: is mapped to a network drive,” they say.
- Network drive letters don’t have to be assigned the same way for every computer on the network. For example, a network drive that’s assigned drive letter M on your computer may be assigned drive letter Z on someone else’s computer. In that case, your drive M: and the other computer’s drive Z: refer to the same data. This arrangement can be confusing. If your network is set up this way, put pepper in your network administrator’s coffee.
- Accessing a shared network folder through a mapped network drive is much faster than accessing the same folder by browsing the network. Windows has to browse the entire network to list all available computers whenever you browse the network. By contrast, Windows doesn’t have to browse the network to access a mapped network drive.
- If you select the Reconnect at Sign-in option for a mapped drive, you receive a warning message if the drive isn’t available when you log on. In most cases, the problem is that your computer can’t connect to the server. Double-check all your network connections and settings to make sure.