
Your Canon EOS 7D Mark II features a built-in flash unit, but it’s no ordinary built-in flash unit. This one has the power to command other Canon flash units that are compatible with your camera, which enables you to shed lots of light on your subject. However, when you shoot pictures using one of the auto modes, you don’t have access to those bells and whistles.
When you take pictures in Full Auto mode, the flash automatically pops up when the camera senses there’s not enough light to properly expose the picture. Don’t expect miracles from the on-camera flash, though; it’s effective only for a distance of about 16 feet at f/3.5 with an ISO setting of 200. After that the on-camera flash falls off so much, it’s not usable. Other issues you’ll find with on-camera flash is red-eye when you’re photographing people. The camera does have a built in red-eye reduction system, however.
Using red-eye reduction
When you enable red-eye reduction, the camera fires a pre-flash that causes your subject’s pupils to constrict, thereby reducing red-eye. The effectiveness of red-eye reduction varies from subject to subject. The alternative is using an auxiliary flash that can bounce the flash off a large surface, such as a wall, which diffuses the light and doesn’t beam it directly into your subject’s eyes. Note that you will not be able to use red-eye reduction while shooting in Full Auto mode. To enable red-eye reduction:
Press the Menu button.
The menu appears on the LCD monitor.
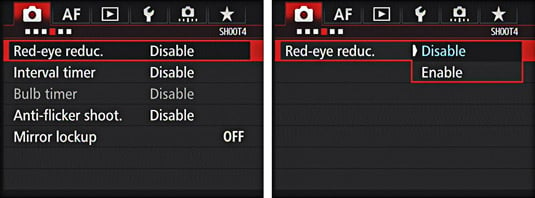
Press the Quick Control button to navigate to the Shoot tab, press the multi-controller button to navigate to the Shoot4 menu, and then use the Quick Control dial to highlight Red-Eye Reduc.
Oh my. It’s like digital Visine.
Press Set.
The Red-Eye Reduc menu displays.
Turn the Quick Control dial to highlight Enable and then press Set.
Red-eye reduction is enabled.
Press the shutter button halfway.
You’re ready to take a picture with no red-eye.
Shooting a red-eye–free portrait
When you shoot a portrait under dodgy (dim) lighting conditions, the flash pops up automatically when you shoot in Full Auto mode. If you’re shooting a portrait of your significant other, or photographing a group of friends, red-eye reduction is the order of the day. The following steps explain how to shoot a red-eye free picture of people. Note that this technique doesn’t work well when you take flash pictures of dogs or cats.
To take a picture when red-eye reduction is enabled:
Enable red-eye reduction.
Press the Flash button.
The flash unit pops up.
Compose your image in the viewfinder.
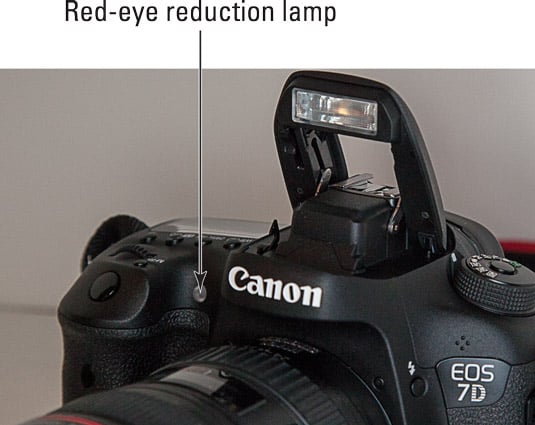
You’ll get your best results if your subject looks directly at the red-eye reduction lamp on the front of the camera.
Press the shutter button halfway.
The red-eye reduction lamp lights. When the green light on the right side of the viewfinder appears, your subject is in focus.
Wait until the exposure compensation display at the bottom of the viewfinder disappears.
This is your signal that the red-eye reduction lamp is functioning optimally. The compensation display disappears on the LCD panel as well. When the display disappears completely, the red-eye reduction lamp has done its thing.
After the display disappears, press the shutter button.
In a flash, the image displays on the LCD monitor. Review the image to make sure no red-eye is visible. If necessary, take the picture again.