


Many photographers use exposure bracketing on the Nikon D5300 to ensure that at least one shot of a subject is properly exposed. Bracketing simply means to shoot the same subject multiple times, slightly varying the exposure settings for each image.
In the P, S, A, and M exposure modes, your camera offers automatic bracketing. When you enable this feature, your only job is to press the shutter button to record the shots; the camera automatically adjusts the exposure settings between each image.
This feature is especially helpful in situations where you don't have time to review images and adjust exposure settings between shots. The D5300, however, takes things one step further than most cameras that offer automatic bracketing, enabling you to bracket not just basic exposure but also Active D-Lighting or white balance.
The camera records a three-shot series of bracketed images when you use the autoexposure and white-balance bracketing options. For Active D-Lighting, you get only two shots in the series: one with the feature turned off and one at the setting currently in force for the Active D-Lighting option.
To try your hand at exposure or Active D-Lighting bracketing, follow these steps:
Set your camera to the P, S, A, or M exposure mode.
You can’t take advantage of the feature in any other mode.
To display the Custom Setting menu, highlight Bracketing/Flash.
Press OK.
Select Auto Bracketing Set and press OK.
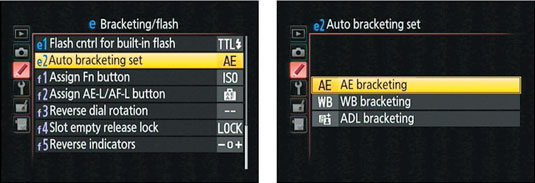
You see the options shown on the right. This screen is where you tell the camera whether you want to bracket the exposure (AE), white balance (WB), or Active D-Lighting (ADL). Note that even though the first option is called AE (for autoexposure), it enables you to bracket exposure in M (manual exposure) mode just the same.
Select the desired bracketing option.
Press OK.
Press the i button to display the control strip, where you can specify the bracketing increment.
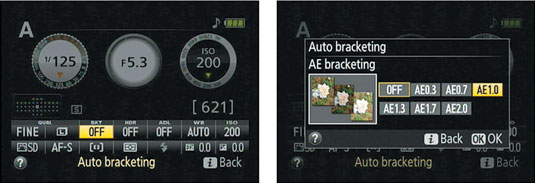
Highlight the BKT setting and press OK to display the second screen. The available settings depend on the feature you’re bracketing, as follows:
For exposure bracketing, the settings control the amount of exposure shift between frames. The settings are based on Exposure Compensation values. For example, if you choose 0.7 for an autoexposure bracketing set, the camera makes three exposures: one with exposure values as metered by the camera, one exposure with EV +0.7, and one exposure with EV –0.7 Your choices are from 0.3 EV to 2.0 EV. Choosing Off disables bracketing.
For Active D-Lighting bracketing, you get only two options: ADL and Off. Select ADL. (This option is a little weird — if you select Off, you just disable bracketing.)
Press OK to return to the control strip.
Press the i button again to exit the strip.
Shoot your first bracketed series.
Remember: For autoexposure bracketing, a series consists of three shots; for Active D-Lighting, two shots.
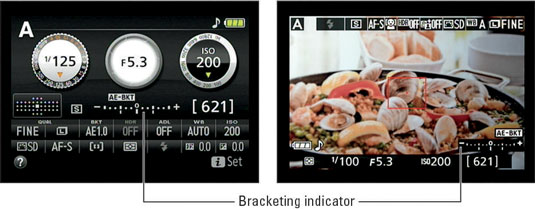
When bracketing is enabled, the Information and Live View displays offer a bracketing indicator. That’s a technical way of saying, Little bars appear under the meter, each one representing one shot in your bracketed series. The indicator updates after each picture to show you how many more shots are left in the series.
For example, the middle bar represents your first shot; after you take your first picture, it disappears. You then see one or two bars — and thus, one or two shots left to shoot — depending on whether you’re bracketing exposure or Active D-Lighting. A label on top of the meter reminds you which feature you’re bracketing — AE-BKT (autoexposure) bracketing.
To disable bracketing, repeat Step 5 and select Off from the second screen.
If you set the Release mode to Continuous Low or Continuous High, you can save yourself some button pressing: In those two Release modes, the camera records the entire bracketed series with one push of the shutter button. To change the Release mode, press the Release mode button or select Release Mode from the Shooting menu. Remember, though, that you can’t use flash in either Release mode.

