

After you get the Kindle Fire tablet out of its packaging, it’s time to turn it on. The Kindle Fire sports a Power button on the bottom of the device when you hold it in portrait orientation. Next to the Power button is a port where you can insert a micro-B cable to connect the Kindle Fire to your computer, as well as a headphone jack.

To turn the device on, press the Power button. If you’re starting up for the first time, you’re taken through a series of setup screens. After you go through the setup process and register your Kindle Fire, you’ll see the Home screen on startup.

The Status Bar gives you information about items such as your device’s battery charge, as well as access to a Quick Settings menu for universal Kindle Fire settings; the Options bar at the bottom of the screen provides access to settings and tools that are context-specific (they vary depending on what you’re doing at the time).
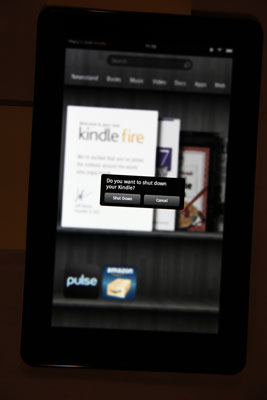
If you want to lock your Kindle Fire, which is akin to putting a laptop computer to sleep, tap the Power button again. To shut down your Kindle, press and hold the Power button until a message appears offering you the options to Shut Down or Cancel.
If your Kindle Fire becomes non-responsive, you can press and hold the Power button for 20 seconds, and it should come to life again.
If you place the device on a surface such as a table oriented with the Power button on the bottom, perhaps to show a friend or client something on the screen, you can accidentally hit the Power button and send Kindle Fire to sleep.

