
You can sync your entire iTunes library with your iPod, if you have enough space. Follow these five easy steps to sync all the content and apps in your iTunes library to an iPod:
Connect the iPod and click the iPod button.
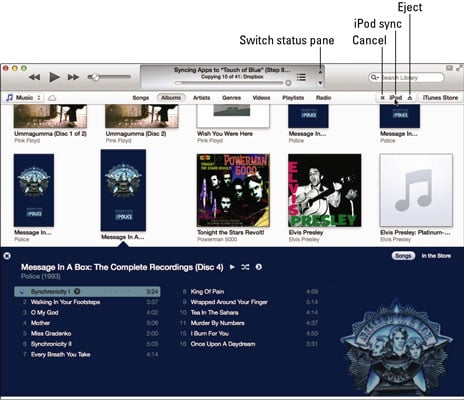
After connecting the iPod, iTunes adds the iPod button in the upper-right corner of the window, which includes the eject button on the right side, and either the X cancel button to cancel syncing (move your pointer over the animated sync icon to see the X if the iPod is syncing) or an iPod icon on the right side.
After you click the iPod button, iTunes displays the sync options with tabs for each sync options page. iTunes automatically starts syncing your iPod, and the sync status pane tells you the progress. (If you’re playing music while syncing, you can switch between the sync status and playback status by clicking the up or down arrows next to the status pane.)
Click the Summary tab to see the Summary page, if it is not already selected.
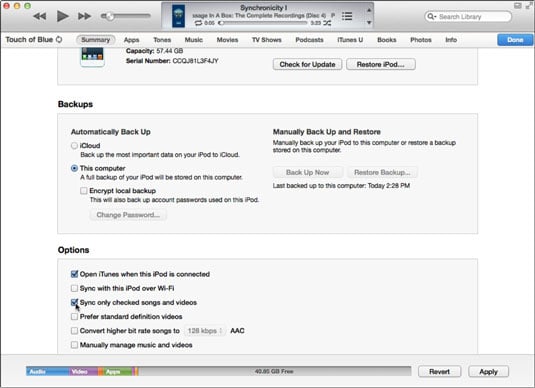
The Summary tab displays the Summary page of sync options, and shows how much space on the device is occupied by content and how much is still free. You can also scroll the Summary page to change sync options in the Backup and Options sections.
If you haven’t made any sync selections, the default is to copy everything in your iTunes library that your iPod model can play. An iPod touch can play everything including apps, and show photos and videos from your photo library. An iPod classic can play everything but apps, and show photos and videos.
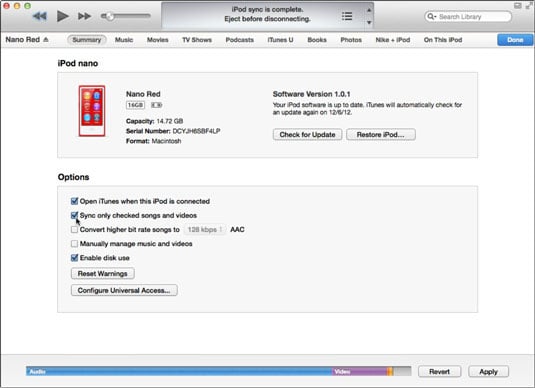
An iPod nano can play music, music videos, audio books, iTunes U courses, and audio podcasts; it can also show photos. An iPod shuffle can play music, audio books, iTunes U courses, and audio podcasts.
After changing a sync option, the Revert and Apply buttons appear in the lower-right corner of the sync pages. Click Apply to apply your sync option change or click Revert to revert back to the previous sync option setting. (If there are no changes to sync options, the Sync button appears in their place — click Sync to start syncing if syncing hasn’t already started.)
Even while syncing is going on, you can select or deselect content to sync and click Apply or Revert.
Click Done in the upper-right corner of the sync pages to finish changing sync settings.
When you’re done with the sync options, click Done to re-sync again with the new settings. iTunes displays whatever content section of the library you were viewing when the sync started.
Wait for syncing to finish, and then click the eject button next to the “iPod” in the iPod button.

You should always wait until the sync status pane (at the top) displays that the synchronization is complete. Then, you can disconnect your iPod from your computer. That’s it. Your iPod is now synchronized.