Providing specific capture settings for landscape photography using your Nikon D5300 is tricky because there's no single best approach to capturing a beautiful stretch of countryside, a city skyline, or another vast subject.
Most people prefer using a wide-angle lens, for example, to incorporate a large area of the landscape into the scene, but if you're far away from your subject, you may like the results you get from a telephoto or medium-angle lens.
And consider depth of field: One person's idea of a super cityscape might be to keep all buildings in the scene sharply focused, but another photographer might prefer to shoot the same scene so that a foreground building is sharply focused while the others are less so, thus drawing the eye to that first building.
Here a few tips to help you photograph a landscape the way you see it:
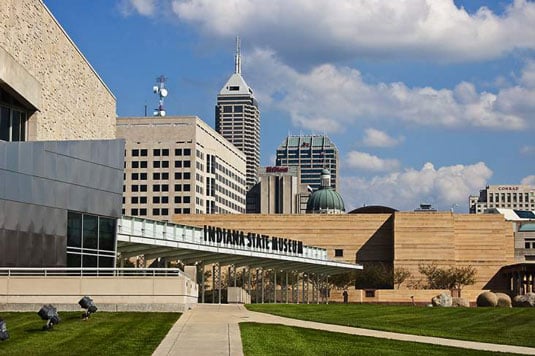
Shoot in aperture-priority autoexposure mode (A) so that you can control depth of field. If you want extreme depth of field so that both near and distant objects are sharply focused, select a high f-stop value. An aperture of f/18 was used for this shot. For short depth of field, use a low value.
If the exposure requires a slow shutter speed, use a tripod to avoid blurring. The downside to a high f-stop is that you may need a slower shutter speed to produce a good exposure. If the shutter speed drops below what you can comfortably handhold, use a tripod to avoid picture-blurring camera shake.
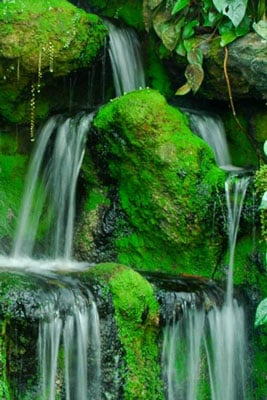
For dramatic waterfall shots, consider using a slow shutter to create that “misty” look. The slow shutter blurs the water, giving it a soft, romantic appearance. Again, use a tripod to ensure that the rest of the scene doesn't also blur due to camera shake. Shutter speed for the was 1/5 second.
In very bright light, you may overexpose the image at a very slow shutter, even if you stop the aperture all the way down and select the camera's lowest ISO setting. As a solution, consider investing in a neutral density filter for your lens.
This type of filter works something like sunglasses for your camera: It simply reduces the amount of light that passes through the lens, without affecting image colors, so that you can use a slower shutter than would otherwise be possible.
At sunrise or sunset, base exposure on the sky. The foreground will be dark, but you can usually brighten it in a photo editor, if needed. If you base exposure on the foreground, on the other hand, the sky will become so bright that all the color will be washed out—a problem you usually can't fix after the fact.
You can also invest in a graduated neutral-density filter, which is clear on one side and dark on the other. You orient the filter so that the dark half falls over the sky and the clear side falls over the dimly lit portion of the scene. This setup enables you to better expose the foreground without blowing out the sky colors.
Also experiment with the Active D-Lighting and HDR features; both are designed to create images that contain a greater range of brightness values than is normally possible.
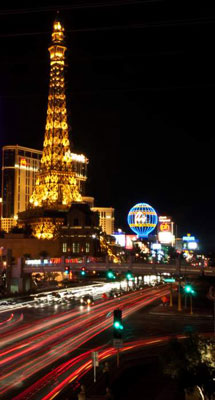
For cool nighttime city pics, experiment with slow shutter speeds. Assuming that cars or other vehicles with their lights on are moving through the scene, the result is neon trails of light like those you see in the foreground of the image. Shutter speed for this image was about 10 seconds.
Rather than change the shutter speed manually between each shot, try Bulb mode. Available only in M (manual) exposure mode, this option records an image for as long as you hold down the shutter button. So just take a series of images, holding down the button for different lengths of time for each shot. In Bulb mode, you also can exceed the standard maximum exposure time of 30 seconds.
For the best lighting, shoot during the magic hours. That's the term photographers use for early morning and late afternoon, when the light cast by the sun is soft and warm, giving everything that beautiful, gently warmed look.
Can't wait for the perfect light? Tweak your camera's White Balance setting to simulate the color of magic-hour light.
In tricky light, bracket exposures. Bracketing simply means to take the same picture at several different exposure settings to increase the odds that at least one of them will capture the scene the way you envision. Bracketing is especially a good idea in difficult lighting situations, such as sunrise and sunset.