
In each Office 2013 application, you can create, open, and save data files. A data file stores your work in a particular application. If you don’t save your work, whatever you’ve entered disappears when you close the application or turn off your computer.
Each Office 2013 application has its own data file format. For example:
Word: Document files, .docx
Excel: Workbook files, .xlsx
PowerPoint: Presentation files, .pptx
Outlook: Personal folders files, .pst
Word, Excel, and PowerPoint use a separate data file for each project you work on. Every time you use one of these programs, you open and save data files. Outlook uses just one data file for all your activities. This file is automatically saved and opened for you, so you usually don’t have to think about data file management in Outlook.
The steps for saving and opening data files are almost exactly the same in each application, so mastering them in one program gives you a big head start in the other programs.
As you work in an application, the content you create is stored in the computer's memory. This memory is only temporary storage. When you exit the application or shut down the computer, whatever is stored in memory is flushed away forever — unless you save it.
The first time you save a file, the application prompts you to enter a name for it. You can also choose a different save location and/or file type.
When you resave a previously saved file, the Save As dialog box doesn’t reappear; the file saves with the most recent settings. If you want to change the settings (such as the location or file type) or save under a different name, choose File→Save As.
Macros are recorded bits of code that can automate certain activities in a program, but they can also carry viruses. The default formats don't support macros for that reason. If you need to create a file that includes macros, you can save in a macro-enabled format.
Open Word. Click the Welcome to Word template to start a new document based on it.
Choose File→Save.
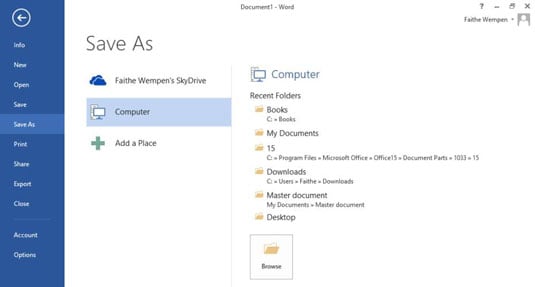
The Save As screen of Backstage view appears. Note that your SkyDrive is the default location selected under the Save As heading. For these instructions, however, you are saving to your computer.
Click Computer.
A list of recently used folders on your local computer appears, as shown here.
Click Browse.
The Save As dialog box opens, showing the default local location (probably your Documents library).
In the File Name text box, type Tour of Word, as shown in this figure.
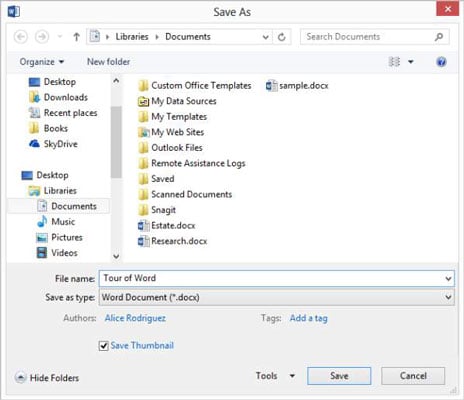
Click Save.
The file is saved. The file’s name appears in Word’s title bar at the top of the window.