
Many times you will want to protect an Excel 2013 workbook that you intend to share on a network. That way, you can allow simultaneous editing of the contents of its worksheets (assuming that you don’t also protect individual sheets), while at the same time preventing anybody but you from removing the Change tracking (and thus deleting the Change History log).
If the workbook is not currently shared, you can both protect the workbook and share it by clicking the Protect and Share Workbook command button on the Ribbon’s Review tab or by pressing Alt+RO. Note that if the workbook is already shared, you must stop sharing the file before you can use this command.
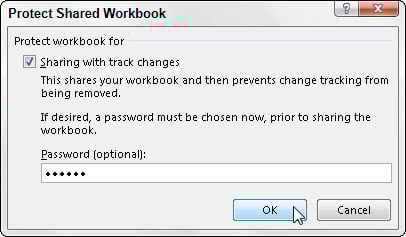
When you click the Protect and Share Workbook command button, Excel opens the Protect Shared Workbook dialog box. In this dialog box, you select the Sharing with Track Changes check box to enable file sharing and to turn on the Change tracking.
As soon as you select this check box, Excel makes available the Password (Optional) text box, where you can enter a password that must be supplied before you can stop sharing the workbook.
If you enter a password in this text box (and you should — otherwise, there’s little reason to use this option, because anyone can remove the protection from the shared workbook and thus stop the file sharing), Excel immediately displays the Confirm Password dialog box, where you must accurately reproduce the password.
When you do this, Excel displays an alert dialog box that informs you that it will now save the workbook, and when you click the Yes button, the program saves the workbook as a shared file and protects it from being made exclusive without the password.
The program also adds a [Shared] indicator to the filename at the top of the Excel program window to let you know that the workbook is being shared.
To remove the protection from the shared workbook and, at the same time, stop sharing it, you choose the Unprotect Shared Workbook command button (that replaces the Protect Sharing button) in the Changes group on the Review tab of the Ribbon.
After you enter the password to unprotect the file in the Unprotect Sharing dialog box and click OK, Excel displays an alert dialog box, informing you that your action is about to remove the file from shared use and erase the Change History log file.
If you click Yes, you prevent users who are currently editing the workbook from saving their changes. If you’re sure that no one else is using the workbook, you can continue and remove the file sharing by clicking the Yes button.