


After you more or less finalize an Excel 2013 worksheet by checking out its formulas and proofing its text, you often want to guard against any unplanned changes by protecting the document.
Each cell in the worksheet can be locked or unlocked. By default, Excel locks all the cells in a worksheet so that, when you follow these steps, Excel locks the whole thing up tighter than a drum:
Click the Protect Sheet command button in the Changes group on the Review tab on Ribbon or press Alt+RPS.
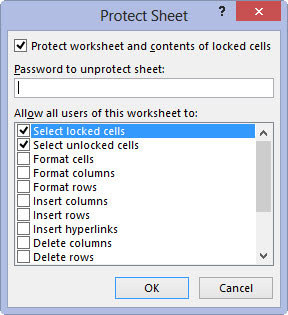
Excel opens the Protect Sheet dialog box in which you select the check box options you want to be available when the protection is turned on in the worksheet. By default, Excel selects the Protect Worksheet and Contents of Locked Cells check box at the top of the Protect Sheet dialog box.
Additionally, the program selects both the Select Locked Cells and Select Unlocked Cells check boxes in the Allow All Users of This Worksheet To list box below.
(Optional) Click any of the check box options in the Allow All Users of This Worksheet To list box that you still want to be functional when the worksheet protection is operational.
Some options in the Allow All User of This Worksheet TO list box that you can check are format cells or insert columns.
If you want to assign a password that must be supplied before you can remove the protection from the worksheet, type the password in the Password to Unprotect Sheet text box.
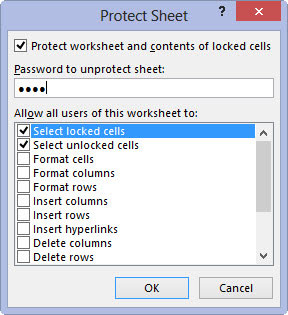
Remember to choose something that you will remember. Don’t be too tricky!
Click OK or press Enter.

If you type a password in the Password to Unprotect Sheet text box, Excel opens the Confirm Password dialog box. Re-enter the password in the Reenter Password to Proceed text box exactly as you typed it in the Password to Unprotect Sheet text box in the Protect Sheet dialog box and then click OK or press Enter.

