For the quickest, most convenient Raw processing, you can do the job before you download images from your Canon EOS 60D by using the Raw Image Processing feature on Playback Menu 1 with no computer or other software required. However, you need to understand one limitation: You can save processed files only in the JPEG format. That format results in some quality loss because of the file compression that JPEG applies.
That said, in-camera Raw processing is a great option for times when you need JPEG copies of your Raw images for immediate online sharing. (JPEG is the standard format for online use.) Follow these steps to convert a photo:
Select a mode in the Creative Zone (P, Tv, Av, M, B, or C).
If you’re in another exposure mode, the menu in Step 3 won't be available.
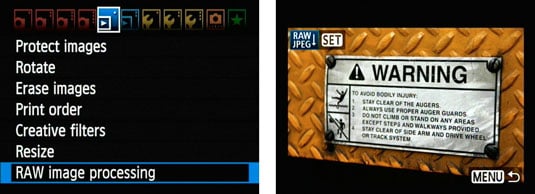
Press Menu and navigate to Playback Menu 1.
Select Raw Image Processing and press Set.
This displays the Raw photos on your camera’s memory card.
Find the photo you want to work with.
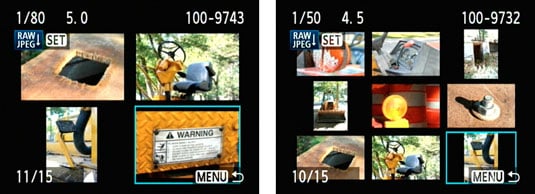
Press Set.
The Raw processing options appear as an overlay on the screen with your photo.

Select image processing options with the multicontroller.
Press Info to reset. Press AF Point Selection/Magnify button to zoom in for a better view.
Change settings with the Quick Control dial.
You’ve highlighted a setting with the multicontroller or Main dial; you should see the setting name appear at the top of the screen.
Here are two ways to make changes:
*Use the Quick Control dial. Simply turn the Quick Control dial, and the setting will change.
*Press Set: This opens the settings screen, and displays all the possible settings and options.
Press Set to lock in the changes and go back to the main screen.
Select the Save option at the bottom of the screen and press Set to save the photo.
Confirm your decision by selecting OK.
The screen that appears tells you the filename of the photo as well as where (what folder) the photo is being saved.
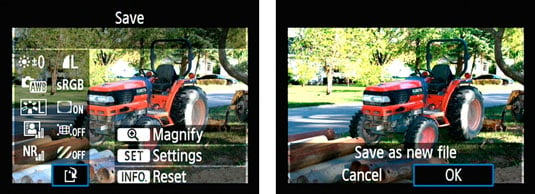
Press OK to finish.